Introduction
This guide walks you through replacing or upgrading the RAM in a Lenovo ThinkPad E14 Gen 4. You may need to do this if your laptop is running slowly, freezing, or struggling to handle demanding applications. The ThinkPad E14 Gen 4 has one user-accessible RAM slot, supporting DDR4 or DDR5 memory depending on your specific configuration — check your model's specs before purchasing new RAM.
Before beginning, power off the laptop completely and unplug it from any power source. Remove any connected peripherals.
What you need
-
-
First start off by using your screwdriver to remove the screws from the back metal shield or cover. Loosen all seven captive screws on the back panel of the device with a Phillips #1 screwdriver.
 Ask FixBot
-
-
-
Insert an opening pick into the seam near the hinges.
-
Working from the hinges to the front, gently pry apart the back of the device from the main body.
-
-
-
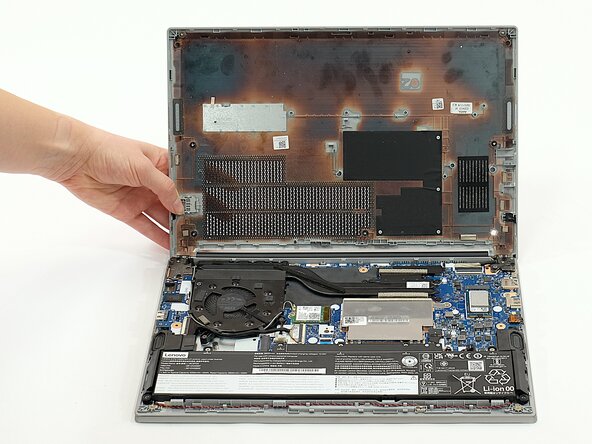
Carefully lift the loosened panel away from the laptop. The metal spudger is useful when extra prying force is needed, but a black nylon spudger or iFixit opening tool should be used whenever possible.
-
-
-
-
Remove all five 5mm screws from the battery using a Phillips #1 screwdriver.
-
-
-
Using the fabric tag, disconnect the battery cables from their port inside the device.
-
-
-
Use a Phillips screwdriver to remove the screws holding down the RAM.
-
Push the metal retention clip away from the side of the RAM stick until the RAM pops up at an angle, then slide it out of the slot.
-


To reassemble your device, follow these instructions in reverse order.

Team

Austin Community College, Team 1-1, Caverte Spring 2026 Member of Austin Community College, Team 1-1, Caverte Spring 2026
AUSTINCC-CAVERTE-S26S1G1
4 Members
3 Guides authored