
Lenovo ThinkPad E14 Gen 1 RAM Replacement

Treyven and 4 other contributors
Last updated on Jun 22, 2026
Views: 333
View statistics:
- Past 24 Hours:
- 5
- Past 7 Days:
- 25
- Past 30 Days:
- 105
- All Time:
- 333
Comments: 1
1 comment on steps.
Completed: 0 1
No one has marked this guide "completed." Will you be the first?
1 person has marked this guide "completed." It's you — great job!
Favorites: 0 1
No one has favorited (and subscribed to) this guide. Will you be the first?
1 person has favorited (and subscribed to) this guide — and that's you!
Introduction
Go to step 1 ↓RAM (Random Access Memory) allows your laptop to run applications and handle multiple tasks at once. If your ThinkPad E14 Gen 1 feels slow, struggles with multitasking, or experiences frequent freezing, upgrading or replacing the RAM can help improve performance.
Follow this guide to replace or upgrade the RAM in your Lenovo ThinkPad E14 Gen 1.
Before beginning, make sure to power off your laptop, unplug the charger, and disconnect the internal battery after removing the bottom cover.
What you need
Tools


-
-
-
Carefully remove seven 5 mm screws securing the lower case with a Phillips #0 screwdriver.
 Ask FixBot
-
-
-
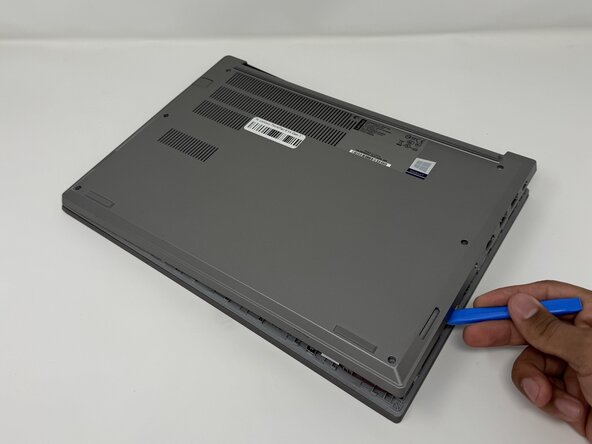
Insert your opening tool into the space between the lower case and the chassis.
-
Gently slide the tool around the edges to release the clips securing the cover.
-
Remove the lower case.
-
-
-
-
-
-
Carefully pull the black fabric tab attached to the battery connector to disconnect the battery from the motherboard.
-
-
-
-
-
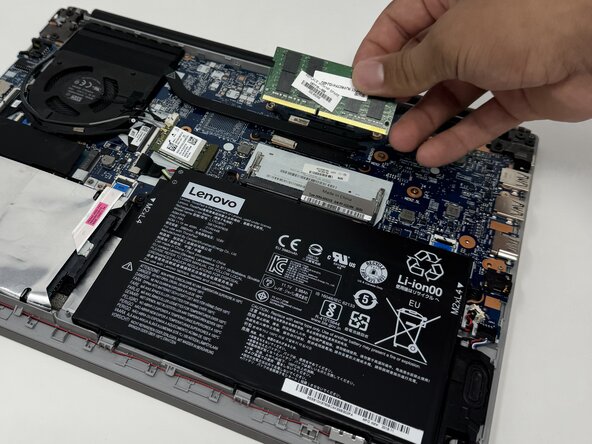
Two clips secure each RAM module in place, one on each side. Using your fingers, spread the clips away from the RAM module.
-
-





To reassemble your device, follow the above steps in reverse order.
Take your e-waste to an R2 or e-Stewards certified recycler.
Repair didn’t go as planned? Try some basic troubleshooting or ask our Answers community for help.

Team

Utah Tech University, Team 1-5, McMurrin Spring 2026 Member of Utah Tech University, Team 1-5, McMurrin Spring 2026
UTAHTECH-MCMURRIN-S26S1G5
3 Members
60 Guides authored
