Introduction
This guide will show you how to replace the motherboard in your Lenovo ThinkBook 13S-IML. The motherboard is the main circuit board that connects all major components of the laptop.
You should follow this guide if your device shows any of the following symptoms:
- Won't power on.
- Display not working.
- Randomly shutting down due to overheating.
- There is a confirmed motherboard failure.
Before removing the motherboard, you must first remove the following components:
- Wi-Fi card (explained in the guide).
- RAM stick (explained in the guide).
- Battery.
- SSD (if installed).
- Cooling assembly (fans and heat sink).
Before you start, power off the laptop and disconnect it from any external power source.
Be careful to avoid damaging delicate connectors and keep track of the screws as there are varying sizes.
What you need
-
-
Remove the nine 4.2 mm-long T5 Torx screws that secure the lower case.
-
Insert an opening tool into the seam between the lower case and chassis.
-
Pry around the entire perimeter until the lower case fully releases.
-
Remove the lower case.
 Ask FixBot
-
-
-
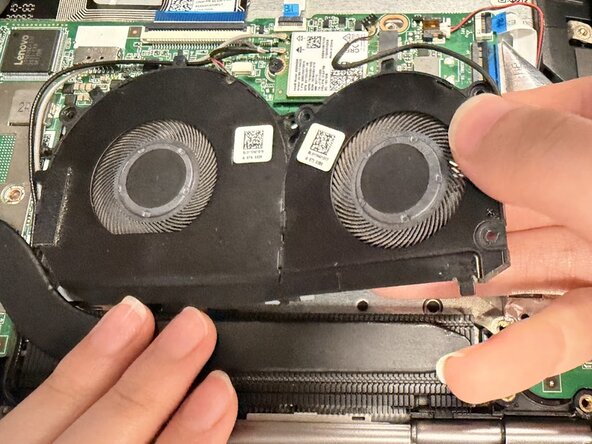
Detach the two sliding fan connectors from the system board by gently pulling them out of their sockets.
-
Use a screwdriver to unscrew the five 3.5 mm Phillips #00 screws that secure the fans in place.
-
Carefully lift the fans out of the system board.
-
-
-
Remove the four 4 mm-long Phillips #00 screws securing the battery.
-
Use a spudger to push the battery connector out of its socket.
-
Remove the battery from the computer by pulling it up and out.
-
-
-
Use tweezers ore the pointed end of a spudger to lift and disconnect the two Wi-Fi card antenna connectors.
-
Remove the 2 mm-long Phillips #00 screw securing the Wi-Fi card down.
-
Slide the Wi-Fi card out of its socket.
-
-
-
-
Two clips secure the RAM module in place, one on each side. Using your fingers, spread the clips away from the RAM module.
-
Slide the RAM module out of its socket.
-
-
-
Use a Phillips #00 screwdriver to remove the 5.4 mm-long screw securing the SSD.
-
Pull the SSD directly out of its socket.
-
-
-
Loosen the three M2 x L3mm Phillips #00 screws securing the heat sink.
-
Gently lift the heat sink up and out.
-
-
-
Remove the six M2.5 x 5mm Phillips #00 screws that secure the upper case hinges first.
-
Remove the two remaining M2 x 5mm Phillips #00 screws and set them aside.
-
-
-
Remove all the following connectors before removing the screws from the motherboard:
-
ZIF connector.
-
Blue ribbon cable connector.
-
Sliding connector.
-
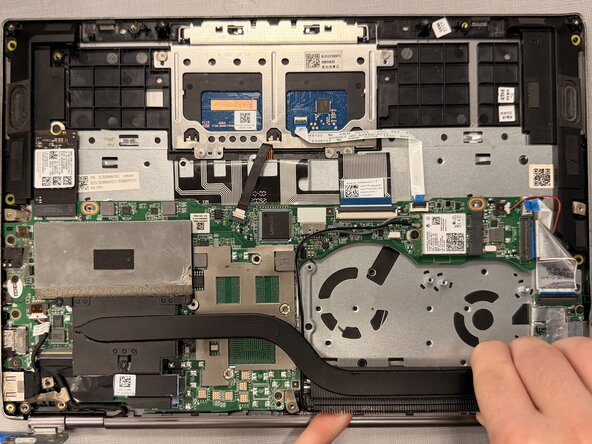
Remove the 5 4mm-long Phillips #00 screws holding down the motherboard.
-
-
-
With all screws out, carefully remove the motherboard as shown, pulling toward the area of the power button (boxed in red).
-


To reassemble your device, follow the above steps in reverse order.
Take your e-waste to an R2 or e-Stewards certified recycler.
Repair didn’t go as planned? Try some basic troubleshooting or ask our Answers community for help.
Team

UW Tacoma, Team E-2, Rose Winter 2026 Member of UW Tacoma, Team E-2, Rose Winter 2026
UWT-ROSE-W26SEG2
4 Members
4 Guides authored