Free Shipping on Domestic Orders $75+

Lenovo Tab 4 8 MicroSD Card Reader Replacement

What you need

    1. Lenovo Tab 4 8 MicroSD Card Reader Replacement, Battery: step 1, image 1 of 3 Lenovo Tab 4 8 MicroSD Card Reader Replacement, Battery: step 1, image 2 of 3 Lenovo Tab 4 8 MicroSD Card Reader Replacement, Battery: step 1, image 3 of 3
      • Start at the microSD slot. This is the easiest entry point.

      • Use the opening pick gently to slide underneath the back cover of the tablet.

      • Slide the opening pick around the entire edge of the tablet. Don't force it and work slowly to release all clips.

      • Once all clips are loose, lift and remove the back cover.

      Ask FixBot

      Add Comment

    2. Lenovo Tab 4 8 MicroSD Card Reader Replacement: step 2, image 1 of 3 Lenovo Tab 4 8 MicroSD Card Reader Replacement: step 2, image 2 of 3 Lenovo Tab 4 8 MicroSD Card Reader Replacement: step 2, image 3 of 3
      Tool used on this step:
      Tweezers
      $4.99
      Buy
      • Remove the 8 Phillips #000 screws holding the plastic shield.

      • Important: One screw is hidden under the blue "S" sticker.

      • Remove any tape holding the plate shield.

      • Use precision tweezers or your fingers to remove the plate.

      Ask FixBot

      Add Comment

    3. Lenovo Tab 4 8 MicroSD Card Reader Replacement: step 3, image 1 of 2 Lenovo Tab 4 8 MicroSD Card Reader Replacement: step 3, image 2 of 2
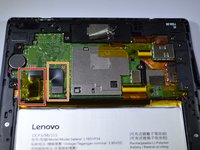
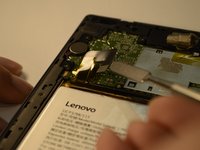
      • Peel back the yellow protective tape over the battery connector.

      • Use a spudger or plastic opening tool to remove the battery's ribbon cable from the motherboard.

      Ask FixBot

      Add Comment

    4. Lenovo Tab 4 8 MicroSD Card Reader Replacement: step 4, image 1 of 3 Lenovo Tab 4 8 MicroSD Card Reader Replacement: step 4, image 2 of 3 Lenovo Tab 4 8 MicroSD Card Reader Replacement: step 4, image 3 of 3
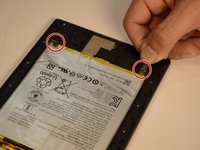
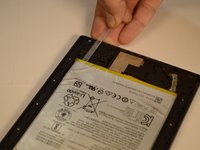
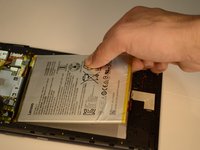
      • Locate the two stretch-release adhesive strips at the bottom of the battery.

      • Gently pull each strip slowly and straight out under the battery.

      • Don't pull upward, only pull horizontally away from the battery

      • The strips are longer than you think, so take your time

      • Once both strips are off, lift the battery from the frame.

      Ask FixBot

      Add Comment

    1. Lenovo Tab 4 8 MicroSD Card Reader Replacement, MicroSD Card Reader: step 5, image 1 of 2 Lenovo Tab 4 8 MicroSD Card Reader Replacement, MicroSD Card Reader: step 5, image 2 of 2
      Tool used on this step:
      Tweezers
      $4.99
      Buy
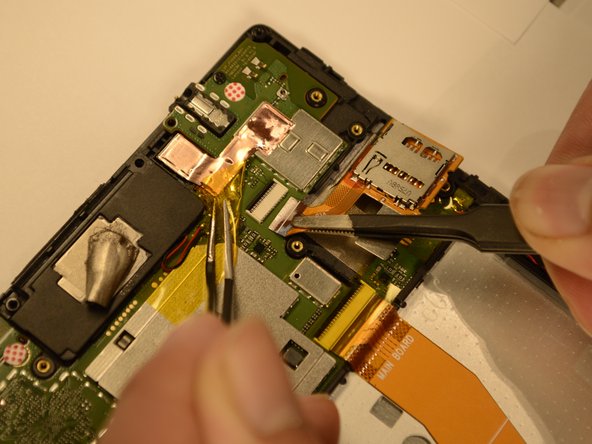
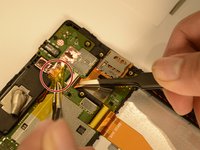
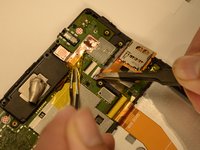
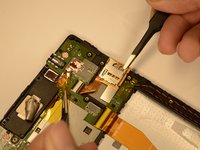
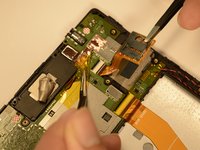
      • There is a yellow tape holding the microSD card reader connector. Use tweezers to hold down the tape.

      • Gently lift the tab on the microSD card reader's ZIF connector, and gently pull the ribbon cable free.

      Ask FixBot

      Add Comment

    2. Lenovo Tab 4 8 MicroSD Card Reader Replacement: step 6, image 1 of 2 Lenovo Tab 4 8 MicroSD Card Reader Replacement: step 6, image 2 of 2
      • Lift the microSD card reader with tweezers or your fingers.

      Ask FixBot

      Add Comment

Conclusion

To reassemble your device, follow these instructions in reverse order.

Cancel: I did not complete this guide.

0 Guide Comments

Add Comment

View Statistics:

Past 24 Hours: 0

Past 7 Days: 6

Past 30 Days: 37

All Time: 1,327