
Lenovo Tab 4 8 Front Camera Replacement

Ivan Chavez and 4 other contributors
Last updated on May 7, 2024
Views: 1.2K
View statistics:
- Past 24 Hours:
- 2
- Past 7 Days:
- 14
- Past 30 Days:
- 72
- All Time:
- 1,197
Comments: 6
6 comments on steps.
Completed: 0 1
No one has marked this guide "completed." Will you be the first?
1 person has marked this guide "completed." It's you — great job!
Favorites: 0 1
No one has favorited (and subscribed to) this guide. Will you be the first?
1 person has favorited (and subscribed to) this guide — and that's you!
Introduction
Go to step 1 ↓If your Lenovo Tab 4 8 (4th gen, 8 inches) front camera isn’t working or is damaged, you can use this guide in order to replace the front-facing camera. By replacing the front-facing camera, usability and video quality can be improved. For this repair, make sure you have a steady hand to prevent harming the internal hardware. When replacing the new camera, be sure that all connections are secure otherwise, the camera and tablet may not function as desired.
What you need
Tools
-
Spudger4.9
-
-


-
-
-
Start at the microSD slot. This is the easiest entry point.
-
Use the opening pick gently to slide underneath the back cover of the tablet.
-
Slide the opening pick around the entire edge of the tablet. Don't force it and work slowly to release all clips.
-
Once all clips are loose, lift and remove the back cover.
 Ask FixBot
-
-
Tool used on this step:Tweezers$4.99
-
Remove the 8 Phillips #000 screws holding the plastic shield.
-
Important: One screw is hidden under the blue "S" sticker.
-
Remove any tape holding the plate shield.
-
Use precision tweezers or your fingers to remove the plate.
-
-
-
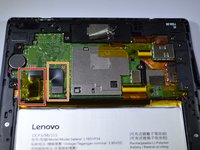
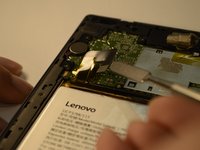
Peel back the yellow protective tape over the battery connector.
-
Use a spudger or plastic opening tool to remove the battery's ribbon cable from the motherboard.
-
-
-
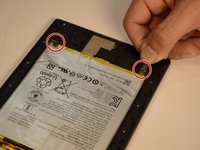
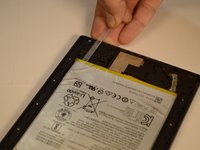
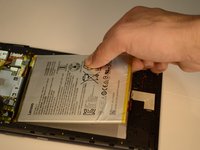
Locate the two stretch-release adhesive strips at the bottom of the battery.
-
Gently pull each strip slowly and straight out under the battery.
-
Once both strips are off, lift the battery from the frame.
-
-
-
-
-
Tool used on this step:Tweezers$4.99
-
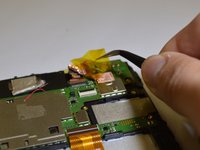
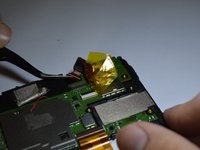
Using tweezers, lift the yellow tape hiding the front camera.
-
Disconnect the front camera's connector from the motherboard using tweezers.
-
-






To reassemble your device, follow these instructions in reverse order.

Team

Purdue University Northwest, Team S2-G4, Hingst Spring 2019 Member of Purdue University Northwest, Team S2-G4, Hingst Spring 2019
PNW-HINGST-S19S2G4
5 Members
72 Guides authored
