Introduction
Replacing the RAM module with a larger capacity one is a easy way to speed up your computer. Make sure the new RAM module is compatible before you install it.
What you need
-
-
-
Position the laptop so that the bottom enclosure is facing upward.
-
Use a Phillips #0 Screwdriver to remove the ten 1.9mm screws holding the bottom enclosure in place.
-
Use an opening tool to carefully pry up the rubber pads.
-
Use a Phillips screwdriver to remove the two screws under the rubber pads, which secure the keyboard.
 Ask FixBot
-
-
-
Flip the laptop over and swing open the display.
-
Lift the edge of the keyboard closest to the trackpad up.
-
Carefully disconnect keyboard ribbon cable from the laptop.
-
Remove the keyboard.
-
-
-
-
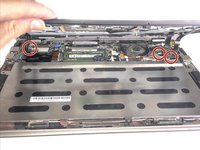
Grab the front edge of the top assembly and lift it up carefully.
-
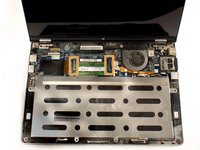
Gently slide the three ribbon cables out of their slots.
-
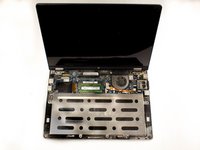
Remove the top assembly completely by pulling it off of the device.
-
-
-
-
-
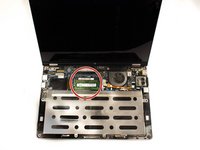
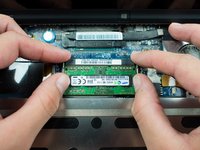
Locate the RAM module.
-
Locate the tabs on both sides of the RAM module
-
Spread both tabs outward at the same time in order to release the RAM module.
-
-






To reassemble your device, follow these instructions in reverse order.
Cancel: I did not complete this guide.
6 other people completed this guide.

Team

Baylor, Team 7-11, Williams Spring 2015 Member of Baylor, Team 7-11, Williams Spring 2015
BU-WILLIAMS-S15S7G11
3 Members
59 Guides authored
2 Guide Comments
Excelente… easy and simply.
At Step 3. Replace the memory now that it is exposed. You don't have to do steps 4-5, I don't think you have to remove the 10 small screws either.
Just the Philips under the foot tabs and carefully remove the keyboard, pull the tabs back that secure the memory and replace with new memory.
