Introduction
You must remove the top assembly in order to remove the display. This guide will also show you how to remove the top assembly to access the display mounts and cables.
What you need
-
-
-
Position the laptop so that the bottom enclosure is facing upward.
-
Use a Phillips #0 Screwdriver to remove the ten 1.9mm screws holding the bottom enclosure in place.
-
Use an opening tool to carefully pry up the rubber pads.
-
Use a Phillips screwdriver to remove the two screws under the rubber pads, which secure the keyboard.
 Ask FixBot
-
-
-
Flip the laptop over and swing open the display.
-
Lift the edge of the keyboard closest to the trackpad up.
-
Carefully disconnect keyboard ribbon cable from the laptop.
-
Remove the keyboard.
-
-
-
-
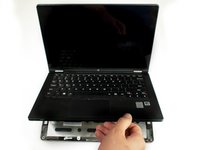
Grab the front edge of the top assembly and lift it up carefully.
-
Gently slide the three ribbon cables out of their slots.
-
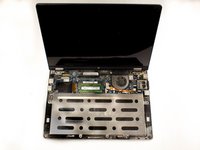
Remove the top assembly completely by pulling it off of the device.
-
-
-
-
-
Keep the device positioned where it sits on the bottom encasing with the display open.
-
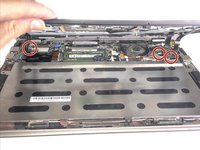
Locate the four 1.9mm screws used to attach the display brackets to the bottom enclosure of the device.
-
Use a Phillips #00 Screwdriver to remove the four screws.
-
-
-
Use a plastic opening tool to lift the retaining flap to disconnect the right display cable connector.
-
Gently pull the display cable out of the socket.
-
-
-
Use a plastic opening tool to lift the retaining flap to disconnect the left display cable connector.
-
Gently pull the display cable out of the socket.
-
-




To reassemble your device, follow these instructions in reverse order.
Cancel: I did not complete this guide.
5 other people completed this guide.

Team

Baylor, Team 7-11, Williams Spring 2015 Member of Baylor, Team 7-11, Williams Spring 2015
BU-WILLIAMS-S15S7G11
3 Members
59 Guides authored
