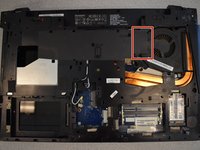
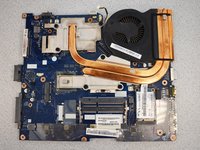
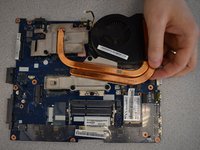
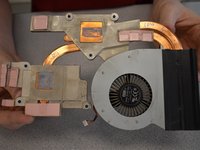
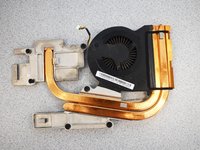
Free Shipping on Domestic Orders $75+

Lenovo IdeaPad Y500 Fan Replacement

What you need

  1. Lenovo IdeaPad Y500 Fan Replacement, Battery: step 1, image 1 of 3 Lenovo IdeaPad Y500 Fan Replacement, Battery: step 1, image 2 of 3 Lenovo IdeaPad Y500 Fan Replacement, Battery: step 1, image 3 of 3
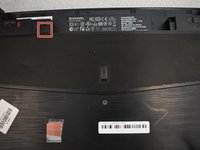
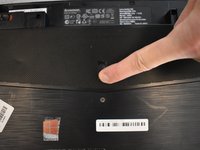
    • Slide the lock on the right side until you hear a click. Once you hear a click , you should see the color red.

    Ask FixBot

    Add Comment

  2. Lenovo IdeaPad Y500 Fan Replacement: step 2, image 1 of 1
    • Unlike the first lock, this lock is spring loaded and must be held in place when used.

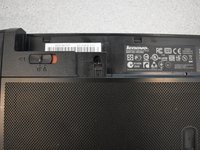
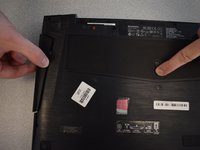
    • Slide the lock to the left (in the direction of the arrow below the lock) and hold in place.

    Ask FixBot

    Add Comment

  3. Lenovo IdeaPad Y500 Fan Replacement: step 3, image 1 of 1
    • Gently pull battery away from the computer while holding open the lock.

    Ask FixBot

    Add Comment

  4. Lenovo IdeaPad Y500 Fan Replacement, Touchpad: step 4, image 1 of 2 Lenovo IdeaPad Y500 Fan Replacement, Touchpad: step 4, image 2 of 2
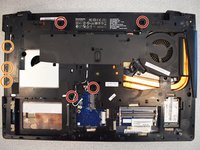
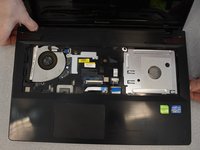
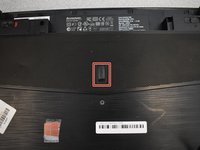
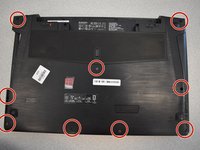
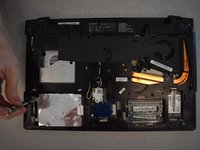
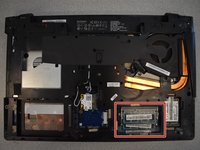
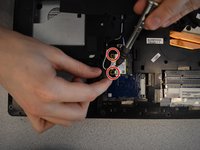
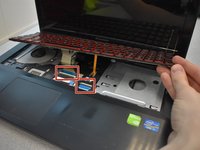
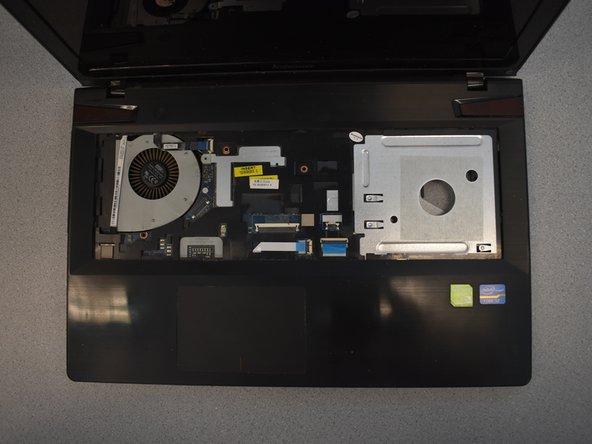
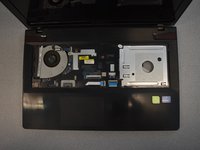
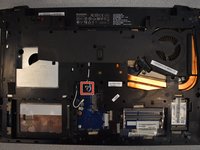
    • Remove a total of 8 screws.

    • Red circles are m2.5 x 10 mm flathead screws.

    • Orange circles m2 x 3mm flathead screws.

    • Yellow circle is m2.5 x 4mm flathead screw.

    Ask FixBot

    Add Comment

  5. Lenovo IdeaPad Y500 Fan Replacement: step 5, image 1 of 3 Lenovo IdeaPad Y500 Fan Replacement: step 5, image 2 of 3 Lenovo IdeaPad Y500 Fan Replacement: step 5, image 3 of 3
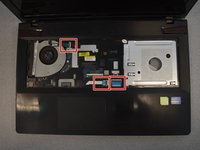
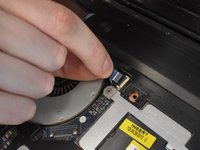
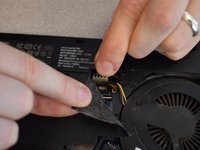
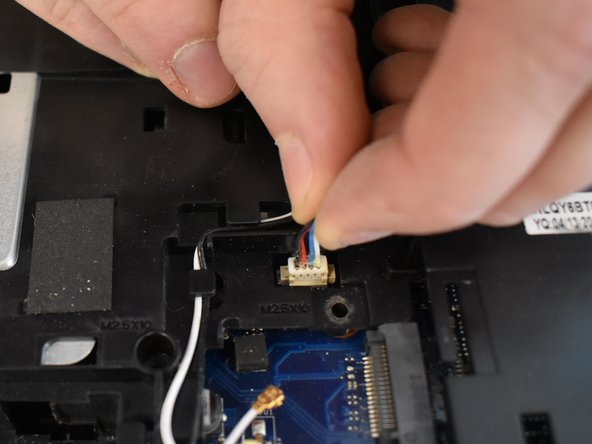
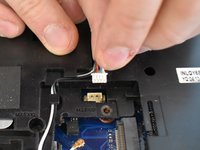
    • Flip up black tabs at the ends of each cable.

    • With fingers, gently remove the cables underneath from their ports.

    Ask FixBot

    Add Comment

  6. Lenovo IdeaPad Y500 Fan Replacement: step 6, image 1 of 3 Lenovo IdeaPad Y500 Fan Replacement: step 6, image 2 of 3 Lenovo IdeaPad Y500 Fan Replacement: step 6, image 3 of 3
    • By unlatching the sides and pulling up, remove the top case from the device.

    • Casing is fragile, be careful not to twist when pulling up.

    Ask FixBot

    Add Comment

  7. Lenovo IdeaPad Y500 Fan Replacement, Keyboard: step 7, image 1 of 3 Lenovo IdeaPad Y500 Fan Replacement, Keyboard: step 7, image 2 of 3 Lenovo IdeaPad Y500 Fan Replacement, Keyboard: step 7, image 3 of 3
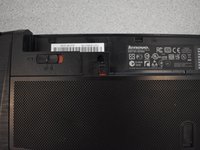
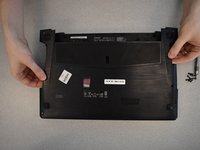
    • Unlock the battery latch by pulling it up.

    • It should reveal red underneath when it's unlocked.

    Ask FixBot

    Add Comment

  8. Lenovo IdeaPad Y500 Fan Replacement: step 8, image 1 of 3 Lenovo IdeaPad Y500 Fan Replacement: step 8, image 2 of 3 Lenovo IdeaPad Y500 Fan Replacement: step 8, image 3 of 3
    • Push the latch down and then hold in position.

    • Pull the optical drive out.

    Ask FixBot

    Add Comment

  9. Lenovo IdeaPad Y500 Fan Replacement: step 9, image 1 of 3 Lenovo IdeaPad Y500 Fan Replacement: step 9, image 2 of 3 Lenovo IdeaPad Y500 Fan Replacement: step 9, image 3 of 3
    • Remove nine screws with a Phillips #1 screwdriver.

    Ask FixBot

    Add Comment

  10. Lenovo IdeaPad Y500 Fan Replacement: step 10, image 1 of 3 Lenovo IdeaPad Y500 Fan Replacement: step 10, image 2 of 3 Lenovo IdeaPad Y500 Fan Replacement: step 10, image 3 of 3
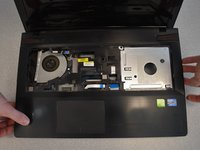
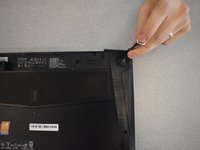
    • Pull up on the loosened cover to remove.

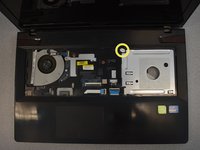
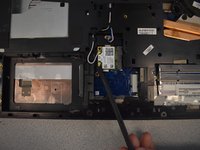
    • Remove two screws with a Phillips #1 screwdriver.

    Ask FixBot

    Add Comment

  11. Lenovo IdeaPad Y500 Fan Replacement: step 11, image 1 of 3 Lenovo IdeaPad Y500 Fan Replacement: step 11, image 2 of 3 Lenovo IdeaPad Y500 Fan Replacement: step 11, image 3 of 3
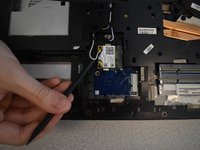
    • Pull the tab straight to the left until part releases.

    • Lift up the part to remove completely.

    Ask FixBot

    Add Comment

  12. Lenovo IdeaPad Y500 Fan Replacement: step 12, image 1 of 3 Lenovo IdeaPad Y500 Fan Replacement: step 12, image 2 of 3 Lenovo IdeaPad Y500 Fan Replacement: step 12, image 3 of 3
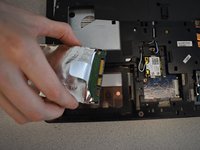
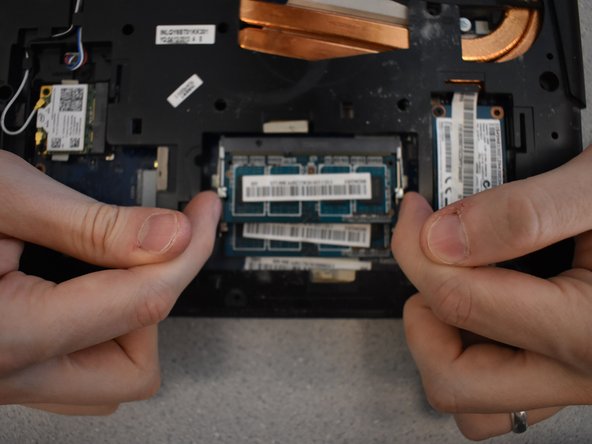
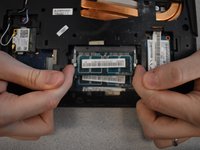
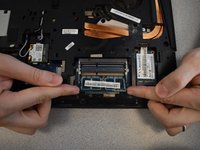
    • To release the DIMM, pull the tabs on either side away from each other simultaneously.

    • The DIMM will pop out on its own.

    Ask FixBot

    Add Comment

  13. Lenovo IdeaPad Y500 Fan Replacement: step 13, image 1 of 3 Lenovo IdeaPad Y500 Fan Replacement: step 13, image 2 of 3 Lenovo IdeaPad Y500 Fan Replacement: step 13, image 3 of 3
    • To disconnect the Wi-Fi cables, use a spudger to gently push up under them.

    • Wi-Fi cables are delicate.

    Ask FixBot

    Add Comment

  14. Lenovo IdeaPad Y500 Fan Replacement: step 14, image 1 of 3 Lenovo IdeaPad Y500 Fan Replacement: step 14, image 2 of 3 Lenovo IdeaPad Y500 Fan Replacement: step 14, image 3 of 3
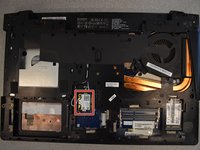
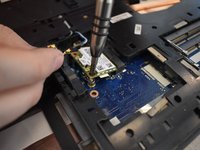
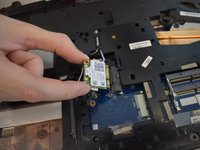
    • Using a Phillips #1 screwdriver, remove the two screws.

    • Once screws are out, the card will just pop out.

    Ask FixBot

    Add Comment

  15. Lenovo IdeaPad Y500 Fan Replacement: step 15, image 1 of 1
    • Remove three screws using a Phillips #1 screwdriver.

    Ask FixBot

    Add Comment

  16. Lenovo IdeaPad Y500 Fan Replacement: step 16, image 1 of 3 Lenovo IdeaPad Y500 Fan Replacement: step 16, image 2 of 3 Lenovo IdeaPad Y500 Fan Replacement: step 16, image 3 of 3
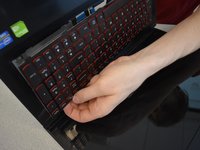
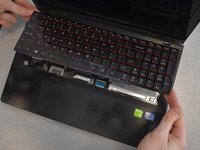
    • With the laptop upside down, open slightly.

    • To remove the keyboard, push the back of the keyboard forward with your thumb while pulling away from the laptop on the other side.

    • You will not be able to pull the keyboard completely away. The cables are still connected to the laptop.

    Ask FixBot

    Add Comment

  17. Lenovo IdeaPad Y500 Fan Replacement: step 17, image 1 of 3 Lenovo IdeaPad Y500 Fan Replacement: step 17, image 2 of 3 Lenovo IdeaPad Y500 Fan Replacement: step 17, image 3 of 3
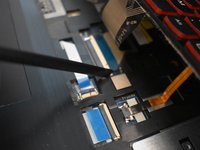
    • To release the cables, use the spudger to push both ends on the side of the cable.

    • Gently pull the cables up to disconnect.

    Ask FixBot

    Add Comment

  18. Lenovo IdeaPad Y500 Fan Replacement: step 18, image 1 of 2 Lenovo IdeaPad Y500 Fan Replacement: step 18, image 2 of 2
    • Pull the keyboard up and away from the laptop to remove it.

    Ask FixBot

    Add Comment

  19. Lenovo IdeaPad Y500 Fan Replacement, Motherboard: step 19, image 1 of 3 Lenovo IdeaPad Y500 Fan Replacement, Motherboard: step 19, image 2 of 3 Lenovo IdeaPad Y500 Fan Replacement, Motherboard: step 19, image 3 of 3
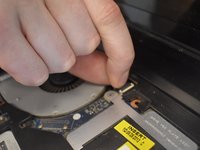
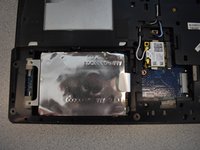
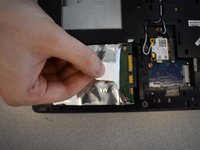
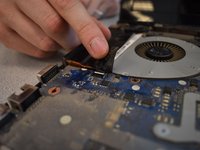
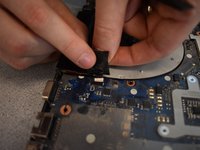
    • Peel up the black tab and remove the tape completely.

    • Remove the cable revealed underneath while pulling up the tape.

    • When reassembled, you will have to stick the tape back down in its original location in order to reinsert the cable.

    Ask FixBot

    Add Comment

  20. Lenovo IdeaPad Y500 Fan Replacement: step 20, image 1 of 3 Lenovo IdeaPad Y500 Fan Replacement: step 20, image 2 of 3 Lenovo IdeaPad Y500 Fan Replacement: step 20, image 3 of 3
    • Flip the laptop back over.

    • Gently pull the cable free by pulling up.

    Ask FixBot

    Add Comment

  21. Lenovo IdeaPad Y500 Fan Replacement: step 21, image 1 of 3 Lenovo IdeaPad Y500 Fan Replacement: step 21, image 2 of 3 Lenovo IdeaPad Y500 Fan Replacement: step 21, image 3 of 3
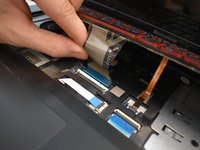
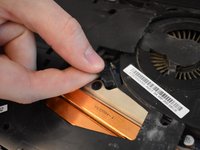
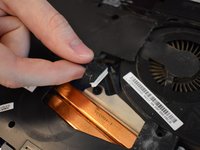
    • Peel back the black tape.

    • Gently pull out both cables revealed underneath from their sockets.

    • When reassembling, you will have to paste the tape back over the cables again.

    Ask FixBot

    Add Comment

  22. Lenovo IdeaPad Y500 Fan Replacement: step 22, image 1 of 3 Lenovo IdeaPad Y500 Fan Replacement: step 22, image 2 of 3 Lenovo IdeaPad Y500 Fan Replacement: step 22, image 3 of 3
    • By gently pulling up, remove the final cable.

    Ask FixBot

    Add Comment

  23. Lenovo IdeaPad Y500 Fan Replacement: step 23, image 1 of 2 Lenovo IdeaPad Y500 Fan Replacement: step 23, image 2 of 2
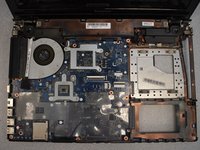
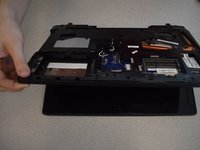
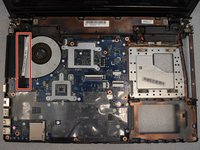
    • Pull motherboard down, away from the case, while lifting the base of the case up.

    Ask FixBot

    Add Comment

  24. Lenovo IdeaPad Y500 Fan Replacement, Fan: step 24, image 1 of 1
    • With a Phillips #1 screwdriver, loosen the six screws.

    • These screws are spring loaded. They will not come completely out. They only need to be loosened.

    Ask FixBot

    Add Comment

  25. Lenovo IdeaPad Y500 Fan Replacement: step 25, image 1 of 3 Lenovo IdeaPad Y500 Fan Replacement: step 25, image 2 of 3 Lenovo IdeaPad Y500 Fan Replacement: step 25, image 3 of 3
    • Gently lift the fan up to remove.

    Ask FixBot

    Add Comment

Conclusion

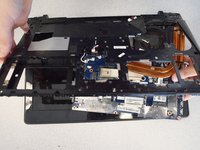
To reassemble your device, follow these instructions in reverse order.

Cancel: I did not complete this guide.

One other person completed this guide.

Tatum Hennige

Member since: 04/22/19

711 Reputation

4 Guides authored

Team

0 Guide Comments

Add Comment

View Statistics:

Past 24 Hours: 0

Past 7 Days: 6

Past 30 Days: 33

All Time: 1,858