Introduction
This screen replacement guide will show you how to replace your defective LCD screen on your Lenovo U410. You will need a Phillips #1 screwdriver and a metal spudger. Be careful when removing the plastic trim and connectors because you can easily break them.
What you need
-
-
-
Power off the laptop.
-
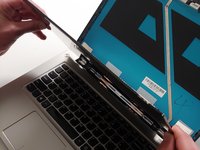
Using the metal spudger, gently pry off the black trim around the screen.
 Ask FixBot
-
-
-
-
Lower LCD screen onto the keyboard.
-
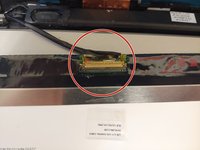
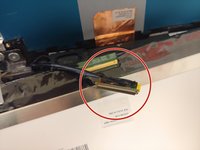
Gently grab the connector on both sides and pull the connector straight out.
-
-


To reassemble your device, follow these instructions in reverse order.
Cancel: I did not complete this guide.
One other person completed this guide.

Team

University of North Texas, Team S3-G5, Raign Fall 2018 Member of University of North Texas, Team S3-G5, Raign Fall 2018
UNT-RAIGN-F18S3G5
4 Members
72 Guides authored
