Introduction
Lenovo G780 is a 17.3 inch laptop with a matte display. The screen is a non touch panel with an LED backlight.
This guide will show step by step how to properly replace the screen for Lenovo G780.
A screen may need to be replaced if there is a visible crack.
Please refer to the Lenovo G780 troubleshoot page for other screen issues addressed before continuing this guide.
Ensure you have read the instructions and have all the necessary tools before starting the tutorial.
What you need
-
-
Turn off the computer.
-
Slide the battery-lock switch on the bottom of the laptop to the unlocked position.
 Ask FixBot
-
-
-
Hold the battery release switch in the unlocked position and remove the battery.
-
-
-
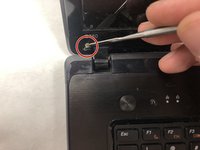
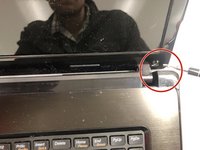
Using the metal spudger, peel back the adhesive-backed bumpers on the bottom left and right corners of the screen.
-
-
-
-
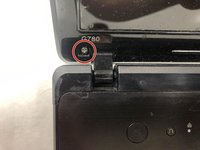
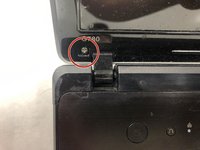
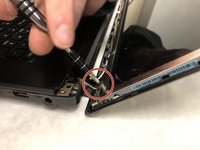
Using a Phillips #1 screwdriver, remove both 5.5mm screws from the corners of the screen.
-
-
-
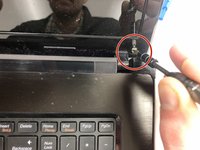
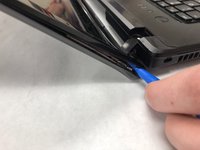
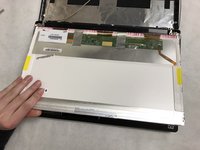
Using an iFixit opening tool, start prying on the top face cover on the screen by applying pressure near the bottom of the screen.
-
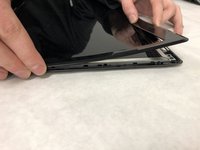
Once the face cover has started to come away from the screen, begin pulling away with both hands until the whole face cover has been removed from the screen.
-
-
-
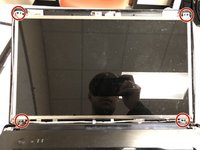
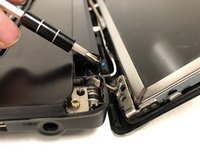
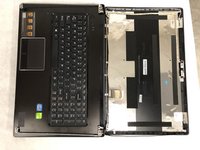
Remove the four 8.5mm screws on the corners of the screen that connect the screen frame to the back cover.
-
-
-
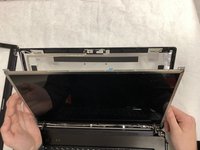
With the back cover being removed from the screen frame, the back cover can be set aside.
-
-
-
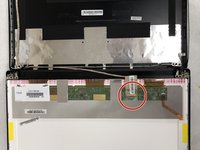
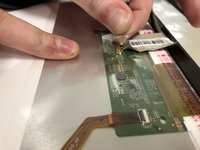
Carefully remove the clear adhesive tape holding the cable down, being careful not to damage the small wires under the tape.
-
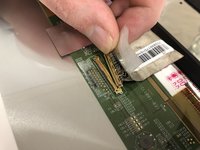
Once the tape has been removed, the ribbon connector will pull away from the back of screen.
-
-
-
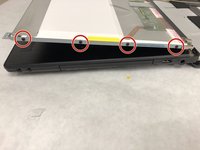
Remove the eight, 3mm screws around the screen frame. There will be four on each side of the screen frame.
-
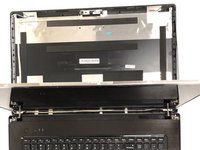
With the screws removed the screen will be free to be lifted away from the screen frame.
-


To reassemble your device, follow these instructions in reverse order.
Cancel: I did not complete this guide.
2 other people completed this guide.
Team

IUPUI, Team S2-G4, Henning Spring 2019 Member of IUPUI, Team S2-G4, Henning Spring 2019
IUPUI-HENNING-S19S2G4
3 Members
3 Guides authored