
Lenovo Edge 15 Hard Drive Disk Replacement

David Daley and 3 other contributors
Last updated on Nov 15, 2022
Views: 7.3K
View statistics:
- Past 24 Hours:
- 2
- Past 7 Days:
- 25
- Past 30 Days:
- 113
- All Time:
- 7,335
Comments: 0
No one has left comments on this guide. Will you be first?
Go to guide commentsCompleted: 4 5
4 people have marked this guide "completed." Will you be next?
5 people have marked this guide "completed." Including you — great job!
Favorites: 0 1
No one has favorited (and subscribed to) this guide. Will you be the first?
1 person has favorited (and subscribed to) this guide — and that's you!
Introduction
Go to step 1 ↓This guide will instruct you on how to replace your Edge 15’s hard drive disk (HDD), or upgrade to a compatible solid state drive (SSD). Physical replacement of the hardware is a simple job, but installing an operating system (OS) on the new drive can be more involved.
This video may be helpful in showing you how to download a Windows operating system file and install it on your new hard drive: https://www.youtube.com/watch?v=tjmRWFep...
What you need
Fix Kit
This kit contains all the parts and tools needed to complete this guide.

Parts


Tools


-
-
-
Locate the eleven M2 x 6.0mm back-cover screws.
-
Unscrew the screws using the Phillips #0 screwdriver.
 Ask FixBot
-
-
-
Gently lift the cover plate off the body of the laptop, ensuring that it does not pull on any components such as the USB ports.
-
-
-
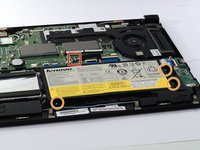
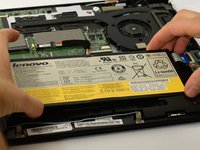
Locate the battery-connector and the three, M2 x 4.0mm screws holding the battery in place.
-
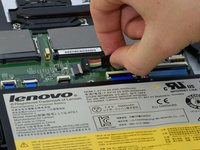
Carefully unplug the battery-connector, wiggling the connector side to side if needed.
-
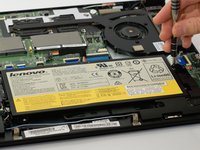
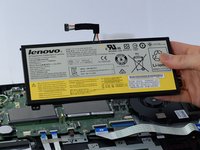
Unscrew the 3-screws using the Phillips # 0 screwdriver.
-
-
-
-
-
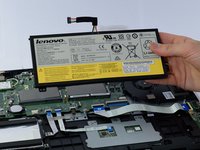
Set the battery aside. This will allow easier access to the connector for the HDD.
-
-
-
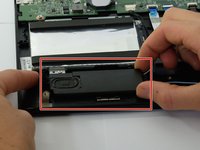
The right side speaker can be lifted up off of its mounts and set out of the way if desired, but don't put sharp bends in the speaker wires.
-
-
-
-
With the Phillips #0 screwdriver, remove the 4 M2 x 4.0mm screws holding the HDD case to the laptop body.
-
-
-
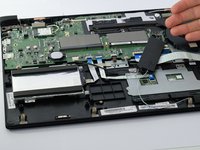
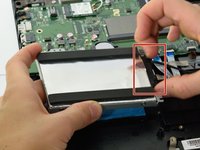
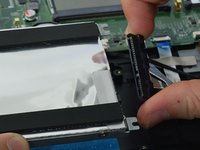
Lift the HDD case up, and gently pull at the sides of the connector to disconnect it.
-
-
-
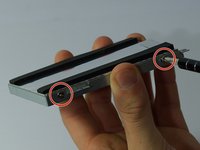
With the Phillips #1, remove the 4 M3 x 4.0mm screws on the sides of the case.
-
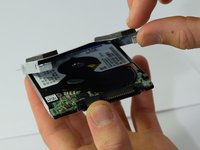
The hard drive can now be removed.
-
-













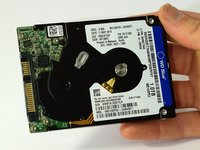
To reassemble your device, follow these instructions in reverse order.
During assembly, take careful note of the following items:
1) Keep track of the correct screws for each application.
2) Components may need to be wiggled to allow for proper screw alignment.
3) Don’t force screws in to avoid cross-threading.
4) Ensure proper connector alignment when reconnecting the HDD and battery cables.
Again, here is a video to help install a Windows OS on your new HDD: https://www.youtube.com/watch?v=tjmRWFep...
Cancel: I did not complete this guide.
4 other people completed this guide.

Team

Cal Poly, Team S8-G1, Banghart Fall 2017 Member of Cal Poly, Team S8-G1, Banghart Fall 2017
CPSU-BANGHART-F17S8G1
5 Members
84 Guides authored
