Free Shipping on Domestic Orders $75+

LG VX9800 Speakers Replacement

What you need

  1. LG VX9800 Speakers Replacement, Front Keypad: step 1, image 1 of 1
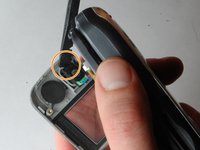
    • Remove the two triangular pads at the top of the two speakers.

    • These pads have adhesive to keep them situated, so you may want to use a fine-tipped object, such as a screwdriver or a pen, to remove them. It is easiest to place the fine-tipped object in the small indent in the corner of these pads.

    Ask FixBot

    Add Comment

  2. LG VX9800 Speakers Replacement: step 2, image 1 of 1
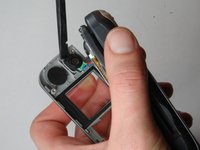
    • Remove the two rubber cylinders from their shafts. These cover more screws.

    • This requires a little more effort, so you may need to "dig" them out.

    Ask FixBot

    Add Comment

  3. LG VX9800 Speakers Replacement: step 3, image 1 of 1
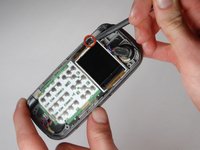
    • Now remove the four screws.

    • The screws are small, so put them somewhere that you can easily keep track of them.

    Ask FixBot

    Add Comment

  4. LG VX9800 Speakers Replacement: step 4, image 1 of 1
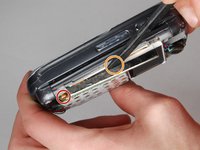
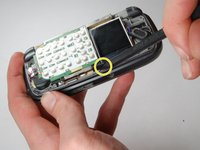
    • Starting on the side with red square, pry the faceplate upwards with the flat end of a spudger.

    • Continue to slide the flat edge along the seam of the faceplate.

    • You should hear popping or snapping noises as the faceplate is being removed.

    Ask FixBot

    Add Comment

  5. LG VX9800 Speakers Replacement: step 5, image 1 of 2 LG VX9800 Speakers Replacement: step 5, image 2 of 2
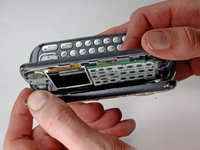
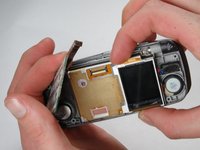
    • The faceplate is attached by wires, so do not pull the faceplate very far away from the phone.

    • Lift the dislodged faceplate off the motherboard while being mindful of the wires still attached to it.

    Ask FixBot

    Add Comment

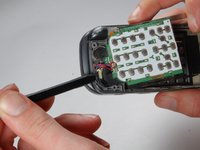
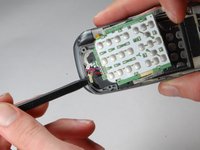
  6. LG VX9800 Speakers Replacement: step 6, image 1 of 3 LG VX9800 Speakers Replacement: step 6, image 2 of 3 LG VX9800 Speakers Replacement: step 6, image 3 of 3
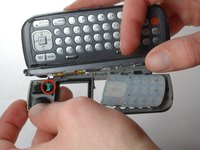
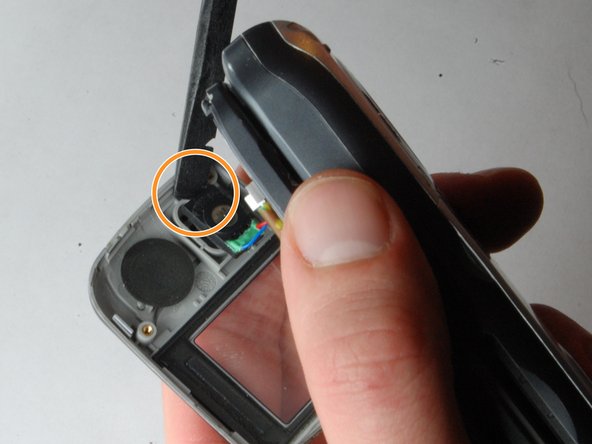
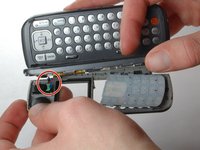
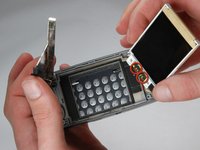
    • The faceplate is still attached through speakers that travel from the ear-piece to the motherboard.

    • Carefully wedge the flat or pointed end of the spudger beneath the ear-piece and the faceplate.

    • This may require a bit of force, as the ear-piece is stuck to the faceplate with adhesive.

    Ask FixBot

    Add Comment

  7. LG VX9800 Speakers Replacement: step 7, image 1 of 1
    • The faceplate and keypad can now be completely removed from the phone.

    Ask FixBot

    Add Comment

  8. LG VX9800 Speakers Replacement, LCD Screens: step 8, image 1 of 3 LG VX9800 Speakers Replacement, LCD Screens: step 8, image 2 of 3 LG VX9800 Speakers Replacement, LCD Screens: step 8, image 3 of 3
    • Wedge the spudger into the small gap between the phone and the metal casing of the motherboard.

    • Slide the spudger underneath the metal and along the edge. The motherboard should begin to rise.

    • There is a ribbon at the end of this groove, do not slide the spudger into the ribbon.

    • Now use the spudger to lift the other side of the motherboard.

    Ask FixBot

    Add Comment

  9. LG VX9800 Speakers Replacement: step 9, image 1 of 1
    • Lift the motherboard at an angle.

    • Do not completely remove the motherboard. Doing so will tear the ribbon!

    Ask FixBot

    Add Comment

  10. LG VX9800 Speakers Replacement: step 10, image 1 of 2 LG VX9800 Speakers Replacement: step 10, image 2 of 2
    • Gently pull the LCD screen upwards.

    • It can be tricky do this, you may want to use a spudger to pry it up if it doesn't pull up easily.

    • Remove the speaker wires from the LCD screen.

    • Replace the LCD screen and solder the wires to the new screen.

    • This step requires soldering. Only do this step if you are OK with soldering small wires. Look at this guide for help with soldering.

    Ask FixBot

    Add Comment

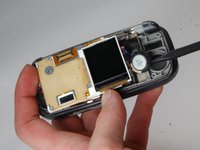
  11. LG VX9800 Speakers Replacement, Speakers: step 11, image 1 of 2 LG VX9800 Speakers Replacement, Speakers: step 11, image 2 of 2
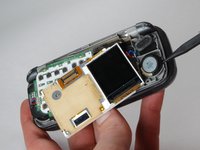
    • Carefully move the LCD screen in front of the logic board and use the spudger to pry against the edge of the speaker

    • The speaker should just pop right out. The only thing holding it in place is an adhesive

    Ask FixBot

    Add Comment

  12. LG VX9800 Speakers Replacement: step 12, image 1 of 1
    • Remove speaker wires from the LCD screen

    • Replace the speaker and solder back the connections to the LCD screen.

    • This step requires soldering. So only remove wires if you are comfortable soldering together small wires.

    Ask FixBot

    Add Comment

  13. LG VX9800 Speakers Replacement: step 13, image 1 of 2 LG VX9800 Speakers Replacement: step 13, image 2 of 2
    • Use the spudger to pry against the left speaker to remove it.

    • Two wires attach the speaker to the logic board, so handle carefully.

    Ask FixBot

    Add Comment

  14. LG VX9800 Speakers Replacement: step 14, image 1 of 1
    • remove the wires connected to the logic board

    • Replace the speaker and solder the connections back to the logic board

    • Only remove wires if you are comfortable soldering on a small scale.

    Ask FixBot

    Add Comment

Finish Line

Cancel: I did not complete this guide.

Steven Clark

Member since: 01/21/10

29 Reputation

2 Guides authored

Team

Cal Poly, Team 16-32, Maness Winter 2010 Member of Cal Poly, Team 16-32, Maness Winter 2010

CPSU-MANESS-W10S16G32

4 Members

8 Guides authored

0 Guide Comments

Add Comment

View Statistics:

Past 24 Hours: 2

Past 7 Days: 4

Past 30 Days: 27

All Time: 1,442