Free Shipping on Domestic Orders $75+

LG G6 USB-C Port Replacement

Archived Guide
This guide is retained solely for historical purposes. Use the updated version of the guide to perform your repair.

What you need

    1. LG G6 USB-C Port Replacement, iOpener Heating: step 1, image 1 of 2 LG G6 USB-C Port Replacement, iOpener Heating: step 1, image 2 of 2
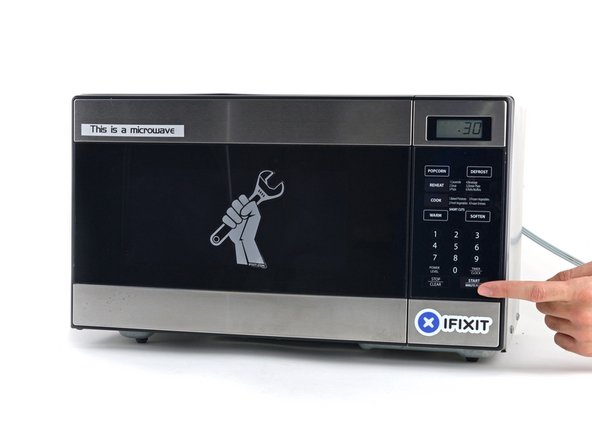
      • We recommend that you clean your microwave before proceeding, as any nasty gunk on the bottom may end up stuck to the iOpener.

      • Place the iOpener in the center of the microwave.

      • For carousel microwaves: Make sure the plate spins freely. If your iOpener gets stuck, it may overheat and burn.

      Ask FixBot
      Add Comment

    2. LG G6 USB-C Port Replacement: step 2, image 1 of 1
      • Heat the iOpener for thirty seconds.

      • Depending on the wattage of your microwave, more or less time may be required. The iOpener is sufficiently heated when it's barely too hot to touch.

      • Throughout the repair procedure, as the iOpener cools, reheat it in the microwave for an additional thirty seconds at a time.

      • Be careful not to overheat the iOpener during the repair. Overheating may cause the iOpener to burst. Do not attempt to heat over 100˚C (212˚F).

      • Never touch the iOpener if it appears swollen.

      • If the iOpener is still too hot in the middle to touch, continue using it while waiting for it to cool down some more before reheating. A properly heated iOpener should stay warm for up to 10 minutes.

      Ask FixBot

      Add Comment

    3. LG G6 USB-C Port Replacement: step 3, image 1 of 1
      • Remove the iOpener from the microwave, holding it by one of the two flat ends to avoid the hot center.

      • The iOpener will be very hot, so be careful when handling it. Use an oven mitt if necessary.

      Ask FixBot

      Add Comment

    4. LG G6 USB-C Port Replacement, Alternate iOpener heating method: step 4, image 1 of 2 LG G6 USB-C Port Replacement, Alternate iOpener heating method: step 4, image 2 of 2
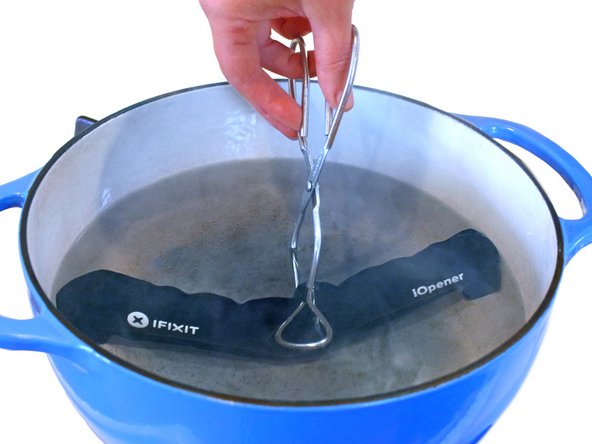
      • If you don't have a microwave, follow this step to heat your iOpener in boiling water.

      • Fill a pot or pan with enough water to fully submerge an iOpener.

      • Heat the water to a boil. Turn off the heat.

      • Place an iOpener into the hot water for 2-3 minutes. Make sure the iOpener is fully submerged in the water.

      • Use tongs to extract the heated iOpener from the hot water.

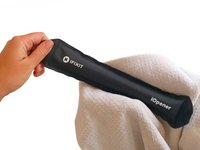
      • Thoroughly dry the iOpener with a towel.

      • The iOpener will be very hot, so be careful to hold it only by the end tabs.

      • Your iOpener is ready for use! If you need to reheat the iOpener, heat the water to a boil, turn off the heat, and place the iOpener in the water for 2-3 minutes.

      Ask FixBot

      Add Comment

    1. LG G6 USB-C Port Replacement, Battery: step 5, image 1 of 1
      • Apply the heated iOpener to the edge of the phone for about 2 minutes.

      Ask FixBot
      Add Comment

    2. LG G6 USB-C Port Replacement: step 6, image 1 of 3 LG G6 USB-C Port Replacement: step 6, image 2 of 3 LG G6 USB-C Port Replacement: step 6, image 3 of 3
      Tool used on this step:
      Plastic Cards
      $2.99
      Buy
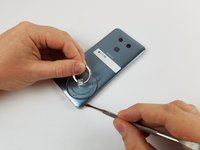
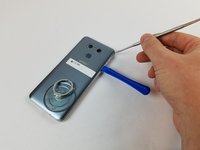
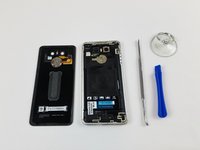
      • When the back panel is heated, apply the suction cup close to a corner of the phone. Lift up and insert a halberd spudger or opening pick under the rear glass.

      • Slide the blade of the Halberd spudger along the edge of the phone to separate the adhesive.

      • Follow around the edge of the phone, and use an opening pick or other tool (such as a plastic card) to keep already opened portions from re-adhering.

      Ask FixBot
      Add Comment

    3. LG G6 USB-C Port Replacement: step 7, image 1 of 2 LG G6 USB-C Port Replacement: step 7, image 2 of 2
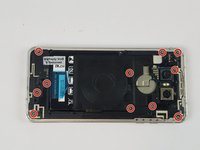
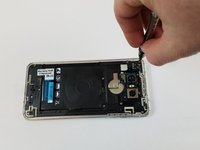
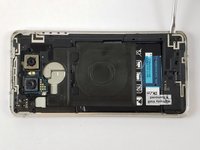
      • Using a Philips 000 bit, remove 11 screws from the highlighted locations.

      Ask FixBot

      Add Comment

    4. LG G6 USB-C Port Replacement: step 8, image 1 of 2 LG G6 USB-C Port Replacement: step 8, image 2 of 2
      • With the screws removed, remove the lower frame components, followed by the upper mid-frame. Both components can be removed with a little prying.

      Ask FixBot

      Add Comment

    5. LG G6 USB-C Port Replacement: step 9, image 1 of 1
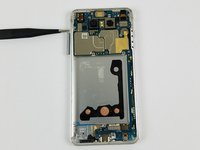
      • Begin battery removal by very gently prying off the power ribbon with a plastic card or a nylon spudger.

      Ask FixBot

      Add Comment

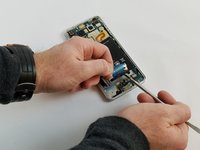
    6. LG G6 USB-C Port Replacement: step 10, image 1 of 3 LG G6 USB-C Port Replacement: step 10, image 2 of 3 LG G6 USB-C Port Replacement: step 10, image 3 of 3
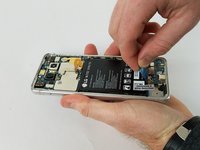
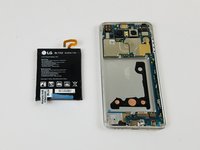
      • Firmly pull the blue tab. Be careful not to bend the battery as you pull it away from the adhesive.
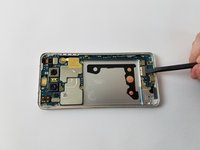
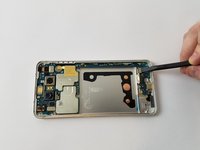
      • Do not use a knife as you may pierce the battery.

      Ask FixBot

      Add Comment

    1. LG G6 USB-C Port Replacement, Motherboard: step 11, image 1 of 2 LG G6 USB-C Port Replacement, Motherboard: step 11, image 2 of 2
      Tool used on this step:
      Tweezers
      $4.99
      Buy
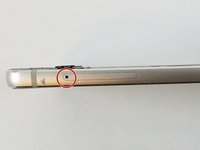
      • Locate the sim card tray release mechanism on the right edge.

      • Using the tweezers, or similar thin and rigid tool, push in the release button and pull out the sim card tray.

      Ask FixBot

      Add Comment

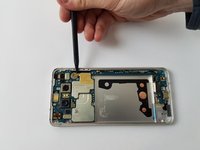
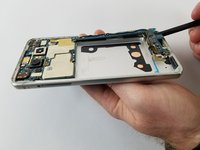
    2. LG G6 USB-C Port Replacement: step 12, image 1 of 3 LG G6 USB-C Port Replacement: step 12, image 2 of 3 LG G6 USB-C Port Replacement: step 12, image 3 of 3
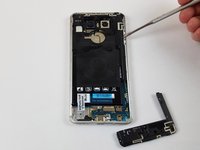
      • Gently pry off the two connectors at the bottom of the phone.

      • Pry off the tape covering the vibrator.

      Ask FixBot

      Add Comment

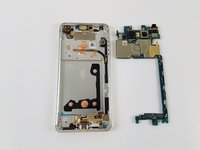
    3. LG G6 USB-C Port Replacement: step 13, image 1 of 2 LG G6 USB-C Port Replacement: step 13, image 2 of 2
      • The motherboard is now removable by gently lifting.

      • Upon removal of the motherboard, the small plastic sim card tray release mechanism will be loose and may get lost.

      Ask FixBot

      Add Comment

    1. LG G6 USB-C Port Replacement, USB-C Port: step 14, image 1 of 2 LG G6 USB-C Port Replacement, USB-C Port: step 14, image 2 of 2
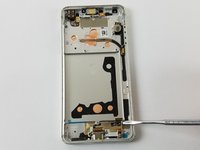
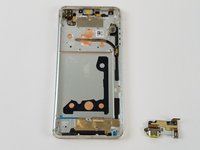
      • Gently pry the USB-c port assembly out of the frame.

      Ask FixBot

      Add Comment

Conclusion

To reassemble your device, follow these instructions in reverse order.

Cancel: I did not complete this guide.

8 other people completed this guide.

David Pugliese

Member since: 09/26/17

1,156 Reputation

4 Guides authored

Team

USF Tampa, Team S2-G6, Passmore Fall 2017 Member of USF Tampa, Team S2-G6, Passmore Fall 2017

USFT-PASSMORE-F17S2G6

4 Members

60 Guides authored

2 Guide Comments

what size tape did you use?

Miguel “CharlieMike” Dias - Reply Share

I skipped removing the main board and was able to remove the port by just lifting the PCB up a little. I also did not remove the battery. just disconnected it. was able the slide out and in the USB port with no trouble or damage.

tenchi50 - Reply Share

Add Comment

View Statistics:

Past 24 Hours: 0

Past 7 Days: 2

Past 30 Days: 23

All Time: 10,132