Free Shipping on Domestic Orders $75+

LG G3 Vigor Motherboard Replacement

What you need

  1. LG G3 Vigor Motherboard Replacement, Rear Case: step 1, image 1 of 1
    • Locate the notch on the bottom right of the phone.

    Ask FixBot

    Add Comment

  2. LG G3 Vigor Motherboard Replacement: step 2, image 1 of 1
    • Gently pull the cover on the back of the phone off to locate the battery.

    Ask FixBot

    Add Comment

  3. LG G3 Vigor Motherboard Replacement, Battery: step 3, image 1 of 1
    • Remove the battery by lifting from the slot at the bottom of the battery.

    Ask FixBot

    Add Comment

  4. LG G3 Vigor Motherboard Replacement, Midframe: step 4, image 1 of 1
    • Remove the twelve Phillips #00 screws securing the midframe to the rest of the phone.

    Ask FixBot

    Add Comment

  5. LG G3 Vigor Motherboard Replacement: step 5, image 1 of 3 LG G3 Vigor Motherboard Replacement: step 5, image 2 of 3 LG G3 Vigor Motherboard Replacement: step 5, image 3 of 3
    • Work a plastic opening tool around the perimeter of the phone to separate the midframe from the rest of the phone.

    Ask FixBot

    Add Comment

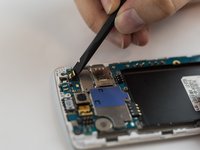
  6. LG G3 Vigor Motherboard Replacement, Rear Facing Camera: step 6, image 1 of 1
    • Use the spudger to gently unplug the ribbon cable connected to the motherboard. Then remove the rear facing camera.

    Ask FixBot

    Add Comment

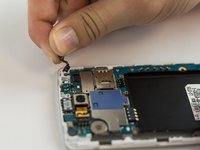
  7. LG G3 Vigor Motherboard Replacement, Front Facing Camera: step 7, image 1 of 2 LG G3 Vigor Motherboard Replacement, Front Facing Camera: step 7, image 2 of 2
    • Use the spudger to gently unplug the ribbon cable connected to the motherboard.

    • Remove the front camera.

    Ask FixBot

    Add Comment

  8. LG G3 Vigor Motherboard Replacement, Motherboard: step 8, image 1 of 1
    • Use the flat edge of a spudger to disconnect the motherboard ribbon connector.

    Ask FixBot

    Add Comment

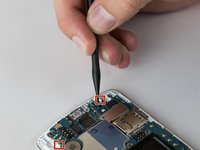
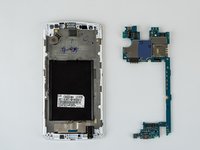
  9. LG G3 Vigor Motherboard Replacement: step 9, image 1 of 2 LG G3 Vigor Motherboard Replacement: step 9, image 2 of 2
    • Use the pointed end of a spudger to push back the two motherboard retaining flaps.

    • The motherboard should now be able to be lifted out of the device.

    Ask FixBot

    Add Comment

Conclusion

To reassemble your device, follow these instructions in reverse order.

Cancel: I did not complete this guide.

8 other people completed this guide.

Jared Stickl

Member since: 02/08/16

407 Reputation

1 Guide authored

Team

USF Tampa, Team 12-5, Eyestone Spring 2016 Member of USF Tampa, Team 12-5, Eyestone Spring 2016

USFT-EYESTONE-S16S12G5

4 Members

5 Guides authored

0 Guide Comments

Add Comment

View Statistics:

Past 24 Hours: 1

Past 7 Days: 4

Past 30 Days: 21

All Time: 2,207