Introduction
Use this guide to remove or replace the motherboard cover assembly in the LG G3 (D855).
What you need
-
-
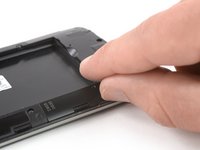
Insert a thumbnail, or a prying tool like a spudger, into the notch at the bottom left of the back cover.
-
Pry the back cover up to separate its plastic clips.
 Ask FixBot
-
-
-
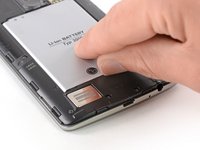
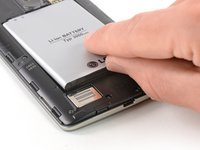
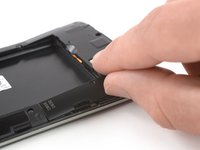
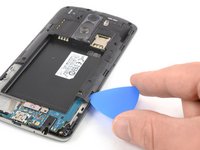
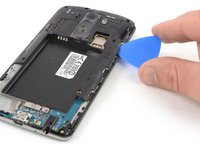
Use a fingernail or a prying tool at the marked notch to lever the battery out of its recess.
-
-
-
-
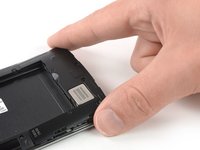
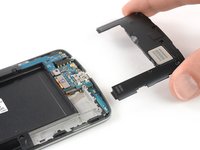
Insert a thumbnail, or a prying tool like a spudger, into the notch at the bottom left of the back cover you used earlier to remove the back cover.
-
Pry up the plastic panel, including the loudspeaker, until you can get a good grip.
-
-
-
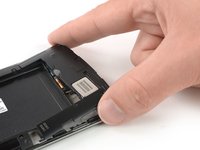
Carefully remove the plastic panel including the loudspeaker by gently pulling it away from the phone assembly.
-
-
-
Remove the eight Phillips #00 screws (4 mm length).
-
-
-
Insert an opening pick between the bottom right corner of the motherboard cover and the motherboard.
-
Pry up the motherboard cover to open the plastic clips which hold the cover in its place.
-
Work your way along the right edge.
-
-
-
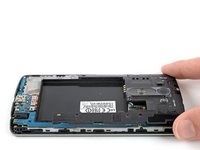
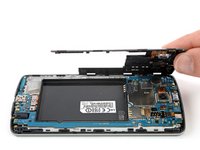
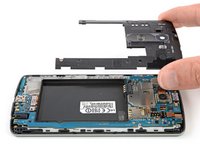
Carefully lift the right edge of the motherboard cover.
-
Remove the motherboard assembly.
-


If possible, turn on your device and test your repair before installing new adhesive and resealing.
Take your e-waste to an R2 or e-Stewards certified recycler.
Repair didn’t go as planned? Try some basic troubleshooting, or ask our Answers Community for help.

