Free Shipping on Domestic Orders $75+

LG Front Load Washing Machine Rotor Replacement

Views: 2.7K

View statistics:

Past 24 Hours:
7
Past 7 Days:
43
Past 30 Days:
196
All Time:
2,708
Comments: 6

6 comments on steps.

Completed: 3

3 people have marked this guide "completed." Will you be next?

Favorites: 0

No one has favorited (and subscribed to) this guide. Will you be the first?

Time Required: 25 - 40 minutes
Difficulty: Moderate
LG Front Load Washing Machine Rotor Replacement

Introduction

Go to step 1 ↓

Use this guide to replace the rotor in your LG front load washing machine.

The rotor is part of the washer's direct drive motor. It doesn't have any electrical components and is less likely to break compared to the motor stator.

This guide will work for most LG front load washing machines. This guide is written with a model WM3050CW washer. If you have a different model, you may encounter some minor disassembly differences, but the overall repair process will be the same.

What you need

    1. LG Front Load Washing Machine Rotor Replacement, Safety Precautions: step 1, image 1 of 2 LG Front Load Washing Machine Rotor Replacement, Safety Precautions: step 1, image 2 of 2
      • Before you begin your repair, perform the following:

      • Turn off the main water supply

      • Unplug your washer

      • Disconnect all water connections at the rear of your washer

      Ask FixBot

      Add Comment

    1. LG Front Load Washing Machine Rotor Replacement, Unfasten the rear panel: step 2, image 1 of 3 LG Front Load Washing Machine Rotor Replacement, Unfasten the rear panel: step 2, image 2 of 3 LG Front Load Washing Machine Rotor Replacement, Unfasten the rear panel: step 2, image 3 of 3
      • Remove the screw(s) securing the rear panel.

      Ask FixBot

      Add Comment

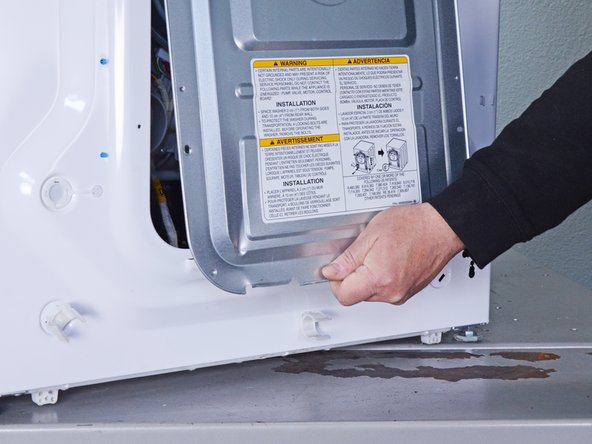
    2. LG Front Load Washing Machine Rotor Replacement, Remove the rear panel: step 3, image 1 of 3 LG Front Load Washing Machine Rotor Replacement, Remove the rear panel: step 3, image 2 of 3 LG Front Load Washing Machine Rotor Replacement, Remove the rear panel: step 3, image 3 of 3
      • Unclip the rear panel from the chassis.

      Ask FixBot

      Add Comment

    3. LG Front Load Washing Machine Rotor Replacement: step 4, image 1 of 1
      • Remove the rear panel.

      Ask FixBot

      Add Comment

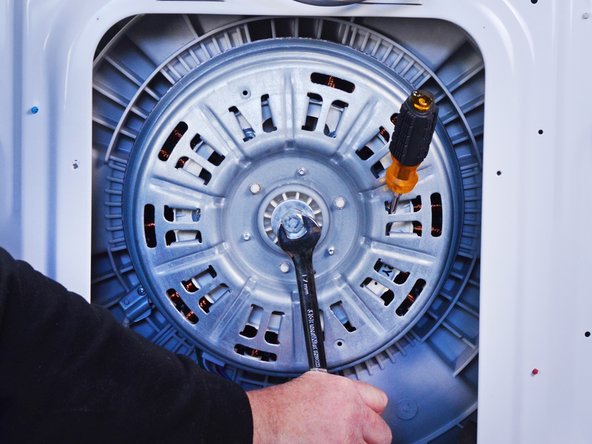
    1. LG Front Load Washing Machine Rotor Replacement, Unfasten the rotor: step 5, image 1 of 2 LG Front Load Washing Machine Rotor Replacement, Unfasten the rotor: step 5, image 2 of 2
      • Use an impact driver to remove the 17 mm nut securing the rotor.

      • Alternatively, you can use a wrench and a hammer to loosen the nut.

      • To secure the rotor, you can insert a screwdriver, or a similar tool, between the rotor and the stator. Make sure to brace the tool against one of the screw bosses on the stator.

      Ask FixBot

      Add Comment

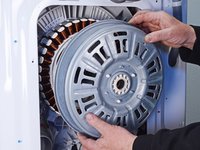
    2. LG Front Load Washing Machine Rotor Replacement, Remove the rotor: step 6, image 1 of 2 LG Front Load Washing Machine Rotor Replacement, Remove the rotor: step 6, image 2 of 2
      • The rotor is magnetically attracted to the stator.

      • Pull the rotor straight off the stator and drive shaft splines to remove it.

      • Wiggle the rotor as you pull to help disconnect it.

      • This may require significant force.

      • During reassembly, watch your fingers when aligning the rotor over the stator, as the rotor gets sucked in easily.

      Ask FixBot

      Add Comment

Conclusion

To reassemble your device, follow these instructions in reverse order.

Take your e-waste to an R2 or e-Stewards certified recycler.

Repair didn’t go as planned? Ask our Answers community for help.

Cancel: I did not complete this guide.

3 other people completed this guide.

Bill Gilbert

Member since: 06/30/22

40,642 Reputation

261 Guides authored

Team

iFixit Member of iFixit

Staff

121 Members

72,885 Guides authored

0 Guide Comments

Add Comment

View Statistics:

Past 24 Hours: 7

Past 7 Days: 43

Past 30 Days: 196

All Time: 2,708