Free Shipping on Domestic Orders $75+

Kurio Xtreme Power/Volume Buttons Replacement

What you need

  1. Kurio Xtreme Power/Volume Buttons Replacement, Back Panel: step 1, image 1 of 1
    • Remove the rubber case by beginning to peel from one of the top corners and continue peeling until the cover is completely removed.

    Ask FixBot

    Add Comment

  2. Kurio Xtreme Power/Volume Buttons Replacement: step 2, image 1 of 2 Kurio Xtreme Power/Volume Buttons Replacement: step 2, image 2 of 2
    • Unscrew the four 4 mm black screws using a Phillips #000 screw driver.

    • There are two screws on each side of the device (four total).

    Ask FixBot

    Add Comment

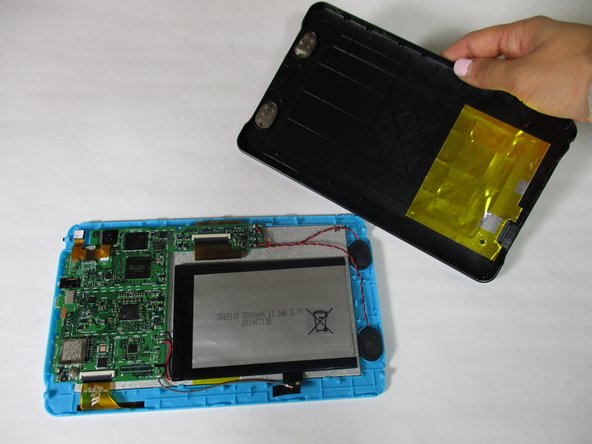
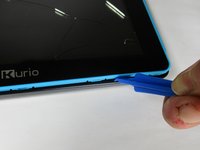
  3. Kurio Xtreme Power/Volume Buttons Replacement: step 3, image 1 of 3 Kurio Xtreme Power/Volume Buttons Replacement: step 3, image 2 of 3 Kurio Xtreme Power/Volume Buttons Replacement: step 3, image 3 of 3
    • Insert the plastic opening tool in between the edges of the blue front casing and black back casing.

    • Slide the plastic opening tool around the perimeter of the device. This may require that you repeatedly run the opening tool up and down the edges of the device.

    • Be sure not to break any of the plastic clamps along the edges of the device when removing the back cover.

    • Carefully lift the back panel off of the rest of the device.

    Ask FixBot

    Add Comment

  4. Kurio Xtreme Power/Volume Buttons Replacement, Power/Volume Buttons: step 4, image 1 of 1
    • Remove the three 4 mm screws on the motherboard with a Phillips #000 screwdriver.

    Ask FixBot

    Add Comment

  5. Kurio Xtreme Power/Volume Buttons Replacement: step 5, image 1 of 2 Kurio Xtreme Power/Volume Buttons Replacement: step 5, image 2 of 2
    • Remove the orange data display ribbon wire above the battery by prying open the ZIF connector with the plastic opening tool.

    Ask FixBot

    Add Comment

  6. Kurio Xtreme Power/Volume Buttons Replacement: step 6, image 1 of 2 Kurio Xtreme Power/Volume Buttons Replacement: step 6, image 2 of 2
    • Remove the orange data display ribbon wire to the left of the battery by prying open the ZIF connector with the plastic opening tool.

    Ask FixBot

    Add Comment

  7. Kurio Xtreme Power/Volume Buttons Replacement: step 7, image 1 of 1
    • Remove the speakers out of the plastic molds by lifting up the black and red wires.

    • Be careful not to disconnect the black and red wires from the motherboard.

    Ask FixBot

    Add Comment

  8. Kurio Xtreme Power/Volume Buttons Replacement: step 8, image 1 of 2 Kurio Xtreme Power/Volume Buttons Replacement: step 8, image 2 of 2
    • Remove the motherboard by lifting it out of the casing. Set it upside down below the casing.

    • The motherboard will still be connected to the battery and the speakers.

    Ask FixBot

    Add Comment

  9. Kurio Xtreme Power/Volume Buttons Replacement: step 9, image 1 of 3 Kurio Xtreme Power/Volume Buttons Replacement: step 9, image 2 of 3 Kurio Xtreme Power/Volume Buttons Replacement: step 9, image 3 of 3
    • Remove the volume buttons and/or power button by soldering them at their bases.

    • Volume down

    • Volume up

    • Power

    Ask FixBot

    Add Comment

Conclusion

To reassemble your device, follow these instructions in reverse order.

Cancel: I did not complete this guide.

One other person completed this guide.

Mallory Myers

Member since: 09/22/15

1,190 Reputation

7 Guides authored

Team

Baylor, Team 6-10, Williams Fall 2015 Member of Baylor, Team 6-10, Williams Fall 2015

BU-WILLIAMS-F15S6G10

3 Members

14 Guides authored

0 Guide Comments

Add Comment

View Statistics:

Past 24 Hours: 0

Past 7 Days: 4

Past 30 Days: 29

All Time: 1,125