
KitchenAid Mixer Motor Repair

Adam Basaraba and one other contributor
Last updated on May 27, 2021
Views: 16K
View statistics:
- Past 24 Hours:
- 9
- Past 7 Days:
- 70
- Past 30 Days:
- 362
- All Time:
- 16,409
Comments: 4
1 comment on steps, 3 guide comments.
Go to guide commentsCompleted: 4 5
4 people have marked this guide "completed." Will you be next?
5 people have marked this guide "completed." Including you — great job!
Favorites: 0 1
No one has favorited (and subscribed to) this guide. Will you be the first?
1 person has favorited (and subscribed to) this guide — and that's you!
Dare To Repair
This guide is a Dare To Repair Contest submission.
Community-Contributed Guide
An awesome member of our community made this guide. It was not created by iFixit staff.
Introduction
Go to step 1 ↓Whether you use your blender to make smoothies or complicated dinner recipes, we understand that it plays an integral role in your daily routine. If your favorite blender stops working, don’t buy a new one! Save some money and repair all the common blender repair issues including leaks, broken switches, faulty motors, problems with the blade assembly, and more.
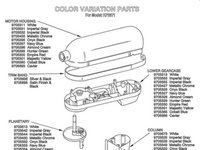
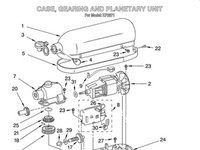
6 QT. STAND MIXER PROFESSIONAL 600 BOWL LIFT MODELS: KP26M1XMR5 (Meringue) KP26M1XPK5 (Pink) KP26M1XBS5 (Blue Steel) KP26M1XTG5 (Tangerine) KP26M1XCM5 (Cinnamon) 4KP26M1XMR5 (Meringue) KP26M1XDP5 (Dark Pewter) 4KP26M1XBS5 (Blue Steel) KP26M1XLC5 (Licorice) 4KP26M1XDP5 (Dark Pewter) KP26M1XMC5 (Metallic Chrome) 4KP26M1XLC5 (Licorice) KP26M1XNP5 (Nickel Pearl) 4KP26M1XMC5 (Metallic Chrome) KP26M1XPM5 (Pearl Metallic) 4KP26M1XNP5 (Nickel Pearl)
What you need
-
-
-
Remove the lid there is one screw at the back holding the band onto the mixer, and four screws holding the lid on.
-
-
-
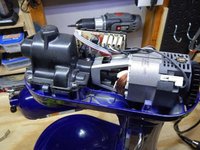
There are four screws holding the motor in place remove them and lift the motor out. Remember to disconnect the wiring connector before you remove the mixer motor from the body.
-
-
-
-
Install the new motor W10247536 number #2 and test it after you reinstall all the screws holding it down. Remember to hook back up the electrical wires before testing the KitchenAid Pro Series Stand Mixer Motor.
-

 Ask FixBot




To reassemble your device, follow these instructions in reverse order.
Cancel: I did not complete this guide.
4 other people completed this guide.

3 Guide Comments
This is useless. It doesn't even show the motor being removed. You'd have to at least open the gearbox as well.
Careful when you remove the plugs on the power board, I had one where the solder joints broke from the board and the connector was still attached but no longer electrically connected. Try to get a spudger or anything to help pry connectors off, when pulling, pull straight out do not wiggle connectors.
I was able to fix the board by resoldering large globs on the back in to get it reconnect to the traces... Its working for now and if I had to I cut scrap off more of the PCB to reveal fresh traces to connect to but better to not have to do this.
Replacing the motor fixed the burning electric smell coming from the old one.
