Introduction
The circuit board is a small part inside the back of the mixer. It is fairly easy to get to and doesn't require many steps.
What you need
-
-
Using a Phillips #2 screwdriver, remove the 10mm screw on the back cover by rotating it counterclockwise.
-
The back cover is now free. Remove it by pulling it back and up.
 Ask FixBot
-
-
-
Using a Phillips #1 screwdriver, remove the 9.5mm screw above the circuit board by rotating it counterclockwise.
-
-
-
Tool used on this step:Tweezers$4.99
-
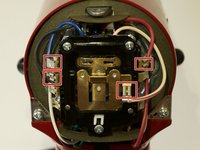
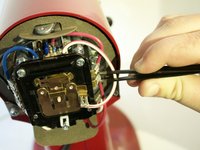
Using pliers or tweezers, remove the connectors of the four wires attached to the circuit board.
-
-
-
Grab the wires and tilt the edge of the board up to lift the circuit board up and out.
-



To reassemble your device, follow these instructions in reverse order.
Cancel: I did not complete this guide.
4 other people completed this guide.

Team

Cal Poly, Team S2-G5, Livingston Winter 2018 Member of Cal Poly, Team S2-G5, Livingston Winter 2018
CPSU-LIVINGSTON-W18S2G5
4 Members
11 Guides authored
