Free Shipping on Domestic Orders $75+

KitchenAid Classic Mixer K45SSWH Worm Gear Replacement

What you need

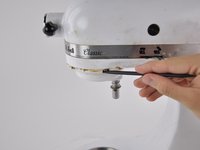
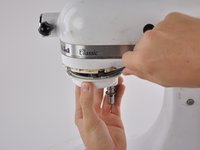
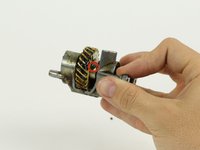
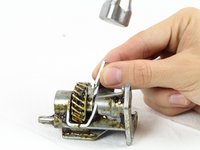
  1. KitchenAid Classic Mixer K45SSWH Worm Gear Replacement, Motor Housing Cover: step 1, image 1 of 2 KitchenAid Classic Mixer K45SSWH Worm Gear Replacement, Motor Housing Cover: step 1, image 2 of 2
    • Using a spudger, gently pry off the aluminum drip ring.

    Ask FixBot
  2. KitchenAid Classic Mixer K45SSWH Worm Gear Replacement: step 2, image 1 of 1
    • Using a 4 mm pin punch and hammer, hammer the pin until it is dislodged from the planetary gear cover.

    Ask FixBot
  3. KitchenAid Classic Mixer K45SSWH Worm Gear Replacement: step 3, image 1 of 2 KitchenAid Classic Mixer K45SSWH Worm Gear Replacement: step 3, image 2 of 2
    • Using a spudger, pry the planetary gear cover from the mixer shaft.

    Ask FixBot
  4. KitchenAid Classic Mixer K45SSWH Worm Gear Replacement: step 4, image 1 of 1
    • Using a flathead screwdriver, remove the five 28 mm front motor housing screws.

    • Using the same flathead screwdriver, remove the two 28 mm locking screws.

    • One of the locking screws contains a safety locking mechanism. Do not interchange these screws with the front motor housing screws.

    Ask FixBot
  5. KitchenAid Classic Mixer K45SSWH Worm Gear Replacement: step 5, image 1 of 1
    • Turn your device around. Using the same flathead screwdriver, remove the two 28 mm rear locking screws.

    • One of the rear motor housing screws contains a safety locking mechanism. Do not interchange these screws with the front motor housing screws.

    Ask FixBot
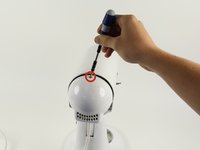
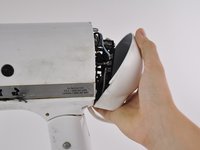
  6. KitchenAid Classic Mixer K45SSWH Worm Gear Replacement: step 6, image 1 of 2 KitchenAid Classic Mixer K45SSWH Worm Gear Replacement: step 6, image 2 of 2
    • Using a Phillips #2 screwdriver, remove the 10 mm screw from top of back cover.

    • The rear cover is now completely free from the mixer.

    Ask FixBot
  7. KitchenAid Classic Mixer K45SSWH Worm Gear Replacement: step 7, image 1 of 2 KitchenAid Classic Mixer K45SSWH Worm Gear Replacement: step 7, image 2 of 2
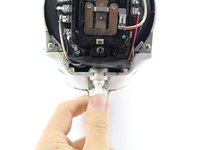
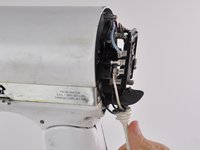
    • Carefully pull the power cord from the notch in back of the mixer.

    • The motor housing cover is now completely free from the base of the mixer.

    Ask FixBot
  8. KitchenAid Classic Mixer K45SSWH Worm Gear Replacement: step 8, image 1 of 1
    • Lift the motor housing cover from the mixer base.

    • Be sure to place the cover upside-down to prevent grease from leaking out.

    Ask FixBot
  9. KitchenAid Classic Mixer K45SSWH Worm Gear Replacement, Worm Gear: step 9, image 1 of 2 KitchenAid Classic Mixer K45SSWH Worm Gear Replacement, Worm Gear: step 9, image 2 of 2
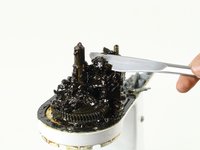
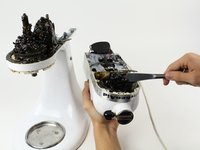
    • Using a butter knife or putty knife, remove the grease from the gears.

    • Place the grease in motor housing cover.

    Ask FixBot
  10. KitchenAid Classic Mixer K45SSWH Worm Gear Replacement: step 10, image 1 of 1
    • Using a Phillips #2 screwdriver, remove the three 20 mm screws from the worm gear tower.

    • The worm gear tower assembly is now free from the mixer base.

    Ask FixBot
  11. KitchenAid Classic Mixer K45SSWH Worm Gear Replacement: step 11, image 1 of 2 KitchenAid Classic Mixer K45SSWH Worm Gear Replacement: step 11, image 2 of 2
    • Using a pin punch and a hammer, remove the roll pin.

    Ask FixBot
  12. KitchenAid Classic Mixer K45SSWH Worm Gear Replacement: step 12, image 1 of 1
    • Slide the tower gear out to access the worm gear.

    Ask FixBot
  13. KitchenAid Classic Mixer K45SSWH Worm Gear Replacement: step 13, image 1 of 1
    • Remove the worm gear from the tower.

    Ask FixBot
Conclusion

To reassemble your device, follow these instructions in reverse order.

61 other people completed this guide.

Chris Grant

Member since: 10/07/14

2,022 Reputation

1 Guide authored

Team

Cal Poly, Team 14-28, Maness Fall 2014 Member of Cal Poly, Team 14-28, Maness Fall 2014

CPSU-MANESS-F14S14G28

4 Members

22 Guides authored

31 Guide Comments

Some corrections:

Step 1 -- Suggest (as the Service Manual does) using a flat-blade screwdriver and tap it with a light hammer to drive the drip ring off.

Step 2 -- the correct size pin punch is 5/32"

Step 3 -- Using two flat-blade screwdrivers, one on each side, pry off the planetary.

A plastic spudger is likely to break. Two points of leverage opposits each other distributes the load and prevents to the planetary and its shaft.

Step 11 -- The proper punch size is 3/32"

Steps 12 & 13 -- There is a washer on each side of the worm gear. Retain these and place one on each side off the grar when reassembling.

A link to the Service Manual:

http://www.kitchenaidparts.eu/documents/...

Finkerbell - Reply Share

Very useful reply.

Step 3: I needed two flat head screwdrivers to pry off the planetary gear.

Step 9: Recommend adding a new seal for the upper housing and new food grade grease. If you have plastic chips from the broken worm gear, you won't want them damaging the new worm gear. Also, if that grease is black its probably time to replace it. Happy Baking!!!

nshourds - Reply Share

Cheers Finkerbell,

Very helpful info, as was the main part of the guide.

Not sure what model number I was working on, but when I l lifted off the motor housing, there was still wires connected to the base.

Just be careful at this stage in case you have the same...

markguerin - Reply Share

my model K5SS WH is the same as yours until step 5. It doesnt have the two bolts as shown in the picture for step 5 so i wasnt able to complete the repair. any suggestions.

sailsetter - Reply Share

Take out remaining two big phillips screws, then you can access (from beneath) the two hidden screws that are still holding the motor housing - then it slips apart easily with dual prying.

Shaun Morrison - Reply Share

Add Comment

View Statistics:

Past 24 Hours: 20

Past 7 Days: 129

Past 30 Days: 595

All Time: 130,764