Free Shipping on Domestic Orders $75+

Kindle Voyage Vibrator Replacement

What you need

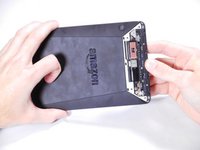
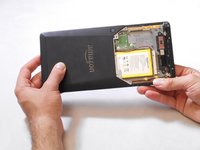
  1. Kindle Voyage Vibrator Replacement, Back Panel: step 1, image 1 of 2 Kindle Voyage Vibrator Replacement, Back Panel: step 1, image 2 of 2
    • Insert a plastic opening tool between the plastic panel shown on the device.

    • Use the tool to pry the plastic away from the device.

    • There will be adhesive holding this piece of plastic to the device. You may have to pull pretty hard to get it separated.

    Ask FixBot

    Add Comment

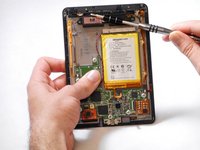
  2. Kindle Voyage Vibrator Replacement: step 2, image 1 of 1
    • Use an aluminum driver attached with a Phillips head size #00 to remove the four 3mm screws shown in the picture. For reassembly, note that the top two and bottom two screws are different sizes.

    Ask FixBot

    Add Comment

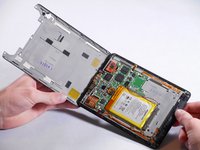
  3. Kindle Voyage Vibrator Replacement: step 3, image 1 of 3 Kindle Voyage Vibrator Replacement: step 3, image 2 of 3 Kindle Voyage Vibrator Replacement: step 3, image 3 of 3
    • Once the screws are removed, the back panel can slide off the device.

    Ask FixBot

    Add Comment

  4. Kindle Voyage Vibrator Replacement: step 4, image 1 of 2 Kindle Voyage Vibrator Replacement: step 4, image 2 of 2
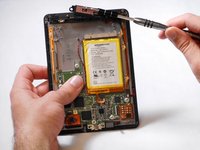
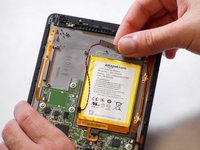
    • Remove the magnetic component with the magnetic head of the aluminum driver.

    Ask FixBot

    Add Comment

  5. Kindle Voyage Vibrator Replacement, Vibrator: step 5, image 1 of 2 Kindle Voyage Vibrator Replacement, Vibrator: step 5, image 2 of 2
    Tool used on this step:
    Tweezers
    $4.99
    Buy
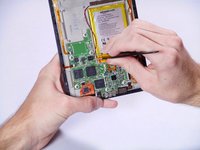
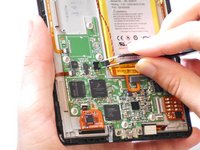
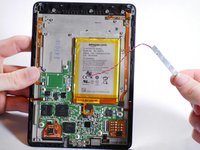
    • Use tweezers to pinch in the sides of the vibrator cable and slide it out of its housing.

    Ask FixBot

    Add Comment

  6. Kindle Voyage Vibrator Replacement: step 6, image 1 of 3 Kindle Voyage Vibrator Replacement: step 6, image 2 of 3 Kindle Voyage Vibrator Replacement: step 6, image 3 of 3
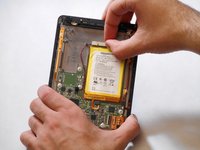
    • Gently peel the vibrator off of the device.

    Ask FixBot

    Add Comment

Conclusion

To reassemble your device, follow these instructions in reverse order.

Cancel: I did not complete this guide.

Sean Yap

Member since: 01/22/15

1,508 Reputation

6 Guides authored

Team

Cal Poly, Team 19-12, Maness Winter 2015 Member of Cal Poly, Team 19-12, Maness Winter 2015

CPSU-MANESS-W15S19G12

5 Members

13 Guides authored

1 Guide Comment

OK, the procedure seems straightforward enough, but you say “no parts required” when you actually *do* need to buy the replacement parts for the pieces that are no longer functioning. Where can you buy these parts?

Sharon Crowley - Reply Share

Add Comment

View Statistics:

Past 24 Hours: 2

Past 7 Days: 11

Past 30 Days: 43

All Time: 1,844