Introduction
The back casing of the Kindle serves as a protective shell for its internal components. Removing it is the first step in accessing the device for any repairs or maintenance.
This repair may be necessary if the back casing is cracked, scratched, or otherwise damaged for cosmetic reasons. Additionally, if the clips securing the casing are broken or worn out, the cover may not stay in place properly and will need replacement. Be mindful that improper removal can further damage these clips or other internal parts. Follow this guide carefully to avoid any unintended damage to your Kindle Paperwhite 12th Gen.
Before proceeding, ensure the device is powered off and any external accessories are disconnected.
What you need
-
-
-
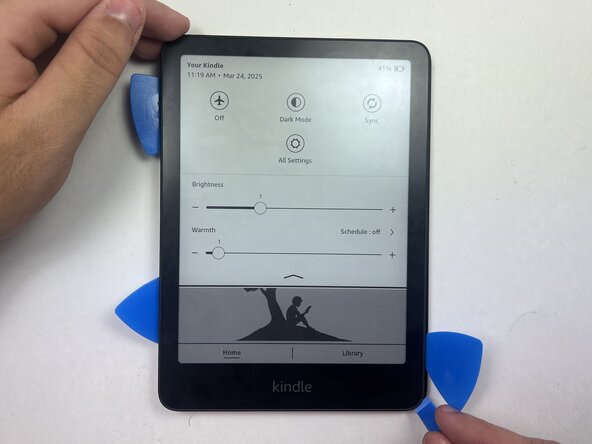
Use an opening tool or opening picks and insert the tip between the back case and screen.
-
Slide the opening tool around the edge of the tablet to release the clips holding them together and avoid damaging the connectors.
 Ask FixBot
-
-
-



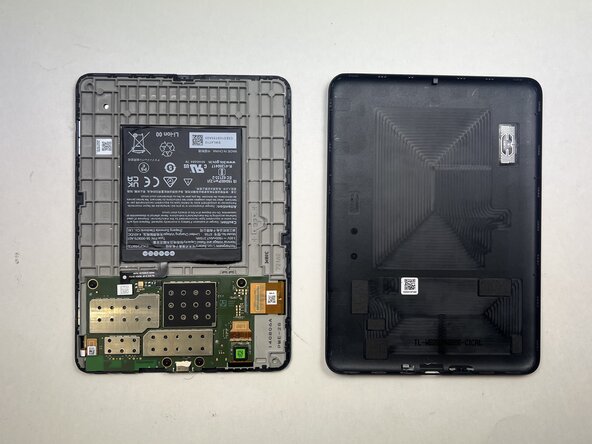


To reassemble your device, follow these instructions in reverse order.

Team

Austin Community College, Team 18-1, Watkins Spring 2025 Member of Austin Community College, Team 18-1, Watkins Spring 2025
AUSTINCC-WATKINS-S25S18G1
4 Members
60 Guides authored
