Introduction
Replacement guide for the motherboard on a Kindle Fire HDX 7” tablet.
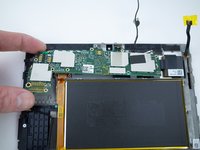
The battery can only be disconnected once the motherboard is removed. Be careful not to cause a short with metal tools around the components on the motherboard.
What you need
-
-
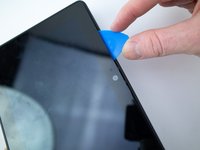
Insert an opening pick underneath the speaker bezel, and slide it along the perimeter to separate it from the tablet.
 Ask FixBot
-
-
-
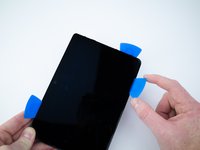
Wedge opening picks around the perimeter between the display and back case.
-
Work the opening picks around the perimeter until the two halves disengage from each other.
-
-
-
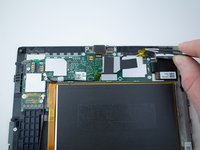
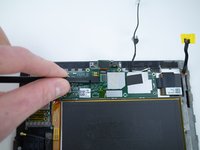
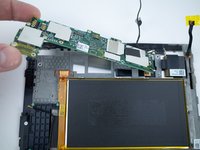
Use the flat end of a spudger to pry up and disconnect the rear panel press-fit connector from the motherboard.
-
-
-
-
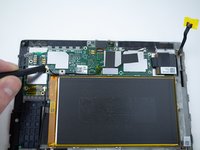
There may be a glue strip between the battery and the outside case. Gently pry the case open and use the flat end of a spudger to separate the glue strip.
-
-
Tool used on this step:Tweezers$4.99
-
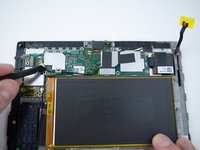
Grab the yellow tape with a pair of tweezers and pull upwards to disconnect the press-fit connector.
-
-
-
Use the flat end of a spudger to disconnect the front camera press-fit connector from the motherboard.
-
-
-
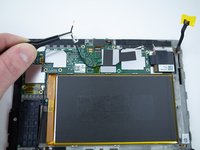
Use a spudger to pry up and disconnect the antenna cable from the motherboard.
-
Pull the antenna cable up and off of the motherboard.
-
-
-
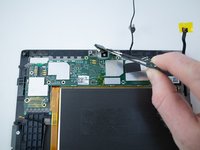
Use the flat end of a spudger to pry up and disconnect the front camera press-fit connector from the motherboard.
-
Remove the front camera.
-


To reassemble your device, follow these instructions in reverse order.
Cancel: I did not complete this guide.
One other person completed this guide.

2 Guide Comments
This is a good tutorial but there is no mention of the bottom two connectors attached to the motherboard and some tips on reattaching these, i.e. the connector cables can be extended and then pulled back to normal to make reattachment possible