
Kindle Fire HD 6 Rear Facing Camera Replacement

Cassandra Beck and 3 other contributors
Last updated on Jul 29, 2015
Views: 1.5K
View statistics:
- Past 24 Hours:
- 1
- Past 7 Days:
- 26
- Past 30 Days:
- 92
- All Time:
- 1,530
Comments: 2
2 comments on steps.
Completed: 0 1
No one has marked this guide "completed." Will you be the first?
1 person has marked this guide "completed." It's you — great job!
Favorites: 0 1
No one has favorited (and subscribed to) this guide. Will you be the first?
1 person has favorited (and subscribed to) this guide — and that's you!
Introduction
Go to step 1 ↓This guide describes how to remove the camera from the Kindle Fire HD 6. You might need to remove your camera if the lens is scratched or dirty, or if you need to access the motherboard or screen.
What you need
Parts
Tools


-
-
-
Place the device face down on a clean cloth or another smooth surface.
-
Insert the plastic opening tool between the device’s front and back panels. You might need to wiggle the tool up and down to wedge it in the gap.
-
Maneuver the tool around the device until the back unclips from the front panel.
 Ask FixBot
-
-
-
-
-
Unscrew the two 3.5mm T5 Torx Screws from the top of the camera.
-
-
-
-
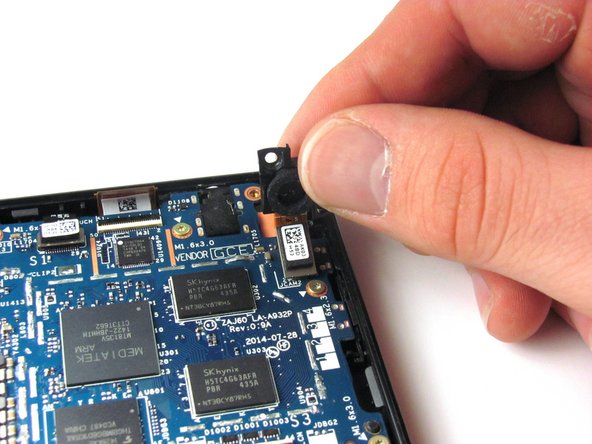
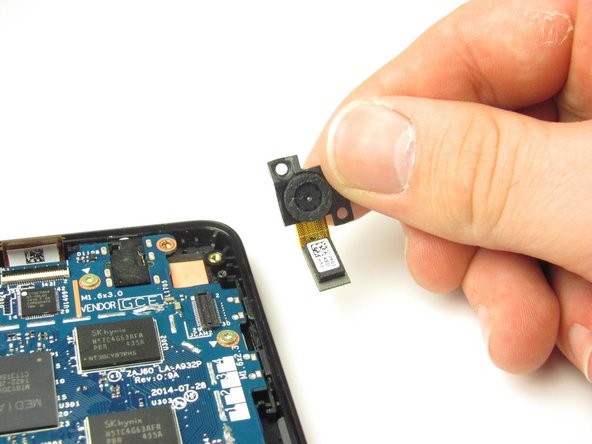
Gently pull the camera up and out of the device. As you pull, unclip the black and white connector with orange tape by popping it off at its base.
-
-


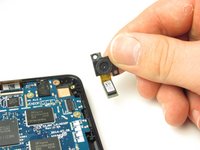
To reassemble your device, follow these instructions in reverse order.

Team

Cal Poly, Team 70-4, Forte Winter 2015 Member of Cal Poly, Team 70-4, Forte Winter 2015
CPSU-FORTE-W15S70G4
4 Members
72 Guides authored
