
Free Shipping on Domestic Orders $75+

Keurig K-Duo Water Pump Replacement

What you need

  1. Keurig K-Duo Water Pump Replacement, Rear Plastic Panels: step 1, image 1 of 1
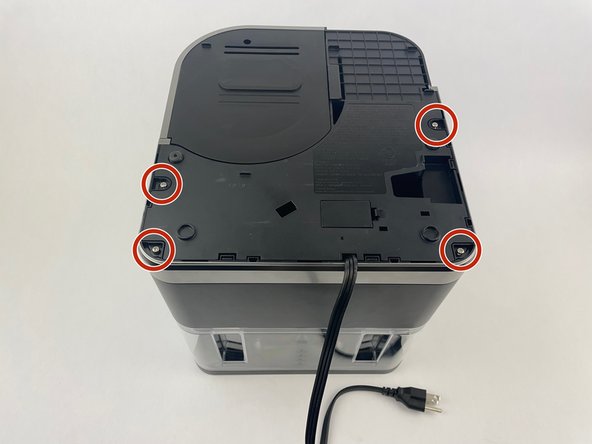
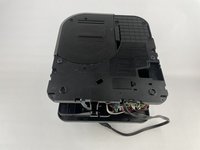
    • Turn the Keurig K-Duo upside down so the power cord is visible and facing you.

  2. Keurig K-Duo Water Pump Replacement: step 2, image 1 of 3 Keurig K-Duo Water Pump Replacement: step 2, image 2 of 3 Keurig K-Duo Water Pump Replacement: step 2, image 3 of 3
    • Use a Phillips screwdriver to remove all four screws that secure the plastic panel.

  3. Keurig K-Duo Water Pump Replacement: step 3, image 1 of 3 Keurig K-Duo Water Pump Replacement: step 3, image 2 of 3 Keurig K-Duo Water Pump Replacement: step 3, image 3 of 3
    • To remove the back panels, grip each side firmly.

    • Gently pull the panel outward toward yourself to release and fully detach the plastic hooks.

  4. Keurig K-Duo Water Pump Replacement, Water Pump: step 4, image 1 of 2 Keurig K-Duo Water Pump Replacement, Water Pump: step 4, image 2 of 2
    • There are two terminal blocks to remove from the motherboard.

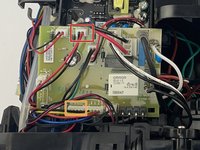
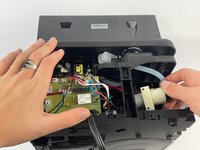
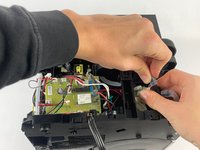
    • Gently disconnect the 2-pin terminal block that has the label "Water Pump" on the motherboard.

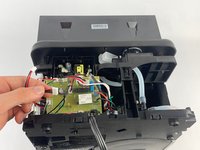
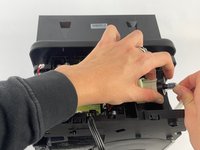
    • Gently disconnect the 4-pin terminal block that has the label "IR Sensor."

  5. Keurig K-Duo Water Pump Replacement: step 5, image 1 of 3 Keurig K-Duo Water Pump Replacement: step 5, image 2 of 3 Keurig K-Duo Water Pump Replacement: step 5, image 3 of 3
    • Pull out the water pump from its socket by twisting it so that the bottom is facing you.

    • Remove the plastic tubes from water pump.

  6. Keurig K-Duo Water Pump Replacement: step 6, image 1 of 2 Keurig K-Duo Water Pump Replacement: step 6, image 2 of 2
    • Fully access the water pump by pulling it straight out.

    • Make sure none of the disconnected wires are caught on any of the motherboard components to avoid damage.

Conclusion

To reassemble your device, follow the above steps in reverse order.
Take your e-waste to an R2 or e-Stewards certified recycler.
Repair didn’t go as planned? Try some basic troubleshooting or ask our Answers community for help.

One other person completed this guide.

Jacob Archer

Member since: 10/28/24

212 Reputation

1 Guide authored

Team

Cuesta, Team 10-3, Krynen Fall 2024 Member of Cuesta, Team 10-3, Krynen Fall 2024

CUESTA-KRYNEN-F24S10G3

4 Members

10 Guides authored

0 Guide Comments

Add Comment

View Statistics:

Past 24 Hours: 5

Past 7 Days: 49

Past 30 Days: 201

All Time: 2,575