Free Shipping on Domestic Orders $75+

Kenwood CH250 Coupling Replacement

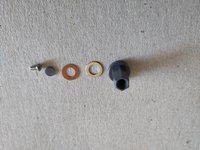
What you need

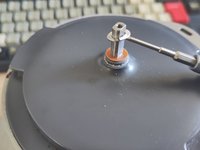
    1. Kenwood CH250 Coupling Replacement, Coupling: step 1, image 1 of 2 Kenwood CH250 Coupling Replacement, Coupling: step 1, image 2 of 2
      • Remove the small cap covering the screw holding the coupling onto the shaft, using a small flat-head screw driver.

      Ask FixBot

      Add Comment

    2. Kenwood CH250 Coupling Replacement: step 2, image 1 of 1
      • Unscrew the screw holding the coupling onto the shaft, using the PH1 screw driver.

      Ask FixBot

      Add Comment

    3. Kenwood CH250 Coupling Replacement: step 3, image 1 of 1
      • Drag off the old coupling.

      Ask FixBot

      Add Comment

    4. Kenwood CH250 Coupling Replacement: step 4, image 1 of 1
      • Clean any dirt around the shaft.

      Ask FixBot

      Add Comment

    5. Kenwood CH250 Coupling Replacement: step 5, image 1 of 2 Kenwood CH250 Coupling Replacement: step 5, image 2 of 2
      • Put the plastic washer onto the shaft, then place the metal washer on top of the plastic washer.

      • Note: the old coupling did not have any washers.

      Ask FixBot

      Add Comment

    6. Kenwood CH250 Coupling Replacement: step 6, image 1 of 1
      • Push the new coupling onto the shaft.

      Ask FixBot

      Add Comment

    7. Kenwood CH250 Coupling Replacement: step 7, image 1 of 1
      • Secure the coupling with the screw, using the PH1 screw driver.

      Ask FixBot

      Add Comment

    8. Kenwood CH250 Coupling Replacement: step 8, image 1 of 1
      • Finally, put the cap on top of the screw and press in place with the flat-head screw driver.

      Ask FixBot

      Add Comment

Finish Line

Cancel: I did not complete this guide.

Sebastian Gassner

Member since: 04/08/20

187 Reputation

1 Guide authored

0 Guide Comments

Add Comment

View Statistics:

Past 24 Hours: 0

Past 7 Days: 12

Past 30 Days: 41

All Time: 695