Free Shipping on Domestic Orders $75+

This translation was generated by a machine and has not been reviewed by a person yet. Speak this language? Review it.

Kennex 5004 Projector Gear Replacement

Views: 165

View statistics:

Past 24 Hours:
3
Past 7 Days:
12
Past 30 Days:
68
All Time:
165
Comments: 0

No one has left comments on this guide. Will you be first?

Go to guide comments
Completed: 0

No one has marked this guide "completed." Will you be the first?

Favorites: 0

No one has favorited (and subscribed to) this guide. Will you be the first?

Time Required: 2 - 3 hours
Difficulty: Moderate
Featured Guide

This guide has been found to be exceptionally cool by the iFixit staff.

Community-Contributed Guide

An awesome member of our community made this guide. It was not created by iFixit staff.

Kennex 5004 Projector Gear Replacement

Introduction

Go to step 1 ↓

What a disappointment when, after just a few slides, the changing mechanism stops working.

Follow this guide to disassemble the projector and replace the faulty gear.

The only difficulty is obtaining the replacement part. It is perfectly possible to 3D print it using PLA+ material.

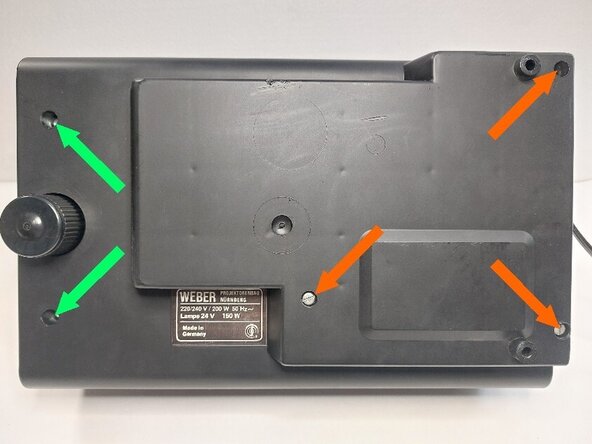
    1. Kennex 5004 Projector Gear Replacement, Lower case removal: step 1, image 1 of 3 Kennex 5004 Projector Gear Replacement, Lower case removal: step 1, image 2 of 3 Kennex 5004 Projector Gear Replacement, Lower case removal: step 1, image 3 of 3
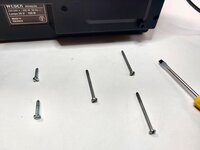
      • Remove the 5 SL5 screws accessible from the bottom of the device.

      • Two 4 x 22 mm SL5 screws.

      • Three 4 x 50 mm SL5 screws.

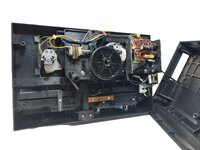
      • With the five screws removed, rotate the lower case away from the power cord to move it out of the way.

      • You can guide the power cord through the opening in the lower case and set the case aside.

      Ask FixBot

      Add Comment

    2. Kennex 5004 Projector Gear Replacement, Removal of the cooling fan assembly screws: step 2, image 1 of 3 Kennex 5004 Projector Gear Replacement, Removal of the cooling fan assembly screws: step 2, image 2 of 3 Kennex 5004 Projector Gear Replacement, Removal of the cooling fan assembly screws: step 2, image 3 of 3
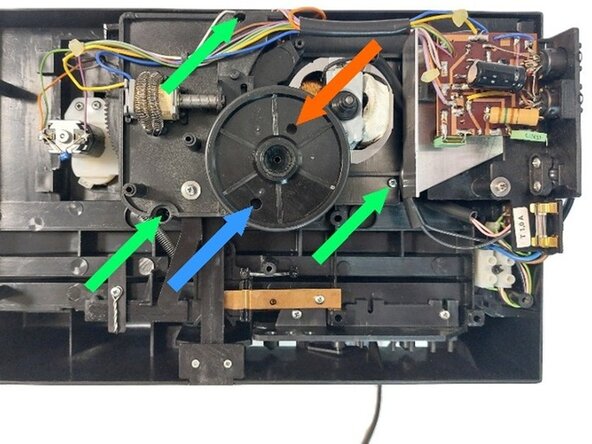
      • Remove the three 3 x 12 mm PH1 screws.

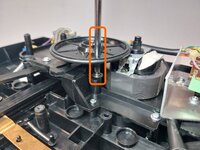
      • By inserting the screwdriver through the hole in the rubber-tired wheel closest to its axle, remove the 3 x 7 mm PH1 screw with its 3 x 10 x 0.6 mm washer.

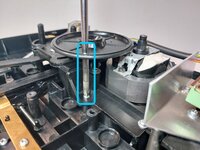
      • By inserting the screwdriver through the hole furthest from the wheel axle, remove the 3 x 12 mm PH1 screw.

      Ask FixBot

      Add Comment

    3. Kennex 5004 Projector Gear Replacement, Autofocus gear motor removal: step 3, image 1 of 2 Kennex 5004 Projector Gear Replacement, Autofocus gear motor removal: step 3, image 2 of 2
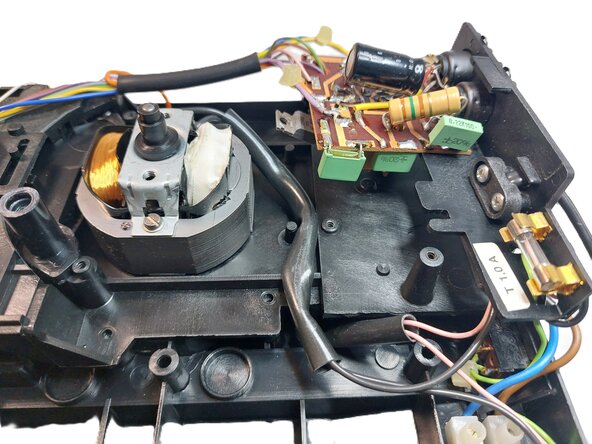
      • In this slide projector, all wires are soldered (no connector). To be able to lift the motor-cooling fan assembly without unsoldering any wires, we will remove the autofocus gear motor and the connection board with fuse holder

      • Remove the three 3 x 7 mm PH1 screws securing the autofocus gear motor.

      • Remove the gear motor.

      Ask FixBot

      Add Comment

    4. Kennex 5004 Projector Gear Replacement, Removing the connection board with fuse holder: step 4, image 1 of 2 Kennex 5004 Projector Gear Replacement, Removing the connection board with fuse holder: step 4, image 2 of 2
      • Remove the 3 x 10 mm PH1 screw securing the circuit board.

      • Remove the 3 x 7 mm PH1 screw securing the light dimmer triac heat sink.

      • Remove the 3 x 12 mm PH1 screw securing the board.

      • Lift the board.

      Ask FixBot

      Add Comment

    5. Kennex 5004 Projector Gear Replacement, Heat sink bracket removal: step 5, image 1 of 2 Kennex 5004 Projector Gear Replacement, Heat sink bracket removal: step 5, image 2 of 2
      • Remove the 3 x 10 mm PH1 screw securing the heat sink bracket.

      • Remove the heat sink bracket.

      Ask FixBot

      Add Comment

    6. Kennex 5004 Projector Gear Replacement, Removing the motor-cooling fan assembly: step 6, image 1 of 2 Kennex 5004 Projector Gear Replacement, Removing the motor-cooling fan assembly: step 6, image 2 of 2
      • Carefully lift the motor-cooling fan assembly, moving the various wires and the terminal block with fuse holder out of the way.

      • Still being careful not to pull on the wires, the assembly can be set down upside down.

      Ask FixBot

      Add Comment

    7. Kennex 5004 Projector Gear Replacement, Ring Gear Removal: step 7, image 1 of 3 Kennex 5004 Projector Gear Replacement, Ring Gear Removal: step 7, image 2 of 3 Kennex 5004 Projector Gear Replacement, Ring Gear Removal: step 7, image 3 of 3
      • Remove the 3.5 x 7 mm countersunk SL5 center screw from the ring gear.

      • Remove the turntable sitting on the ring gear.

      • Remove the ring gear.

      Ask FixBot

      Add Comment

    8. Kennex 5004 Projector Gear Replacement, Removing the wheel-sprocket assembly: step 8, image 1 of 3 Kennex 5004 Projector Gear Replacement, Removing the wheel-sprocket assembly: step 8, image 2 of 3 Kennex 5004 Projector Gear Replacement, Removing the wheel-sprocket assembly: step 8, image 3 of 3
      Tool used on this step:
      Tweezers
      $4.99
      Buy
      • The support for the wheel-sprocket assembly can now be removed.

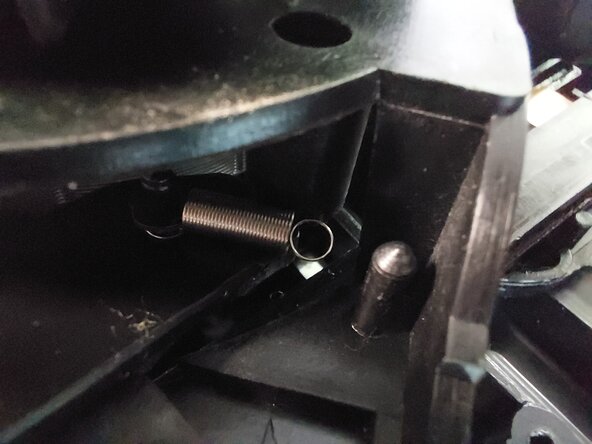
      • Using tweezers, pull the end of the return spring off its anchor pin.

      Ask FixBot

      Add Comment

    9. Kennex 5004 Projector Gear Replacement: step 9, image 1 of 3 Kennex 5004 Projector Gear Replacement: step 9, image 2 of 3 Kennex 5004 Projector Gear Replacement: step 9, image 3 of 3
      • Free the gear-wheel assembly by turning it and sliding it toward the motor.

      • In the photo, the gear is in place, but in the context of the troubleshooting that led to this guide, the gear was broken and missing.

      Ask FixBot

      Add Comment

    10. Kennex 5004 Projector Gear Replacement, Removing the gear: step 10, image 1 of 3 Kennex 5004 Projector Gear Replacement, Removing the gear: step 10, image 2 of 3 Kennex 5004 Projector Gear Replacement, Removing the gear: step 10, image 3 of 3
      • Remove the 2 x 5 mm SL3 screw.

      • You can see the broken gear and the 3D-printed replacement gear. Gluing the broken gear likely would not have held up over time.

      • The gear has an outer diameter of 12.5 mm, a thickness of 6.5 mm, 15 teeth, and a 4 mm square bore.

      Ask FixBot

      Add Comment

Conclusion

To reassemble your device, follow the instructions in reverse order.

It is best to apply a little thermal paste to the triac heat sink.

Cancel: I did not complete this guide.

Ecuval

Member since: 06/02/25

2,793 Reputation

12 Guides authored

0 Guide Comments

Add Comment

View Statistics:

Past 24 Hours: 3

Past 7 Days: 12

Past 30 Days: 68

All Time: 165