Introduction
Use this guide to remove or replace the battery on your JVC HA-531BT headphones.
If your battery is swollen, take appropriate precautions.
For your safety, discharge your battery below 25% before disassembling your headphones. This reduces the risk of a dangerous thermal event if the battery is accidentally damaged during the repair.
-
-
The battery and all the electronics you need to work with are stored in the right earpiece. You can remove the ear-cushion by just working it around the ear-piece.
-
-
-
Once the cushion is removed, you can remove the 4 screws. 3 of them are simple Phillips screws, and the last is a security screw. Security screws have never stopped me, don't let them stop you! This one is defeated by using a simple blade bit. Just find the one that fits the screw and remove it.
-
-
-
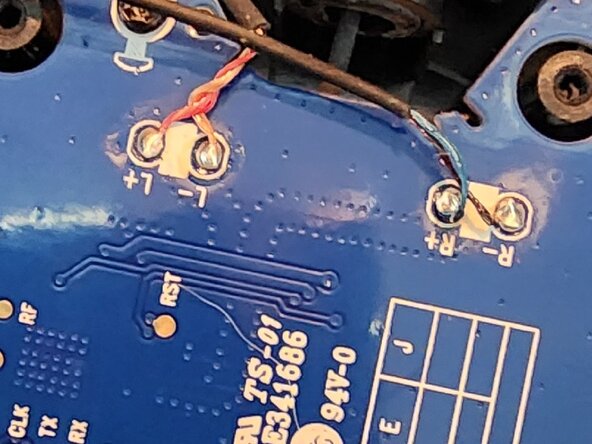
To ensure I didn't stress any of the wires or pads on the circuit board, I decided to remove the wires. I warmed up the R-, R+ and L-,L+ pads one at a time with my soldering iron and lifted the wires from the board.
-
-
-
The microphone wires are just to the left of the 3 thicker battery wires. Using the same technique, heat up the two pads and lift the wires to the mic.
-
-
-
Again, using the same technique, heat up the battery terminals one by one. As you remove a wire, cover the bare terminal in some electrical tape to prevent shorts.
-
-
-
There are 4 small Phillips screws holding the circuit board to the right headphone base. Remove these screws and gently lift the circuit board from the top edge and pull up. This is due to the USB jack that goes through the base. Mind the rubber guide for the power LEDs. It will come off, but can be refitted during reassembly.
-
-
-
-
The battery is taped and glued to the right headphone base. You can use a screwdriver to pop it free. By specification it's 35mm x 40mm x 4mm. It is a LI-ION Polymer 3.7 Volt 430 mAh. Ensure you dispose of this through a recycling center as this is hazardous waste.
-
-
-
I went to AliExpress and sourced a similar 3 wire battery. The headphones can accommodate a battery of slightly larger size. I installed a 40mm x 40mm x 5mm 600mAh. The headphones had no problem with the larger battery. I used a small piece of 3M VHB double sided tape to affix the battery.
-
-
-
Re-fit the circuit board, pulling the battery wires from underneath as you replace the board. Remember to insert the USB jack first and align the light guide for the power LED. Once in place, replace the four small Phillips screws.
-
-
-
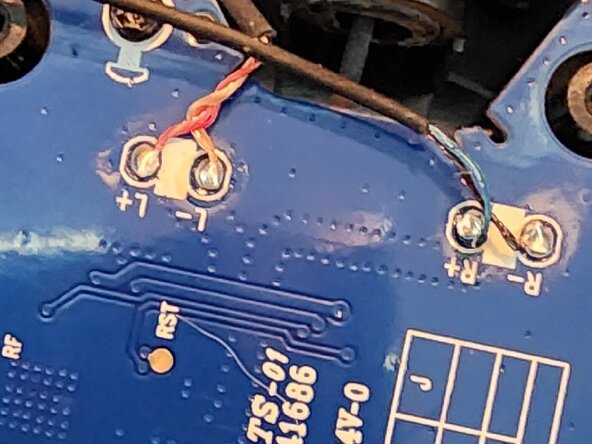
Warm up the solder pads for the MIC with your soldering iron one at a time. Re-fit the wires one at a time. Take care not to make a solder bridge between terminals.
-
-
-
Re-attach the Left +/- and Right +/- wires. Warm up each solder pad. Do one at a time, ensuring not to create a solder bridge between pads.
-
-
-
The battery will have three wires. Black, Red and a third colour. Likely white or yellow. This wire is serves as a safety wire to sense temperature of the charging battery providing feedback to the charging circuit. Attach it first. Secondly, attach the Red wire, and lastly (and very carefully - to prevent short circuits), attach the Black wire.
-
-
-
Using the 3 Phillips screws and 1 security screw, you can re-fit the right speaker to the right headphone base.
-
-
-
Gently work the the Ear Cushion on to the headseat. You will need to slightly stretch/pull it on the the headset. Work around to fit it equally on all sides.
-
-
-
At this point, your headset should be functional. My battery contained enough charge to power the headset so I tried to see if I could hear the startup tone in both ears. Success! I powered it down and placed it on charge for a few hours until the right charging light goes out.
-
-
-
The older, slightly puffy battery was only giving about 2 hours of runtime. The owners manual says to expect about 17 hours of runtime. So far, I've only performed 1 charge and I'm still going from there. The new, slightly oversized cell shows I'm still at about 80% charged after about 7 or 8 hours of use.
-


To reassemble your device, follow these instructions in reverse order.
