
JBL Grip Case Replacement

Isaac Loma and 3 other contributors
Last updated on May 18, 2026
Views: 356
View statistics:
- Past 24 Hours:
- 2
- Past 7 Days:
- 14
- Past 30 Days:
- 84
- All Time:
- 356
Comments: 0
No one has left comments on this guide. Will you be first?
Go to guide commentsCompleted: 1 2
1 person has marked this guide "completed." Will you be next?
2 people have marked this guide "completed." Including you — great job!
Favorites: 0 1
No one has favorited (and subscribed to) this guide. Will you be the first?
1 person has favorited (and subscribed to) this guide — and that's you!
Introduction
Go to step 1 ↓This guide will show you how to safely remove the outer case (membrane) of the JBL Grip speaker. Removing the membrane is a necessary first step to access the internal components of the device, including the charging port and internal circuitry.
The outer case is secured by clips and adhesive, so it must be handled carefully to avoid tearing or deforming the material. Use the recommended tools and apply gentle, even pressure when separating the membrane.
What you need
Tools


 Ask FixBot

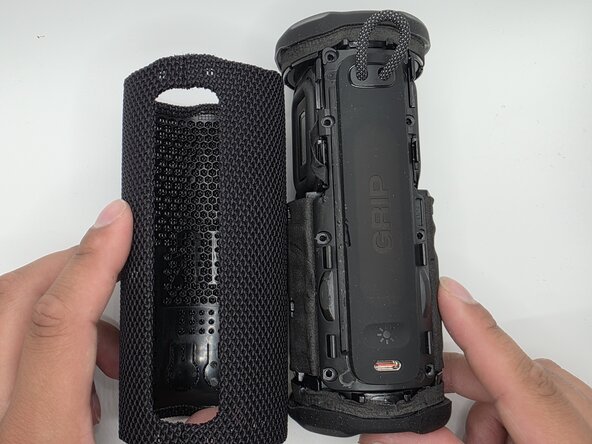


To reassemble your device, follow these instructions in reverse order.
Cancel: I did not complete this guide.
One other person completed this guide.

Team

University of North Texas, Team 1-4, Kilpatrick Spring 2026 Member of University of North Texas, Team 1-4, Kilpatrick Spring 2026
UNT-KILPATRICK-S26S1G4
5 Members
96 Guides authored
