
JBL Clip 3 Button Board Replacement

Adrian Mayorga and one other contributor
Last updated on Dec 30, 2024
Views: 849
View statistics:
- Past 24 Hours:
- 4
- Past 7 Days:
- 28
- Past 30 Days:
- 97
- All Time:
- 849
Comments: 0
No one has left comments on this guide. Will you be first?
Go to guide commentsCompleted: 1 2
1 person has marked this guide "completed." Will you be next?
2 people have marked this guide "completed." Including you — great job!
Favorites: 0 1
No one has favorited (and subscribed to) this guide. Will you be the first?
1 person has favorited (and subscribed to) this guide — and that's you!
Introduction
Go to step 1 ↓This guide demonstrates how to replace the button board in a JBL Clip 3 speaker step-by-step.
The JBL Clip 3 speaker has a rather simple design. It features three buttons at the speaker's center for pausing/unpausing and increasing or decreasing volume. If the buttons fail to function, there are various reasons why this could be the case. The problem could be a faulty button or debris stuck in the button. Before using this guide, test to make sure that your button is not the issue and confirm that the issue is the speaker's button board.
Note: Before starting, make sure to power off the JBL Clip 3, and disconnect it from any power sources.
What you need
Tools


-
-
-
Insert an opening tool between the speaker grille and speaker housing and pry around the entire perimeter of the device until the grille is released.
 Ask FixBot
-
-
-
Use a Phillips #1 screwdriver to remove the five 6.3 mm screws around the perimeter.
-
-
-
-
Use a Phillips #2 screwdriver to remove the two 6.3 mm screws.
-
Carefully remove the internal speaker from the speaker housing.
-
-
-
Use a Phillips #2 screwdriver to remove the two 6.3 mm screws from the button board.
-
Carefully lift and remove the button board from the speaker housing.
-
-


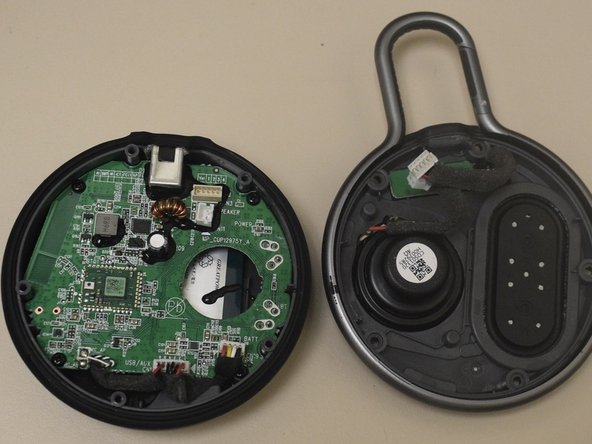


To reassemble your device, follow these instructions in reverse order.
Cancel: I did not complete this guide.
One other person completed this guide.

Team

CSU Los Angeles, Team 3-2, Harris Fall 2024 Member of CSU Los Angeles, Team 3-2, Harris Fall 2024
CSULA-HARRIS-F24S3G2
1 Member
12 Guides authored
