
JBL Charge Battery Replacement

Joe Durand and 13 other contributors
Last updated on Jul 6, 2026
Views: 241K
View statistics:
- Past 24 Hours:
- 5
- Past 7 Days:
- 77
- Past 30 Days:
- 451
- All Time:
- 240,621
Comments: 45
10 comments on steps, 35 guide comments.
Go to guide commentsCompleted: 40 41
40 people have marked this guide "completed." Will you be next?
41 people have marked this guide "completed." Including you — great job!
Favorites: 4 5
4 people have favorited (and subscribed to) this guide. Will you be next?
5 people have favorited (and subscribed to) this guide — including you!
Incorrect Tools
Help make this guide better by using the correct tools in images and/or text.
Introduction
Go to step 1 ↓If your speaker is not working or sounds like it's not delivering the high quality you expect from JBL, maybe you need to replace the battery. Replacing the battery can breathe new life into your worn device.
What you need


-
-
-
Make sure the device is powered off before you begin to disassemble the speaker.
-
Remove the trim from the speaker using a jimmy or metal spudger.
 Ask FixBot
-
-
-
Use the PH1 screwdriver to remove all five of the 6 mm screws from the battery cover.
-
Remove the battery cover and set the cover aside.
-
-
-
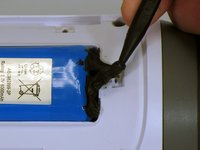
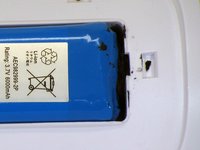
Use a spudger to carefully remove the liquid electrical tape that holds the battery inside the battery compartment.
-
-
-
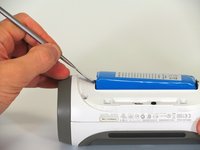
Use a spudger to lift the battery out of the device.
-
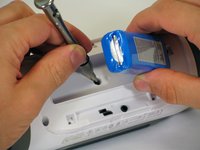
Lift the end of the battery that does not have the wire connection and remove the 16 mm PH2 screw underneath the battery.
-
-
-
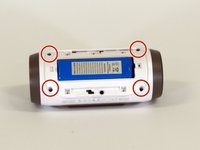
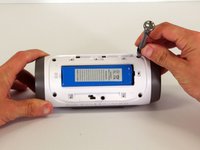
Remove the four 16 mm screws from the white plastic casing using the PH2 screwdriver.
-
-
-
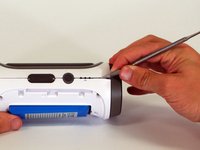
Starting in a corner of the device where the casing and the side meet, use a pointed metal spudger to pry the back casing off the speaker and the glue holding the seam together.
-
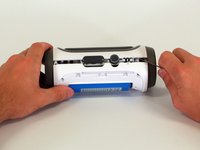
Slide the metal spudger along the seam to separate the back casing from the rest of the speaker.
-
-
-
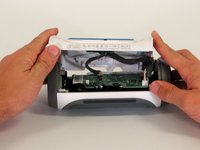
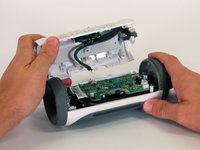
Once the back casing is open, disconnect the three white connectors from the motherboard.
-
Remove the upper casing.
-
-
-
-
-
-
Using a razor blade, remove the glue holding the battery cable in place.
-
Use multiple vertical cuts to remove pieces of the glue.
-












To reassemble your device, follow these instructions in reverse order.
Cancel: I did not complete this guide.
40 other people completed this guide.

Team

Cal Poly, Team 12-4, Lancaster Spring 2015 Member of Cal Poly, Team 12-4, Lancaster Spring 2015
CPSU-LANCASTER-S15S12G4
2 Members
48 Guides authored
35 Guide Comments
How i replaced a new battery in myjbl reflect headphone bluetooth
Please I need directions on replacing the battery of my jbl pulse speaker because it charges but doesn't indicate battery charging nor does it work.please I will be ver grateful.
Ifeanyi(kazhbone0147@gmail.com)
Your instructions state to replace the white cover, but do not say why it has to be replaced. Can you expound, please? Thank you,
Hi Delton, that is a good question. The entire cover has to be replaced if one is replacing the aux/USB ports.
You can ignore that note in this battery replacement guide. Good catch!
