Free Shipping on Domestic Orders $75+

JBL Charge 3 Speaker Replacement

What you need

    1. JBL Charge 3 Speaker Replacement, Front Cover: step 1, image 1 of 3 JBL Charge 3 Speaker Replacement, Front Cover: step 1, image 2 of 3 JBL Charge 3 Speaker Replacement, Front Cover: step 1, image 3 of 3
      • Turn your speaker upside down and insert the plastic opening tool vertically into the slit in the front cover.

      • Slowly pull the plastic opening tool outward to remove the four clips holding the covering in place.

      • Repeat this process for all four edges of the front cover.

      Ask FixBot

      Add Comment

    2. JBL Charge 3 Speaker Replacement: step 2, image 1 of 1
      • Pull apart your cover gently from both sides and remove it from the speaker housing.

      • There are screws around the foot of the device that may need loosening to be able to unclip the other side of the cover.

      • The inside of the front cover has holes that must match with their corresponding pins on the speaker housing for proper reassembly.

      • Removing the Front Cover does not affect the waterproof seals of the device. However, removing any further disassembly of your speaker will require removing waterproof seals and gaskets. Your device may no longer be waterproof after these have been altered.

      Ask FixBot

      Add Comment

    1. JBL Charge 3 Speaker Replacement, Speaker: step 3, image 1 of 2 JBL Charge 3 Speaker Replacement, Speaker: step 3, image 2 of 2
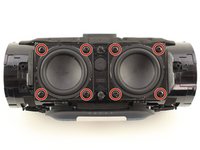
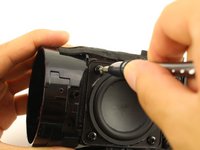
      • Remove the eight 10mm Phillips #1 screws from around the two front speakers.

      Ask FixBot

      Add Comment

    2. JBL Charge 3 Speaker Replacement: step 4, image 1 of 1
      • Pull gently on one of the speakers so it is outside of the housing. Be careful as it is still attached with the wires to the motherboard.

      Ask FixBot

      Add Comment

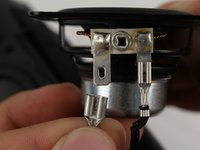
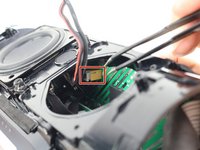
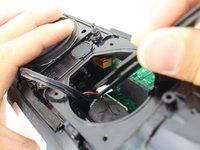
    3. JBL Charge 3 Speaker Replacement: step 5, image 1 of 3 JBL Charge 3 Speaker Replacement: step 5, image 2 of 3 JBL Charge 3 Speaker Replacement: step 5, image 3 of 3
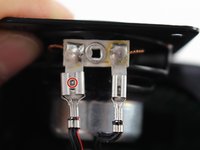
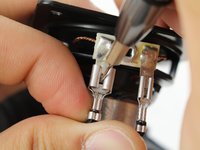
      • Press the small metal tab on the speaker connector with a Phillips #000 screwdriver and gently pull the connector apart.

      Ask FixBot

      Add Comment

    4. JBL Charge 3 Speaker Replacement: step 6, image 1 of 1
      • Repeat the previous step for the second connector.

      Ask FixBot

      Add Comment

    5. JBL Charge 3 Speaker Replacement: step 7, image 1 of 2 JBL Charge 3 Speaker Replacement: step 7, image 2 of 2
      Tool used on this step:
      Tweezers
      $4.99
      Buy
      • Grab the bundled cable connector that joins the speakers to the motherboard with tweezers. Gently pull the connector free.

      Ask FixBot

      Add Comment

    6. JBL Charge 3 Speaker Replacement: step 8, image 1 of 1
      • Now that the second speaker is disconnected from the motherboard, pull the speaker and wires out of the housing.

      Ask FixBot

      Add Comment

Conclusion

To reassemble your device, follow these instructions in reverse order.

Cancel: I did not complete this guide.

48 other people completed this guide.

Aidan Hays

Member since: 10/08/18

4,419 Reputation

2 Guides authored

Team

Cal Poly, Team S13-G1, White Fall 2018 Member of Cal Poly, Team S13-G1, White Fall 2018

CPSU-WHITE-F18S13G1

3 Members

48 Guides authored

33 Guide Comments

Where I can buy the same jbl speaker ?

Ekinox - Reply Share

I need to replace my JBL charge 3 speaker

Lara Esther - Reply Share

Where can buy the small speakers? Helpp

Luis Cilia - Reply Share

I have to pull out the motherboard to get those speakers out.

Tr0ll05aur0s 3z - Reply Share

where can i buy the replacement speakers?

Yhamani Pangarungan - Reply Share

Add Comment

View Statistics:

Past 24 Hours: 14

Past 7 Days: 119

Past 30 Days: 476

All Time: 109,437