
Instax Mini 90 Battery Contact Replacement

Elliott Tegan-Tawney and 4 other contributors
Last updated on Jun 2, 2017
Views: 5.8K
View statistics:
- Past 24 Hours:
- 3
- Past 7 Days:
- 22
- Past 30 Days:
- 117
- All Time:
- 5,752
Comments: 3
2 comments on steps, 1 guide comment.
Go to guide commentsCompleted: 2 3
2 people have marked this guide "completed." Will you be next?
3 people have marked this guide "completed." Including you — great job!
Favorites: 0 1
No one has favorited (and subscribed to) this guide. Will you be the first?
1 person has favorited (and subscribed to) this guide — and that's you!
Introduction
Go to step 1 ↓This should be a fairly easy fix, since the only tool you need is a Phillips #000 screwdriver. There are no safety risks in this process, as long as you keep the camera turned off. The battery contact could have been damaged when the camera was dropped, or if the camera was not kept in a cool, clean, indoor environment. To prevent further damage to battery contact, only use the proper batteries from Fujifilm, and take caution to prevent battery leaks. Remove battery when the camera is not being used for long periods of time.
What you need
Parts
Tools

-
-
-
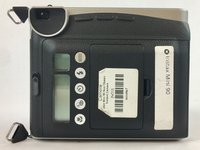
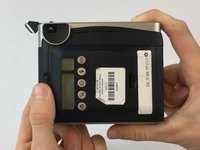
The battery compartment can be found on the backside of the camera. Pinpoint this compartment and focus on the right edge of the compartment gate to find the opening latch.
 Ask FixBot
-
-
-
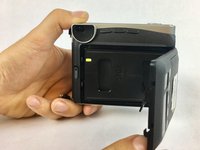
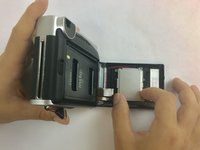
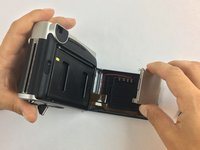
Pinch the latch in towards the battery compartment gate. This will release the gate and allow it to open.
-
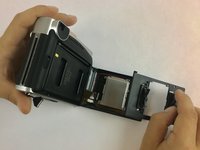
Completely open the gate and remove from camera. Take out the battery and replace the gate.
-
-
-
-
-
Turn camera around to its backside.
-
Open up the back side of the camera by pushing up on the slide button. This button is located on the middle left side of the camera.
-
-
-
Use the Phillips #000 Screwdriver to remove the five 3.5 mm screws located in the backside door of the camera.
-
-
-
-
Remove the black plastic piece on top, then remove the thin, metal piece. This metal piece is the battery contact.
-
Replace the battery contact with the new one.
-
-




To reassemble your device, follow these instructions in reverse order.
Cancel: I did not complete this guide.
2 other people completed this guide.

Team

USF Tampa, Team S2-G1, Nance Spring 2017 Member of USF Tampa, Team S2-G1, Nance Spring 2017
USFT-NANCE-S17S2G1
4 Members
72 Guides authored
