Free Shipping on Domestic Orders $75+

Insignia NS-CLIP02 Digital Display Replacement

Views: 834

View statistics:

Past 24 Hours:
2
Past 7 Days:
18
Past 30 Days:
90
All Time:
834
Comments: 0

No one has left comments on this guide. Will you be first?

Go to guide comments
Completed: 0

No one has marked this guide "completed." Will you be the first?

Favorites: 0

No one has favorited (and subscribed to) this guide. Will you be the first?

Time Required: 30 minutes - 1 hour
Difficulty: Difficult
Slice and Dice

The steps in this guide should be split up and made into a series of prerequisite guides.

Step Trimmer

This guide has unnecessary steps. Trim them to be more concise!

Insignia NS-CLIP02 Digital Display Replacement

Introduction

Go to step 1 ↓

This guide shows you how to replace a broken display on the Insignia NS-CLIP02. The device should be physically unplugged, not just “switched off.” If your display glass is cracked, keep further breakage contained and prevent bodily harm during your repair by taping over the glass.

What you need

    1. Insignia NS-CLIP02 Digital Display Replacement, Motherboard: step 1, image 1 of 1
      • Set the clock radio on the work space so the bottom of the device is showing.

      Ask FixBot

      Add Comment

    2. Insignia NS-CLIP02 Digital Display Replacement: step 2, image 1 of 2 Insignia NS-CLIP02 Digital Display Replacement: step 2, image 2 of 2
      • Use a metal spudger to peel back the adhesive sticker on the bottom of the clock.

      • You should see a single screw beneath the sticker.

      Ask FixBot

      Add Comment

    3. Insignia NS-CLIP02 Digital Display Replacement: step 3, image 1 of 2 Insignia NS-CLIP02 Digital Display Replacement: step 3, image 2 of 2
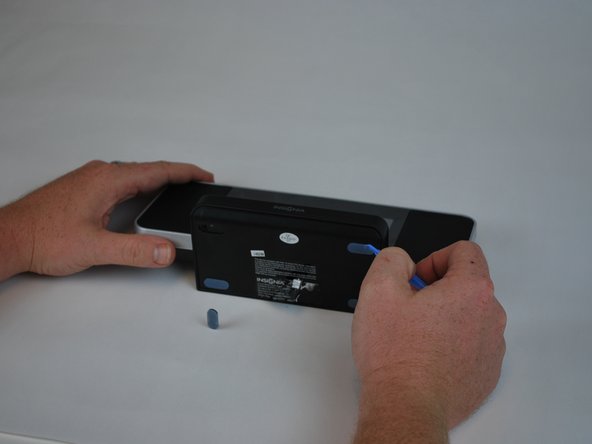
      • Using a plastic opening tool, peel off the adhesive gel stoppers.

      Ask FixBot

      Add Comment

    4. Insignia NS-CLIP02 Digital Display Replacement: step 4, image 1 of 1
      • Use a Phillips screwdriver to remove the six 11 mm screws on the bottom of the device.

      Ask FixBot

      Add Comment

    5. Insignia NS-CLIP02 Digital Display Replacement: step 5, image 1 of 1
      • Remove the bottom cover from the device to reveal the motherboard.

      Ask FixBot

      Add Comment

    6. Insignia NS-CLIP02 Digital Display Replacement: step 6, image 1 of 1
      • Use a Phillips screwdriver to remove the 9.5 mm screw located near the center of the motherboard.

      Ask FixBot

      Add Comment

    7. Insignia NS-CLIP02 Digital Display Replacement: step 7, image 1 of 1
      • Lift the motherboard away from the device.

      Ask FixBot

      Add Comment

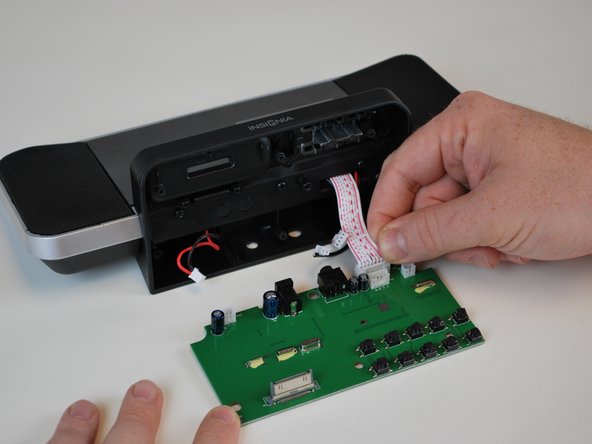
    8. Insignia NS-CLIP02 Digital Display Replacement: step 8, image 1 of 3 Insignia NS-CLIP02 Digital Display Replacement: step 8, image 2 of 3 Insignia NS-CLIP02 Digital Display Replacement: step 8, image 3 of 3
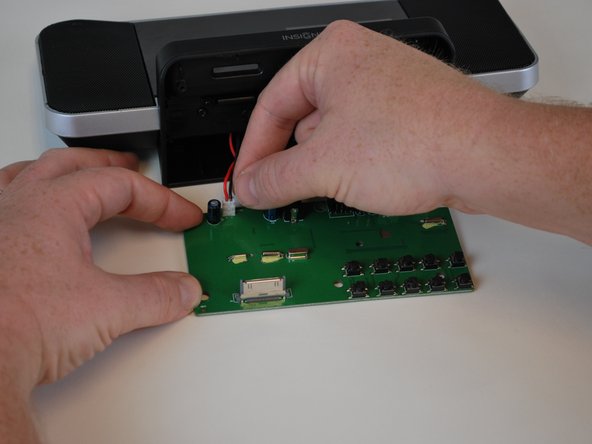
      • Disconnect the four cables connecting the motherboard to the device.

      Ask FixBot

      Add Comment

    1. Insignia NS-CLIP02 Digital Display Replacement, Digital Display: step 9, image 1 of 1
      • Using the Phillips screwdriver, remove the three screws that run along the center of the base.

      Ask FixBot

      Add Comment

    2. Insignia NS-CLIP02 Digital Display Replacement: step 10, image 1 of 2 Insignia NS-CLIP02 Digital Display Replacement: step 10, image 2 of 2
      • Carefully remove the base.

      Ask FixBot

      Add Comment

    3. Insignia NS-CLIP02 Digital Display Replacement: step 11, image 1 of 2 Insignia NS-CLIP02 Digital Display Replacement: step 11, image 2 of 2
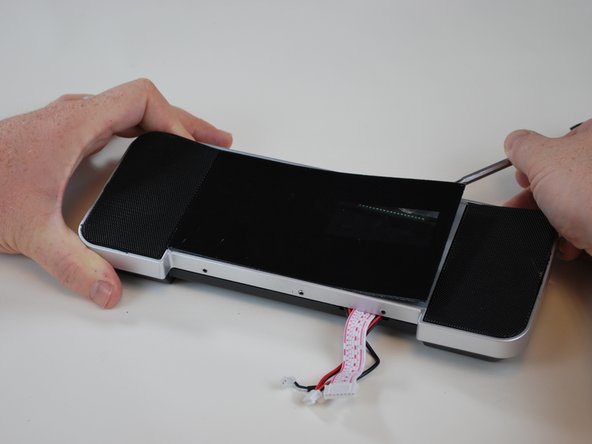
      • Using the metal spudger, gently lift the face plate away from the display.

      Ask FixBot

      Add Comment

    4. Insignia NS-CLIP02 Digital Display Replacement: step 12, image 1 of 1
      • Once the face plate is removed, use the Phillips screwdriver to remove the six screws shown here.

      Ask FixBot

      Add Comment

    5. Insignia NS-CLIP02 Digital Display Replacement: step 13, image 1 of 2 Insignia NS-CLIP02 Digital Display Replacement: step 13, image 2 of 2
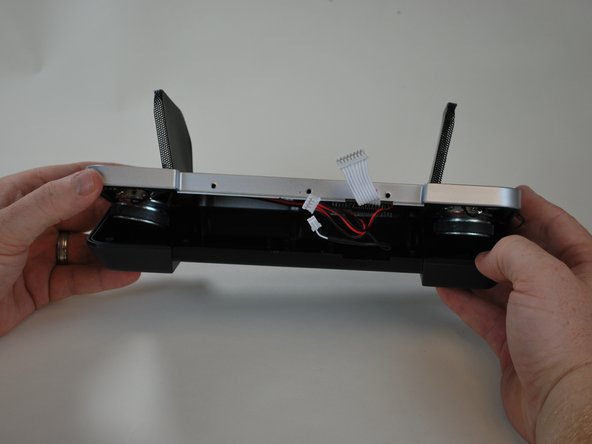
      • Using the metal spudger, lift the speaker grilles from the display.

      • The speaker grilles will hinge on the side closest to the display.

      Ask FixBot

      Add Comment

    6. Insignia NS-CLIP02 Digital Display Replacement: step 14, image 1 of 1
      • Using the Phillips screwdriver, remove the four screws shown here.

      Ask FixBot

      Add Comment

    7. Insignia NS-CLIP02 Digital Display Replacement: step 15, image 1 of 2 Insignia NS-CLIP02 Digital Display Replacement: step 15, image 2 of 2
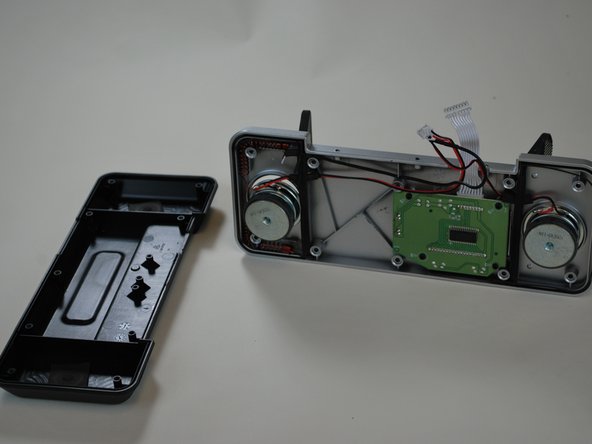
      • The two pieces of the display should easily separate.

      Ask FixBot

      Add Comment

    8. Insignia NS-CLIP02 Digital Display Replacement: step 16, image 1 of 1
      • Using the Phillips screwdriver, remove the three screws shown here.

      Ask FixBot

      Add Comment

    9. Insignia NS-CLIP02 Digital Display Replacement: step 17, image 1 of 3 Insignia NS-CLIP02 Digital Display Replacement: step 17, image 2 of 3 Insignia NS-CLIP02 Digital Display Replacement: step 17, image 3 of 3
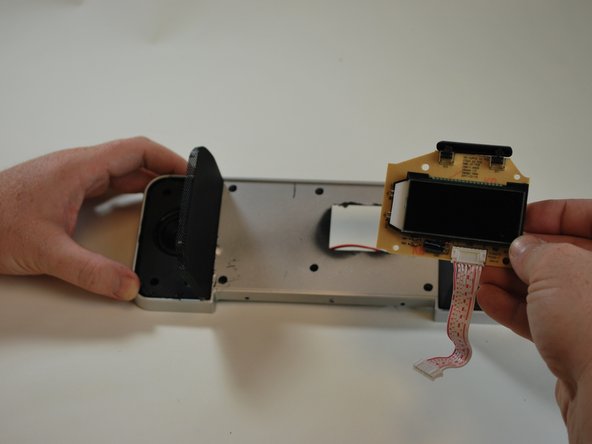
      • The digital display should now be easy to remove.

      • Replace with new part.

      Ask FixBot

      Add Comment

Conclusion

To reassemble your device, follow these instructions in reverse order.

Cancel: I did not complete this guide.

Aubrey

Member since: 02/24/15

214 Reputation

2 Guides authored

Team

USF Tampa, Team 9-3, Leahy Winter 2015 Member of USF Tampa, Team 9-3, Leahy Winter 2015

USFT-LEAHY-W15S9G3

4 Members

72 Guides authored

0 Guide Comments

Add Comment

View Statistics:

Past 24 Hours: 2

Past 7 Days: 18

Past 30 Days: 90

All Time: 834