
InFocus Screenplay 4805 Top Panel Replacement

Marilyn Urness and 2 other contributors
Last updated on Sep 29, 2023
Views: 712
View statistics:
- Past 24 Hours:
- 1
- Past 7 Days:
- 18
- Past 30 Days:
- 95
- All Time:
- 712
Comments: 2
1 comment on steps, 1 guide comment.
Go to guide commentsCompleted: 1 2
1 person has marked this guide "completed." Will you be next?
2 people have marked this guide "completed." Including you — great job!
Favorites: 0 1
No one has favorited (and subscribed to) this guide. Will you be the first?
1 person has favorited (and subscribed to) this guide — and that's you!
Introduction
Go to step 1 ↓This guide shows how to open up the projector. This will allow for following actions to replace parts.
What you need
Tools


-
-
-
Flip the projector on its back.
-
Use the Phillips #2 screwdriver to remove the (4) four 2 cm gold screws.
-
Use the Phillips #2 screwdriver to remove the (3) three 1 cm silver screws.
 Ask FixBot
-
-
-
Turn the projector, facing the back cable board towards you.
-
Using the Phillips #0 screwdriver, remove the (3) three 1.0 cm silver screws on the back panel.
-
Gently take off back cable panel.
-
-
-
Turn the projector so the front side with the lens is facing you.
-
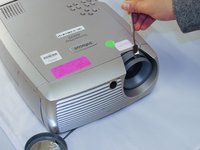
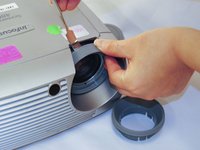
Gently pry the both of the grey lens rings using the metal spudger.
-
-
-
Now that the screws have been removed, proceed with the removal of the outer panel.
-
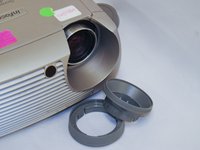
Gently remove the front lens panel.
-
-
-
-
Being careful not to pull the wires inside the projector, gently lift the top panel off the projector.
-
-




Cancel: I did not complete this guide.
One other person completed this guide.

Team

Eastern Washington University, Team S2-G3, Crane Fall 2017 Member of Eastern Washington University, Team S2-G3, Crane Fall 2017
EWU-CRANE-F17S2G3
5 Members
84 Guides authored
1 Guide Comment
There’s a 4th orange screw to be removed on the STEP1 image. It’s located on the top right corner of the projector body, if looking at it as shown on the photo...STEP4 image - all 3 plastic latches at the top panel are damaged. That’s why at the shown case, the front panel goes off easily.If the projector has never been opened, it is actually very hard to remove the front panel. One can release the latches with thin tea spoon (f.ex.), operating it with caution, over the front grill.
