Free Shipping on Domestic Orders $75+

Imation Superdisk USB Drive Metal Casing Replacement

Views: 893

View statistics:

Past 24 Hours:
4
Past 7 Days:
13
Past 30 Days:
47
All Time:
893
Comments: 0

No one has left comments on this guide. Will you be first?

Go to guide comments
Completed: 0

No one has marked this guide "completed." Will you be the first?

Favorites: 0

No one has favorited (and subscribed to) this guide. Will you be the first?

Time Required: 10 - 15 minutes
Difficulty: Very easy
Better Introduction

Improve this guide by completing or revising its introduction.

Imation Superdisk USB Drive Metal Casing Replacement

What you need

Tools

    1. Imation Superdisk USB Drive Metal Casing Replacement, Plastic Housing: step 1, image 1 of 2 Imation Superdisk USB Drive Metal Casing Replacement, Plastic Housing: step 1, image 2 of 2
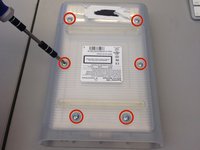
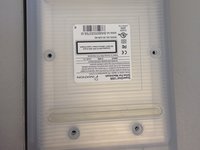
      • Flip the device over so the bottom is facing up.

      • You will know it is the bottom because there will be six silver screws visible.

      Ask FixBot

      Add Comment

    2. Imation Superdisk USB Drive Metal Casing Replacement: step 2, image 1 of 2 Imation Superdisk USB Drive Metal Casing Replacement: step 2, image 2 of 2
      • Remove the USB converter device by gently pulling it out.

      • Do not pull the converter device out by the cord.

      Ask FixBot

      Add Comment

    3. Imation Superdisk USB Drive Metal Casing Replacement: step 3, image 1 of 2 Imation Superdisk USB Drive Metal Casing Replacement: step 3, image 2 of 2
      • Remove the six silver screws using a small Phillips head screwdriver.

      Ask FixBot

      Add Comment

    4. Imation Superdisk USB Drive Metal Casing Replacement: step 4, image 1 of 2 Imation Superdisk USB Drive Metal Casing Replacement: step 4, image 2 of 2
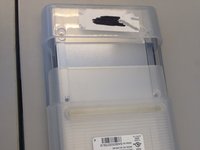
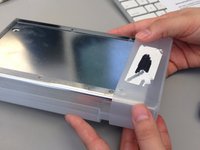
      • Slide the bottom plastic panel of the shell down so it is free of the end cap and the top panel.

      • Lift panel free of device.

      Ask FixBot

      Add Comment

    5. Imation Superdisk USB Drive Metal Casing Replacement: step 5, image 1 of 2 Imation Superdisk USB Drive Metal Casing Replacement: step 5, image 2 of 2
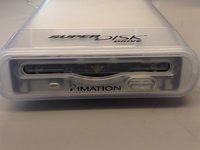
      • Identify the end cap by noting the label "SuperDisk Drive" above where you would insert a floppy disk.

      • Remove the plastic end cap by sliding it forward, freeing from the rest of the device.

      Ask FixBot

      Add Comment

    6. Imation Superdisk USB Drive Metal Casing Replacement: step 6, image 1 of 2 Imation Superdisk USB Drive Metal Casing Replacement: step 6, image 2 of 2
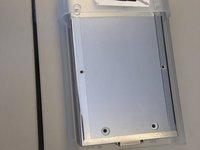
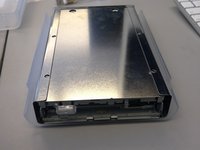
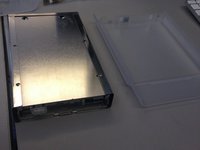
      • Slide the metal housing out of the plastic shell.

      Ask FixBot

      Add Comment

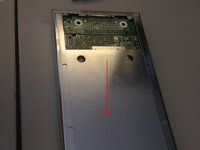
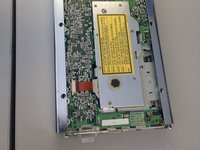
    1. Imation Superdisk USB Drive Metal Casing Replacement, Metal Casing: step 7, image 1 of 2 Imation Superdisk USB Drive Metal Casing Replacement, Metal Casing: step 7, image 2 of 2
      • Slide metal panel out of the metal casing.

      Ask FixBot

      Add Comment

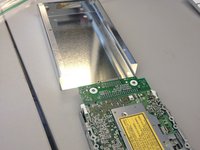
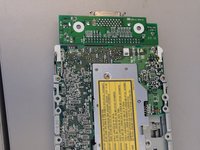
    2. Imation Superdisk USB Drive Metal Casing Replacement: step 8, image 1 of 2 Imation Superdisk USB Drive Metal Casing Replacement: step 8, image 2 of 2
      • Slide disk drive out of metal casing.

      Ask FixBot

      Add Comment

Conclusion

To reassemble your device, follow these instructions in reverse order.

Cancel: I did not complete this guide.

Ryan

Member since: 02/13/14

1 Reputation

1 Guide authored

Team

Ohio State, Team 1-2, Buehl Spring 2014 Member of Ohio State, Team 1-2, Buehl Spring 2014

OSU-BUEHL-S14S1G2

4 Members

84 Guides authored

0 Guide Comments

Add Comment

View Statistics:

Past 24 Hours: 4

Past 7 Days: 13

Past 30 Days: 47

All Time: 893