Introduction
This guide shows you how to fix an IKEA KOPPLA 3-port charger that has become unreliable. One to three ports can be defective.
What you need
-
-
-
open device , using brute force is the only option because it's ultrasonic welded together.
-
use screw driver or squeeze in a vice to crack it open.''
 Ask FixBot
-
-
-
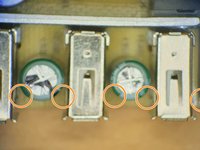
Resolder all the USB connector pins (red box'es), on all 3 USB connectors to be sure they are functional. (on this image the top one is defective)
-
The reason solder points break is the connector support is soldered onto the board on one side only. Not by the arrow. Thereby adding stress directly to the soldered pins.
-
In addition the connector pin (square) near the U2 marking is too short and therefore may not be soldered properly.
-
see 2nd image for example of front support pin is pulled out of solder area.
-
-
-
-
add hot melt glue in these areas on the board and on the side of the connector.
-
Add the cover first to understand where there is room for it in the cover.
-
If connector is not glued, it is likely the charger will stop working again in the near future.
-
Ikea have been notified of this issue.
-
-
-
To seal the enclosure , add suitable glue to edge, and press the top/bottom together.
-
Use as vice while holding them together, while the glue hardens.
-
-


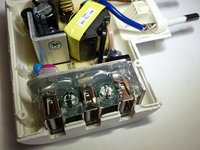
I understand these adapters are cheap, but they can be repaired as described.
Cancel: I did not complete this guide.
5 other people completed this guide.

