
IBM ThinkPad T30 Hard Drive Replacement

Allie Knauer and 13 other contributors
Last updated on Dec 15, 2023
Views: 21K
View statistics:
- Past 24 Hours:
- 4
- Past 7 Days:
- 29
- Past 30 Days:
- 137
- All Time:
- 21,037
Comments: 1
1 guide comment.
Go to guide commentsCompleted: 11 12
11 people have marked this guide "completed." Will you be next?
12 people have marked this guide "completed." Including you — great job!
Favorites: 4 5
4 people have favorited (and subscribed to) this guide. Will you be next?
5 people have favorited (and subscribed to) this guide — including you!
Featured Guide
This guide has been found to be exceptionally cool by the iFixit staff.
Introduction
Go to step 1 ↓In this guide, you will learn how to remove and replace a hard drive for an IBM ThinkPad T30 laptop. The laptop comes with an IDE / PATA Hard disk drive that is either 20/40/60GB and is easy to remove only using a few tools
What you need
Fix Kit
This kit contains all the parts and tools needed to complete this guide.

Parts


Tools


-
-
-
Flip the ThinkPad upside down with the bottom facing you.
-
Slide the latch to the right into the unlock position.
-
While holding the latch in the unlock position, lift the battery out with your other hand.
 Ask FixBot
-
-
-
-
-
Flip to the back of the Thinkpad.
-
Remove the single 11 mm screw using the Phillips #0 screwdriver.
-
-
-
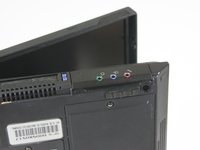
Flip the Thinkpad on its side to get a better view of the hard drive.
-
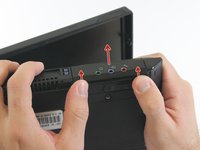
Push on the lower edge of the hard drive cover to detach the hard drive from the Thinkpad.
-
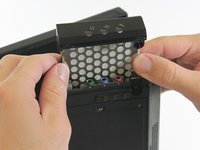
Once you have detached the hard drive from the Thinkpad, slide the hard drive out of the device.
-
-
-
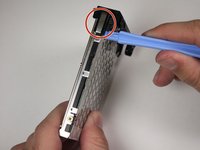
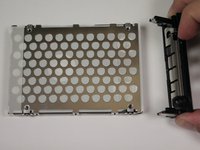
Using the plastic tool, remove the black plastic cover from the main body of the hard drive.
-
Place the plastic tool at the ends of the plastic cover to detach it from the hard drive.
-
-
-
-
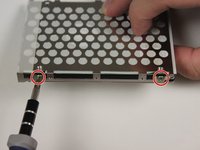
Remove the four 2.8 mm screws from the mounting bracket using a Phillips #0 screwdriver.
-
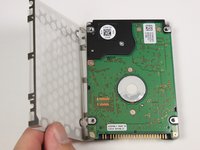
Pull the mounting bracket off of the hard drive.
-
-






To reassemble your device with a new hard drive, follow these instructions in reverse order with a new hard drive replacing the old one.
Cancel: I did not complete this guide.
11 other people completed this guide.

Team

Cal Poly, Team 3-20, Amido Fall 2012 Member of Cal Poly, Team 3-20, Amido Fall 2012
CPSU-AMIDO-F12S3G20
3 Members
96 Guides authored
