Introduction
The fuel pump assembly contains the electric fuel pump, the fuel filter, and the fuel level sender. Although each of those parts are individually replaceable, all of them require removing the assembly from the fuel tank.
Caution
Before working on any fuel line in the vehicle, you must relieve the fuel pressure in those lines. Note that there may be some residual pressure remaining in the lines, so be sure to place a cloth under the connector you are planning to remove to catch any fuel that overflows.
This guide was written using a 2012 Hyundai Accent GLS. It should be applicable to all Accent models from 2012 to 2017, according to the consensus of the available YouTube videos demonstrating that repair. The fuel pump itself only claims to fit 2012 to 2015 models, so use your best judgement in deciding if this guide will work on your car.
What you need
-
-
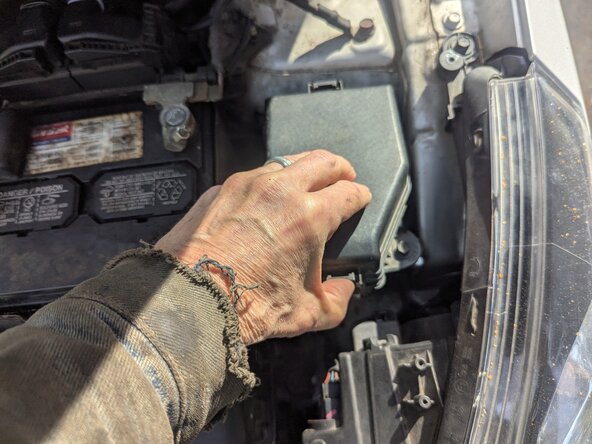
Facing the front of the car, the underhood fuse box is located on the right hand side, between the battery and the fender.
 Ask FixBot
-
-
-
Press the tab on the front of the fuse box.
-
And release the tab on the rear side of the fuse box.
-
-
-
You can remove the fuel pump fuse or the fuel pump relay; either one will accomplish your purpose.
-
Fuel pump fuse
-
Fuel pump relay
-
-
-
In this example, we are pulling the fuse rather than the relay, but again, either will do the job.
-
Using the fuse puller found in the fuse box, remove the 15A fuel pump fuse and set it aside.
-
-
-
Put the key in the ignition and start the car. There will usually be enough residual pressure in the line to allow the car to start.
-
-
-
Depending how long it's been since the car was run last, there may be quite a bit of pressure in the lines, which can let the car run for as much as three minutes, so be patient and let the car idle until it dies on its own.
-
Turn the car off and remove the key.
-
-
-
There is a single bolt holding the rear seat cushion in place. It's located in the center of the seat at the rear but can't be seen without compressing the seat.
-
-
-
-
There are two latches holding the front of the seat cushion that just need to be popped loose to finish removing the seat.
-
Grasp the front edge of the seat and pull up firmly to disconnect the latches.
-
-
-
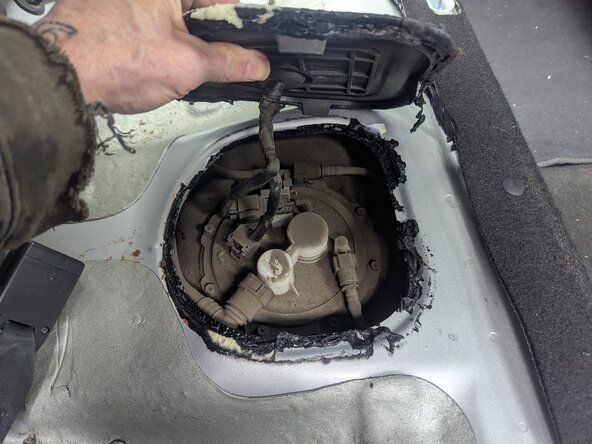
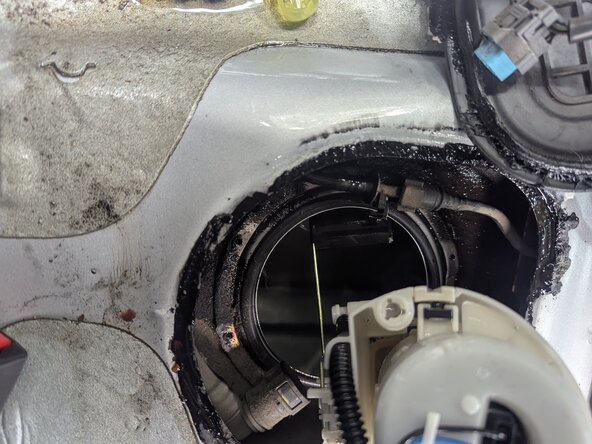
Once the seat has been removed, the access cover can be seen. It is secured with putty.
-
Go around the edges of the cover with a putty knife, separating the cover from the floor panel.
-
-
-
Once the majority of the adhesive has been released, pry the cover off, being mindful of the wires still attached through the hole in the center of the cover.
-
-
-
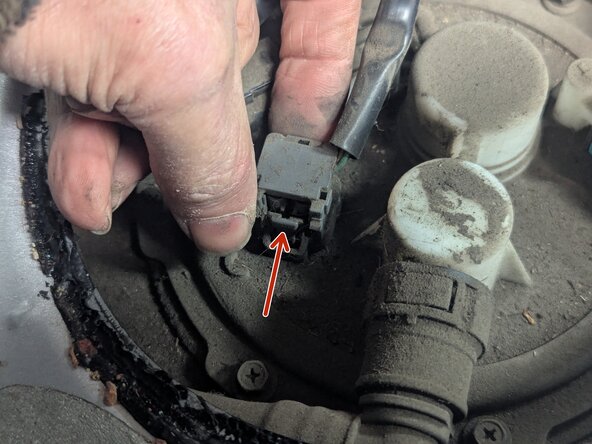
Squeeze the locking tab and pull up to disconnect the plug that carries the fuel pump power and fuel sender wires.
-
-
-
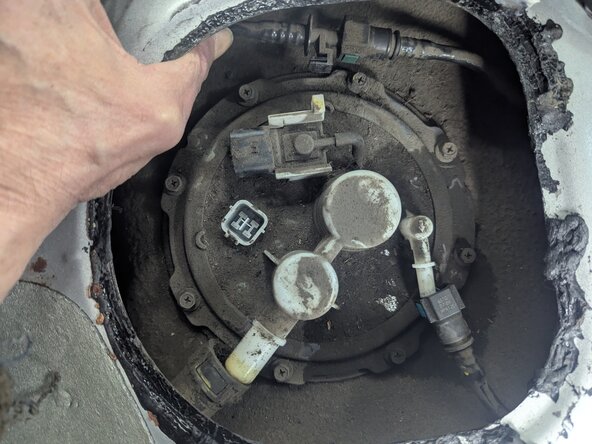
Press the locking tab on the pressure sensor connector and pull it sideways to remove it.
-
-
-
Squeeze the two blue tabs on either side of the evap return line to disconnect it from the fuel pump.
-
-
-
The other evap line is not connected to the fuel pump, but is mounted on it. As such, it does not need to be disconnected, but rather just needs to be dismounted from the pump.
-
Press the retaining tab to release the line's mount.
-
Slide the mount out of the retaining bracket.
-
Set the line aside.
-
-
-
Squeeze the tabs on the top and bottom of the main fuel line connector to release it.
-
Slide the connector off the nipple.
-
-
-
The retaining ring is now free, so lift it off the pump, maneuvering it over the fuel outlet.
-
-
-
The pump has some odd offsets and angles, so you'll have to do some fiddling with the pump to get it out. First, lift it up and slide it to the side to position the main body within the opening.
-
Next, lift it straight up, being mindful that it is a container and still holds a quantity of gasoline.
-
Be careful of the fuel sender float at the bottom of the pump assembly; you'll have to offset the pump again to get it out without damage.
-
-
-
Lift out the O-ring, then clean the groove it sits in thoroughly.
-


To reassemble your car, follow these instructions in reverse order.
Cancel: I did not complete this guide.
2 other people completed this guide.

2 Guide Comments
Hi I just removed old fuel pump from my Hyundai accent 2005,I noticed black sludge in the fuel tank what is it and should it be removed before new fuel pump goes in?
@tammy64954 Not sure exactly what your black sludge is; there are several possibilities. You might have an issue with your EVAP system that recirculates fuel vapor back to the tank or it could be a case of contaminated gasoline leaving that nasty stuff in the tank. Either way I'd say you'll almost certainly want to empty the tank and flush it out before going any further; that stuff could easily get into your new fuel pump and block up the filter, which could be what happened to your first pump.