Free Shipping on Domestic Orders $75+

HyperX QuadCast S I/O Board Replacement

What you need

    1. HyperX QuadCast S I/O Board Replacement, Gain Control Knob: step 1, image 1 of 3 HyperX QuadCast S I/O Board Replacement, Gain Control Knob: step 1, image 2 of 3 HyperX QuadCast S I/O Board Replacement, Gain Control Knob: step 1, image 3 of 3
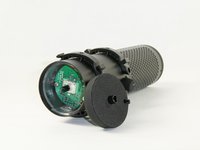
      • Set the microphone on a flat surface.

      • Pull each of the support bands upwards and off of the notches to release the microphone from its base.

      • There are four support bands in total, but it does not matter which band you choose to take off first.

      Ask FixBot

      Add Comment

    2. HyperX QuadCast S I/O Board Replacement: step 2, image 1 of 3 HyperX QuadCast S I/O Board Replacement: step 2, image 2 of 3 HyperX QuadCast S I/O Board Replacement: step 2, image 3 of 3
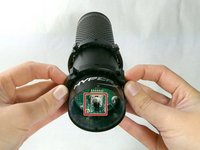
      • Orientate the microphone with the gain control knob upwards.

      • Pull outwards from the microphone to release the gain control knob.

      • It will not take much force to release the knob from the microphone. Be aware that a small "pop" may be heard once the knob is unplugged.

      Ask FixBot

      Add Comment

    3. HyperX QuadCast S I/O Board Replacement: step 3, image 1 of 3 HyperX QuadCast S I/O Board Replacement: step 3, image 2 of 3 HyperX QuadCast S I/O Board Replacement: step 3, image 3 of 3
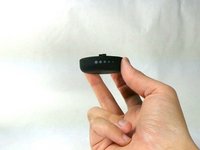
      • Remove the gain control knob.

      • The gain control knob connects to the tiny black pin indicated. When reattaching the knob, make sure to properly align the hole to the shape of the pin.

      Ask FixBot

      Add Comment

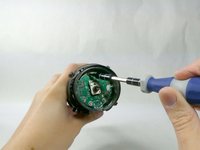
    1. HyperX QuadCast S I/O Board Replacement, I/O Board: step 4, image 1 of 2 HyperX QuadCast S I/O Board Replacement, I/O Board: step 4, image 2 of 2
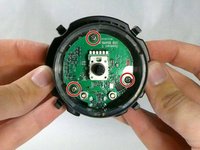
      • Remove the three 6 mm Phillips #0 screws.

      Ask FixBot

      Add Comment

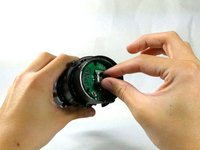
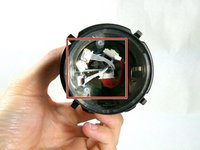
    2. HyperX QuadCast S I/O Board Replacement: step 5, image 1 of 3 HyperX QuadCast S I/O Board Replacement: step 5, image 2 of 3 HyperX QuadCast S I/O Board Replacement: step 5, image 3 of 3
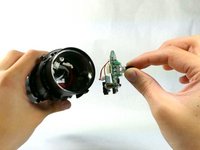
      • Begin to pull out the I/O board.

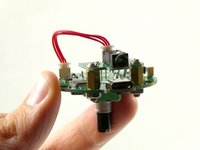
      • Unplug any cables connected to the I/O board.

      • Some of the cables will need to be soldered back to any replacement I/O board to function properly.

      Ask FixBot

      Add Comment

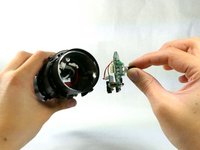
    3. HyperX QuadCast S I/O Board Replacement: step 6, image 1 of 2 HyperX QuadCast S I/O Board Replacement: step 6, image 2 of 2
      • Finish pulling out the I/O board to remove it from the microphone.

      Ask FixBot

      Add Comment

Conclusion

To reassemble your device, follow these instructions in reverse order.

Cancel: I did not complete this guide.

2 other people completed this guide.

Nathan Arruda

Member since: 10/25/22

765 Reputation

6 Guides authored

Team

UMass Dartmouth, Team 4-1, Sinclaire Fall 2022 Member of UMass Dartmouth, Team 4-1, Sinclaire Fall 2022

UMASSD-SINCLAIRE-F22S4G1

5 Members

57 Guides authored

2 Guide Comments

I need a replacement io board, does ifixit or anyone else have them?

josh bryant - Reply Share

Unfortunately HyperX does not sell the replacement parts separately. Your best bet is to find a scrap quad-cast to pull parts from.

Nathan Arruda - Reply Share

Add Comment

View Statistics:

Past 24 Hours: 5

Past 7 Days: 22

Past 30 Days: 120

All Time: 5,510