Introduction
The HyperX Cloud III (model 727A9AA) is plugged into a computer, but the system fails to detect it? The motherboard might be the problem.
Follow this guide to replace the motherboard in a HyperX Cloud III headset.
The motherboard is essential for the headset to turn on and connect to any electronic device.
Note that replacing the motherboard requires skills in soldering. If you are new or not familiar with soldering, use our guide on soldering and desoldering connections.
Before following this guide, check the troubleshooting page to be sure of what the problem is.
What you need
-
-
-
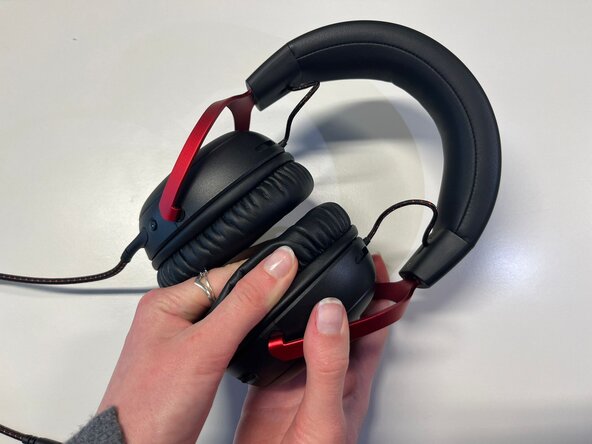
Pinch the side of one ear cushion with your thumb.
-
Slide it with your thumb to remove it completely from the outline.
-
Do the same on the other side of the headset if you want to replace both ear cushions.
 Ask FixBot
-
-
-
-
-
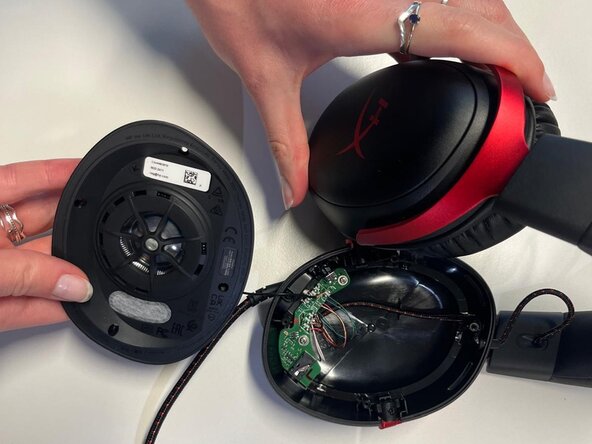
Use a Phillips #2 screwdriver to remove the four 9.4 mm-long screws securing the speaker plate to the earphone.
-
Use your fingers to pull and remove the black speaker plate.
-
-
-
-
Use a Phillips #2 screwdriver to remove the two 6.7 mm-long screws securing the motherboard.
-
-
-




To reassemble your device, follow the steps instructions in reverse order.
Prior knowledge of soldering is required and working with wires is necessary.
Repair didn’t go as planned? Try some basic troubleshooting or ask our Answers community for help.

Team

Université Paris Cité, Team 4-4, Duvezin Winter 2026 Member of Université Paris Cité, Team 4-4, Duvezin Winter 2026
UPARIS-DUVEZIN-W26S4G4
3 Members
60 Guides authored
