Introduction
This guide covers the screen replacement for the Hyper Mega Tech! Super Pocket, a compact handheld retro gaming console.
The LCD screen is responsible for displaying all visual information from the console. A damaged or faulty screen may exhibit symptoms such as:
- A cracked or shattered display
- Dead pixels or dark spots
- Flickering or no image
- Discoloration
- Lines across the display
If you are experiencing any of these issues, consult the troubleshooting page before beginning this repair, as some symptoms may be caused by a loose ribbon cable rather than a failed screen.
What you need
-
-
-
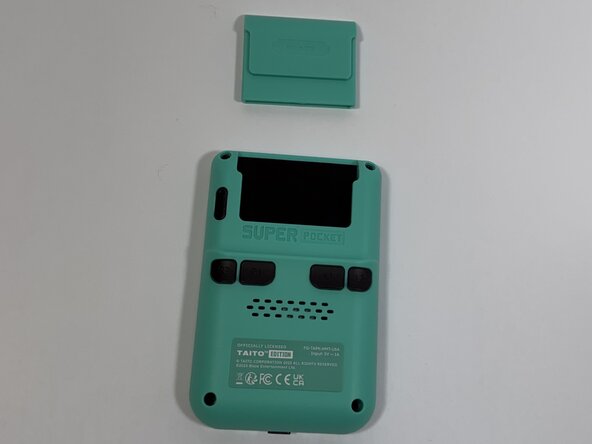
Face the back of the device, then remove the Super Pocket gaming cartridge from the device.
-
-
-
Use a Phillips #000 screwdriver to remove the four 2 mm screws from the four corners.
-
-
-
Face the front of the device and use the iFixit opening tool to lift the front panel from the back cover.
-
-
-
-
-
Use a Phillips #000 screwdriver to remove the four 2 mm screws from the four corners.
-
-
-
Using the tweezers, grab the terminal connection of the speaker.
-
While holding the male terminal connection with tweezers, lift perpendicular to the board and separate the terminals.
-
Using tweezers, gently slide the wires out of the notched section on the printed circuit board.
-
-
-
-
-
Using an iFixit opening tool, carefully separate the screen assembly from the main PCB by prying along the edge where they meet.
-
Continue prying to fully detach the screen, allowing it to hinge away from the board with the ribbon cable still attached.
-
-
-
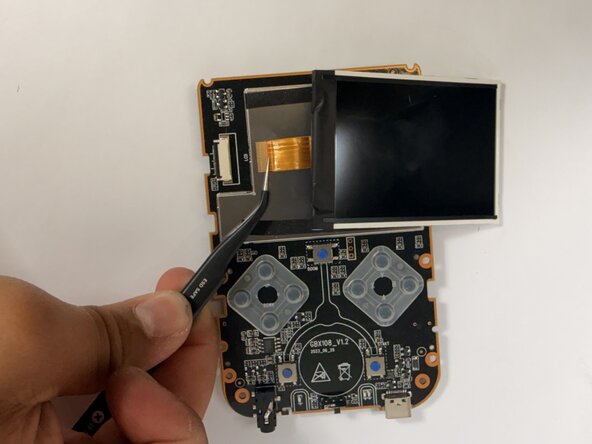
With the screen assembly free, lift the metal backplate/display panel upward, and pivot it away from the PCB on the ribbon cable.
-
Using the opening tool, pry upwards to release the ribbon cable from the connector.
-
-
-
With the screen hinged open, disconnect the ribbon cable connector from the PCB.
-
Carefully lift the screen away from the PCB using tweezers.
-
-

 Ask FixBot





To reassemble your device, follow these instructions in reverse order.

Team

Idaho State University, Team 1-4, Watkins Spring 2026 Member of Idaho State University, Team 1-4, Watkins Spring 2026
ISU-WATKINS-S26S1G4
4 Members
84 Guides authored
