Introduction
If you Hyper Mega Tech! Super Pocket back buttons are not functioning properly, use this guide to replace them.
This guide walks you through desoldering and replacing one or more of the tactile switches on the back of the device. These buttons are R2, R1, L1, L2. These buttons are surface-mounted tactile switches soldered directly to the main PCB. This guide covers replacing those soldered switches, not the hard black plastic buttons.
Some symptoms that may indicate button replacement include: buttons does not register when pressed, button requires excessive force to register press, button registers inputs randomly without being pressed.
This repair requires comfort with a soldering iron. Applying too much heat to the PCB can damage solder pads or nearby components. If you are new to soldering consider practicing on scrap electronics first.
iFixit Soldering 101: A Beginner's Guide
Before beginning, make sure to power off your device completely and disconnect from any external power source.
What you need
-
-
-
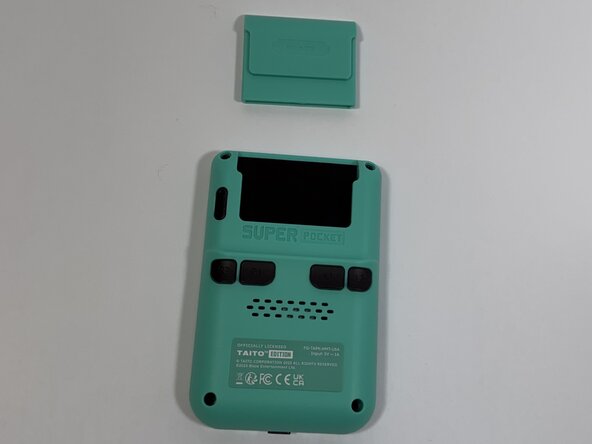
Face the back of the device, then remove the Super Pocket gaming cartridge from the device.
-
-
-
Use a Phillips #000 screwdriver to remove the four 2 mm screws from the four corners.
-
-
-
-
Face the front of the device and use the iFixit opening tool to lift the front panel from the back cover.
-
-
-
-
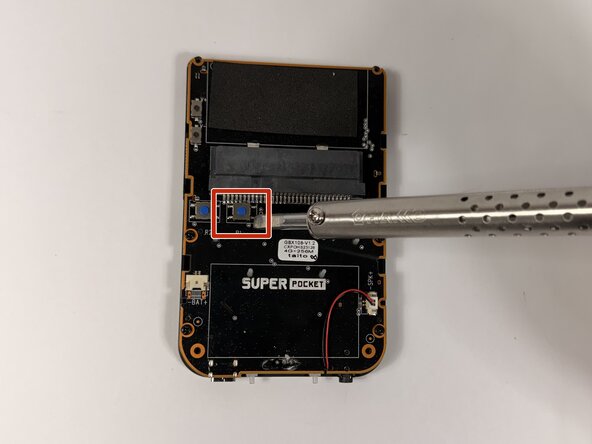
With the back of the PCB exposed, use a soldering iron to apply heat to all four pads.
-
-
-
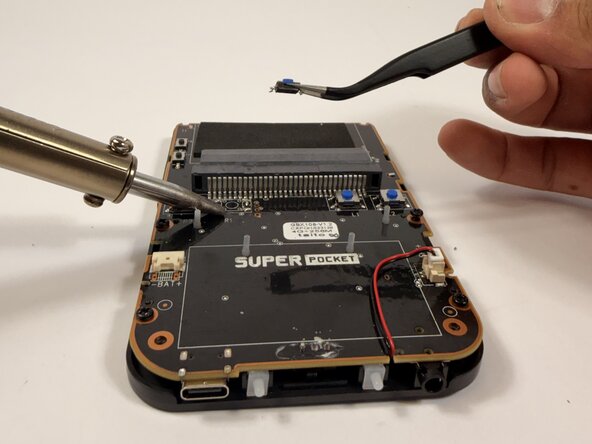
Gently grab the button using tweezers and lift the button off the PCB.
-
Repeat this step for every button that needs to be replaced.
-
-

 Ask FixBot






To reassemble your device, follow these instructions in reverse order.

Team

Idaho State University, Team 1-4, Watkins Spring 2026 Member of Idaho State University, Team 1-4, Watkins Spring 2026
ISU-WATKINS-S26S1G4
4 Members
84 Guides authored
