Introduction
If the front buttons on your Hyper Mega Tech! Super Pocket are unresponsive or sticky, use this guide to replace the rubber button pads. Over time, these conductive rubber pads can tear, degrade, or lose their elasticity.
Common symptoms that indicate your button pads need to be replaced include buttons requiring excessive force to register a press, or inputs registering randomly on their own.
This repair requires a steady hand and a pair of tweezers to gently pry and lift the pad away from the board. Before beginning, ensure the device is completely powered off and disconnected from any external power sources.
What you need
-
-
-
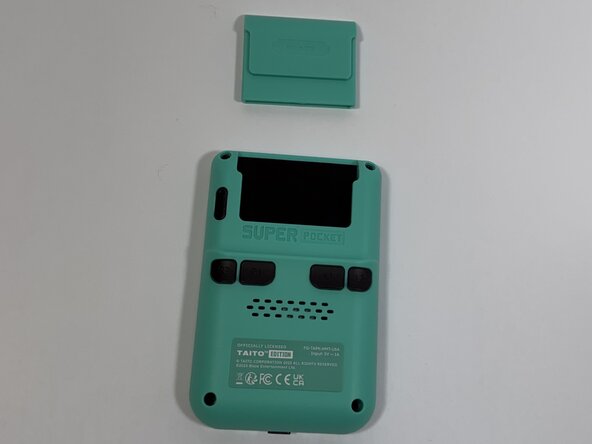
Face the back of the device, then remove the Super Pocket gaming cartridge from the device.
-
-
-
Use a Phillips #000 screwdriver to remove the four 2 mm screws from the four corners.
-
-
-
-
Face the front of the device and use the iFixit opening tool to lift the front panel from the back cover.
-
-
-
-
Use a Phillips #000 screwdriver to remove the four 2 mm screws from the four corners.
-
-
-
Using the tweezers, grab the terminal connection of the speaker.
-
While holding the male terminal connection with tweezers, lift perpendicular to the board and separate the terminals.
-
Using tweezers, gently slide the wires out of the notched section on the printed circuit board.
-
-
-
-
-
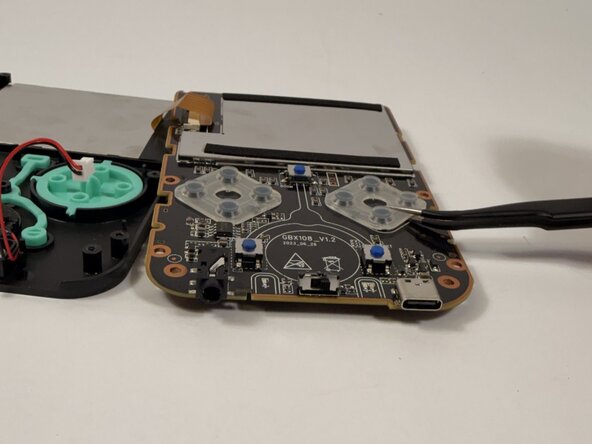
Using tweezers, lift up the front button and remove it from the PCB.
-
-

 Ask FixBot





To reassemble your device, follow these instructions in reverse order.

Team

Idaho State University, Team 1-4, Watkins Spring 2026 Member of Idaho State University, Team 1-4, Watkins Spring 2026
ISU-WATKINS-S26S1G4
4 Members
84 Guides authored
