Introduction
Use this guide to replace the stop switch (or "kill" switch) on your Husqvarna 223L String Trimmer.
The stop switch on a string trimmer is a critical safety mechanism that immediately turns off the string trimmer when pushed. A malfunctioning stop switch is a danger to both the person using the string trimmer and anyone in their vicinity.
Double-check that your string trimmer is the 223L model. Each Husqvarna string trimmer has unique specifications, so this guide may not work for other models.
Before you begin this guide, turn the engine off and allow it to cool completely. Make sure the stop switch is set to the OFF position. Drain the fuel tank or run the engine until it is out of fuel to reduce the risk of spills or fire. Perform the repair in a well-ventilated area, away from open flames or sparks.
What you need
-
-
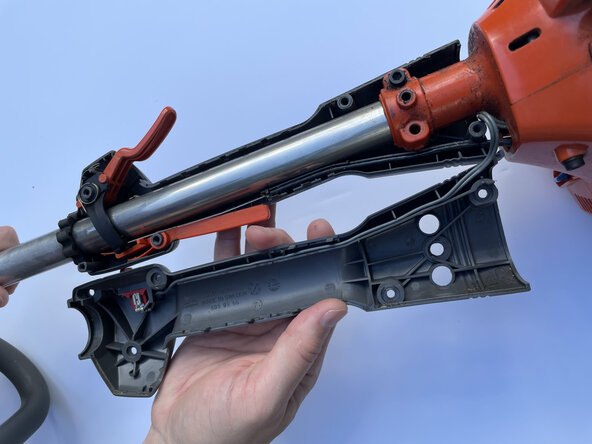
Using your 4 mm Allen wrench, remove the five 4x18 mm hex cap screws, one 5x14 mm button head hex cap screw, and the 8x16 mm O-Ring under the button head screw from the plastic housing.
-
Remove the plastic housing.
-
-
-
-
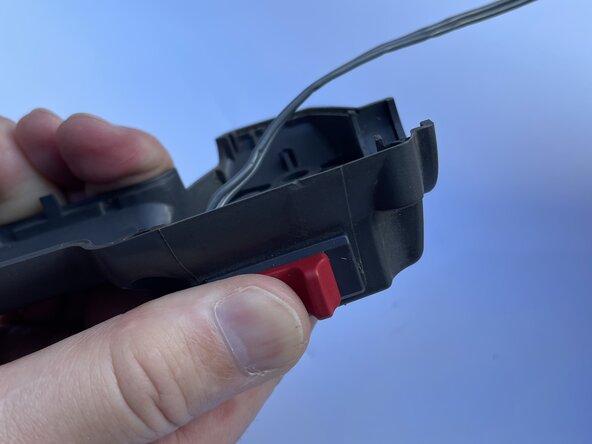
Reinsert the stop switch into the plastic housing until it clicks into place.
-
-
-
Replace the plastic housing onto the string trimmer.
-
Using your 4 mm Allen wrench, replace the five 4x18 mm hex cap screws, one 5x14 mm button head hex cap screw, and the 8x16 mm O-Ring under the button head screw in the plastic housing.
-


Team

University of North Alabama, Team 1-1, Winner Fall 2025 Member of University of North Alabama, Team 1-1, Winner Fall 2025
UNA-WINNER-F25S1G1
13 Members
4 Guides authored