Free Shipping on Domestic Orders $75+

Huawei P8 Display with Frame Replacement

What you need

  1. Huawei P8 Display with Frame Replacement, Huawei P8 Battery Replacement: step 1, image 1 of 2 Huawei P8 Display with Frame Replacement, Huawei P8 Battery Replacement: step 1, image 2 of 2
    • First switch off your phone.

    • Remove the trays for the SD card and the SIM card.

    Ask FixBot

    Add Comment

  2. Huawei P8 Display with Frame Replacement: step 2, image 1 of 1
    • Remove the two Torx T2 screws located at the bottom next to the device's Micro USB port.

    • If the screen is cracked you might want to use some tape to protect your eyes from glass shards and get a better grip to open the phone.

    Ask FixBot

    Add Comment

  3. Huawei P8 Display with Frame Replacement: step 3, image 1 of 2 Huawei P8 Display with Frame Replacement: step 3, image 2 of 2
    • Use an iSclack or a suction handle to separate the display unit from the rear panel.

    Ask FixBot

    Add Comment

  4. Huawei P8 Display with Frame Replacement: step 4, image 1 of 1
    • Remove the two Phillips #00 screws that secure the front camera and display/battery connector brackets

    Ask FixBot

    Add Comment

  5. Huawei P8 Display with Frame Replacement: step 5, image 1 of 3 Huawei P8 Display with Frame Replacement: step 5, image 2 of 3 Huawei P8 Display with Frame Replacement: step 5, image 3 of 3
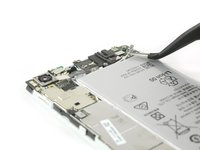
    • Use a tweezer to remove the bracket covering the display and the battery flex connector.

    • Unplug the battery flex connector with a Spudger.

    • Remove the bracket covering the flex connector of the front camera.

    Ask FixBot

    Add Comment

  6. Huawei P8 Display with Frame Replacement: step 6, image 1 of 3 Huawei P8 Display with Frame Replacement: step 6, image 2 of 3 Huawei P8 Display with Frame Replacement: step 6, image 3 of 3
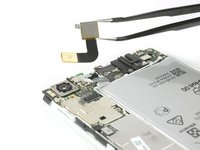
    • Unplug the headphone jack and the front camera flex connectors.

    • Remove the front camera.

    Ask FixBot

    Add Comment

  7. Huawei P8 Display with Frame Replacement: step 7, image 1 of 2 Huawei P8 Display with Frame Replacement: step 7, image 2 of 2
    • Use a spudger to disconnect the power/volume cable and fold it out of the way.

    • Remove the liquid contact indicator.

    Ask FixBot

    Add Comment

  8. Huawei P8 Display with Frame Replacement: step 8, image 1 of 1
    • Remove the five Phillips #00 screws that hold down the motherboard of your Huawei P8.

    Ask FixBot

    Add Comment

  9. Huawei P8 Display with Frame Replacement: step 9, image 1 of 2 Huawei P8 Display with Frame Replacement: step 9, image 2 of 2
    • Unplug the vibration motor flex connector.

    • Disconnect the antenna cable.

    Ask FixBot

    Add Comment

  10. Huawei P8 Display with Frame Replacement: step 10, image 1 of 3 Huawei P8 Display with Frame Replacement: step 10, image 2 of 3 Huawei P8 Display with Frame Replacement: step 10, image 3 of 3
    • Unplug the display flex connector from the main board with a Spudger.

    • Disconnect and remove the antenna cable with a tweezer.

    Ask FixBot

    Add Comment

  11. Huawei P8 Display with Frame Replacement: step 11, image 1 of 1
    • Remove the motherboard from the phone.

    Ask FixBot

    Add Comment

  12. Huawei P8 Display with Frame Replacement: step 12, image 1 of 2 Huawei P8 Display with Frame Replacement: step 12, image 2 of 2
    • Carefully peel up the flex cable of your loudspeaker.

    • If the cable is difficult to peel, heat the loudspeaker assembly with an iOpener or a heat gun.

    • Lift up the loudspeaker assembly with a spudger and remove it.

    Ask FixBot

    Add Comment

  13. Huawei P8 Display with Frame Replacement: step 13, image 1 of 2 Huawei P8 Display with Frame Replacement: step 13, image 2 of 2
    • Free the end of the first adhesive pull tab to get a good grip on it.

    • Pull the adhesive tab in a slow constant movement to free the battery.

    Ask FixBot

    Add Comment

  14. Huawei P8 Display with Frame Replacement: step 14, image 1 of 2 Huawei P8 Display with Frame Replacement: step 14, image 2 of 2
    • Free the end of the second adhesive pull tab.

    • Pull the adhesive tab in a slow constant movement.

    • Should those adhesive tabs snap, you might want to use an iOpener to heat and soften them a little bit so you can pry out the battery with a spudger.

    Ask FixBot

    Add Comment

  15. Huawei P8 Display with Frame Replacement: step 15, image 1 of 2 Huawei P8 Display with Frame Replacement: step 15, image 2 of 2
    Tool used on this step:
    Tesa 61395 Tape
    $8.95
    Buy
    Ask FixBot

    Add Comment

  16. Huawei P8 Display with Frame Replacement, Display with Frame: step 16, image 1 of 3 Huawei P8 Display with Frame Replacement, Display with Frame: step 16, image 2 of 3 Huawei P8 Display with Frame Replacement, Display with Frame: step 16, image 3 of 3
    • Remove the vibration motor gasket.

    • Remove the vibration motor.

    • There is some adhesive under the vibration motor and its gasket. If you are not able to remove them, use an iOpener to loosen the adhesive a little bit.

    Ask FixBot

    Add Comment

  17. Huawei P8 Display with Frame Replacement: step 17, image 1 of 3 Huawei P8 Display with Frame Replacement: step 17, image 2 of 3 Huawei P8 Display with Frame Replacement: step 17, image 3 of 3
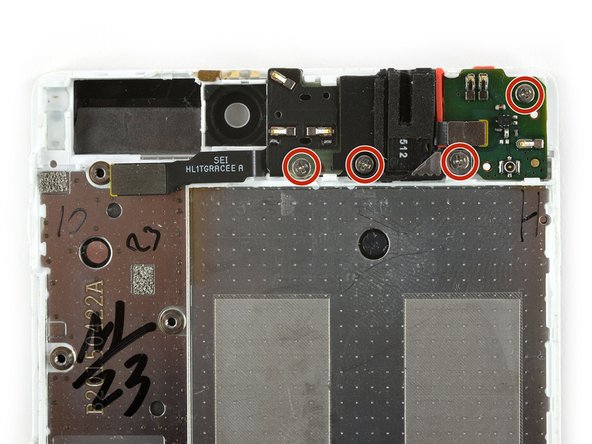
    • Remove the power and volume button flex cable.

    • Remove the four Phillips #00 screws.

    • Use a tweezer to remove the plastic bracket which is covering the corner of the headphone jack.

    Ask FixBot

    Add Comment

  18. Huawei P8 Display with Frame Replacement: step 18, image 1 of 3 Huawei P8 Display with Frame Replacement: step 18, image 2 of 3 Huawei P8 Display with Frame Replacement: step 18, image 3 of 3
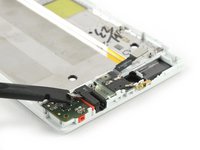
    • Use a spudger to disconnect the headphone jack flex cable.

    • Use a tweezer to remove the first daughter board which was connected to the headphone jack.

    • Remove the second daughter board including the headphone jack.

    • Both daughterboards are clamped into the mid frame and a little bit tricky to remove. Try to grab them near the holes for the Phillips #00 screws to not damage any contacts.

    Ask FixBot

    Add Comment

  19. Huawei P8 Display with Frame Replacement: step 19, image 1 of 3 Huawei P8 Display with Frame Replacement: step 19, image 2 of 3 Huawei P8 Display with Frame Replacement: step 19, image 3 of 3
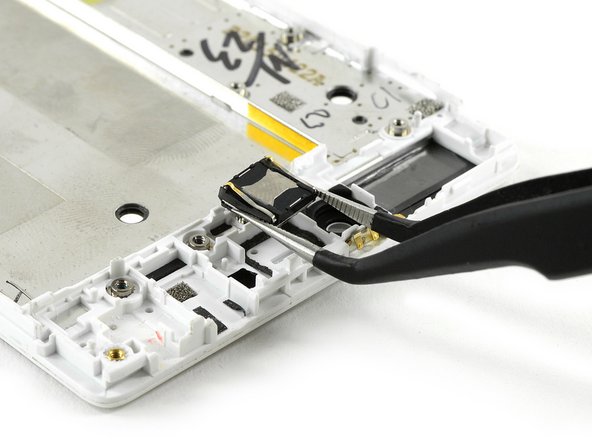
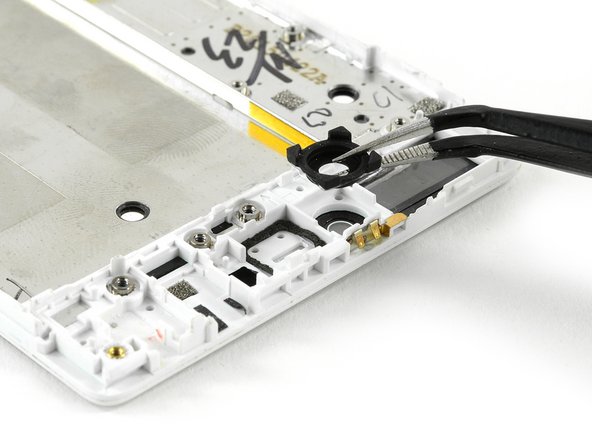
    • Remove the gasket which was placed under the daughterboard in the top right corner of your phone.

    • Remove the earpiece speaker with a tweezer. Take care of its connectors while doing so.

    • Remove the front camera gasket.

    Ask FixBot

    Add Comment

  20. Huawei P8 Display with Frame Replacement: step 20, image 1 of 1
    • Before reassembly compare your new replacement part with the old one and check for any additional components that might need to be transferred.

    Ask FixBot

    Add Comment

Conclusion

To reassemble your device, follow these instructions in reverse order. Reapply adhesive where necessary and transfer the rubber gaskets and sealings of your old frame to the new one.

Cancel: I did not complete this guide.

8 other people completed this guide.

Dominik Schnabelrauch

Member since: 11/23/16

260,264 Reputation

682 Guides authored

Team

iFixit EU Team Member of iFixit EU Team

Staff

37 Members

1,268 Guides authored

2 Guide Comments

Cracking guide, although mentioning the need to removed the stuck down power and volume buttons could be a great addition.

Michael McDaid - Reply Share

Hi,

aftet a quiet small shock this phone just stopped calling. everything works includind sms data and wifi, but no call.

could it be fixed by antenna replacement?

thanks !

friton - Reply Share

Add Comment

View Statistics:

Past 24 Hours: 2

Past 7 Days: 19

Past 30 Days: 89

All Time: 8,027