What you need
-
-
Turn the phone off and remove the SIM Tray before beginning the repair
-
-
-
Use a suction cup and pick to get between the battery cover and frame.
-
Work the pick all the way around to loosen the adhesive and remove the cover.
-
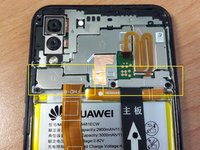
Flip the cover carefully to the right side of the phone, there is a cable attached to the back cover for the fingerprint ID sensor.
-
-
-
Release the ZIF connector to remove the Fingerprint scanner cable from the back cover.
-
-
-
Remove the 8 upper screws that hold the metal covers.
-
One of the screws may be covered with a white dot sticker. Remove the dot to access the screw.
-
-
-
-
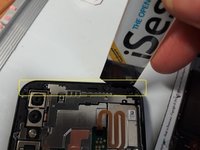
Once the screws have been removed (as described in the previous step) the two lower metal covers can be removed.
-
The upper cover can be removed by prying the upper right corner free (2nd picture).
-
-
-
Disconnect the battery connector from the mainboard.
-
Remove the dual camera, the front camera and the two flex cables. The Wi-Fi antenna cable can also be disconnected
-
-
-
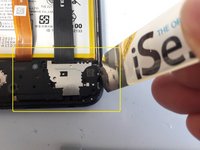
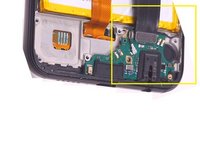
Using the iOpener or a similar tool, loosen the cover on the right side, by prying between the cover and the frame.
-
At the top of the cover (2nd picture) use the iOpener to pry up the cover to remove it from the frame.
-
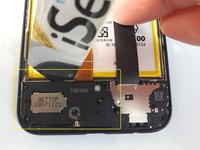
Underneath the cover is the daughter board containing the charger port and headphone jack. Disconnect the cable attached to the daughter board.
-
Pry the daughter board to remove it from the frame, it is lightly glued, and can be reused in the new frame.
-
Repeat the steps in reverse to reassemble the phone.
-


To reassemble your device, follow these instructions in reverse order.
Cancel: I did not complete this guide.
41 other people completed this guide.
25 Guide Comments
Can the antenna cable (black thin one) be reused?
hi, when you replace a faulty battery does the screen needs to be changed as well even though the screen is fine?