Free Shipping on Domestic Orders $75+

Huawei P10 Lite Charging Board Replacement

What you need

    1. Huawei P10 Lite Charging Board Replacement, Back cover: step 1, image 1 of 3 Huawei P10 Lite Charging Board Replacement, Back cover: step 1, image 2 of 3 Huawei P10 Lite Charging Board Replacement, Back cover: step 1, image 3 of 3
      • Insert the tip of an opening pick between the back cover and the mid frame and slide it around the phone, to cut the adhesive.

      • Using a suction handle to lift the back cover may help to get an initial gap for the opening pick to put in.

      • If the adhesive is hard to cut, use an iOpener to loosen it.

      Ask FixBot

      Add Comment

    2. Huawei P10 Lite Charging Board Replacement: step 2, image 1 of 3 Huawei P10 Lite Charging Board Replacement: step 2, image 2 of 3 Huawei P10 Lite Charging Board Replacement: step 2, image 3 of 3
      • After you cut the adhesive on every edge, twist your opening pick, to separate the rear cover from the phone.

      • Flip the rear cover over to the right side of the phone.

      Ask FixBot

      Add Comment

    3. Huawei P10 Lite Charging Board Replacement: step 3, image 1 of 2 Huawei P10 Lite Charging Board Replacement: step 3, image 2 of 2
      Tool used on this step:
      Tweezers
      $4.99
      Buy
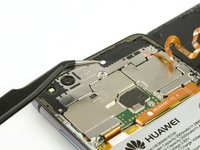
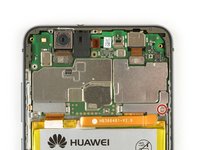
      • Use a pair of tweezers to remove the sticker.

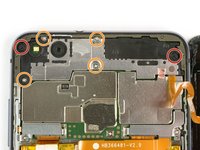
      • Remove the two Phillips #00 screws.

      • Remove the four 2.5 mm Phillips #00 screws.

      Ask FixBot

      Add Comment

    4. Huawei P10 Lite Charging Board Replacement: step 4, image 1 of 2 Huawei P10 Lite Charging Board Replacement: step 4, image 2 of 2
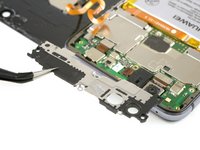
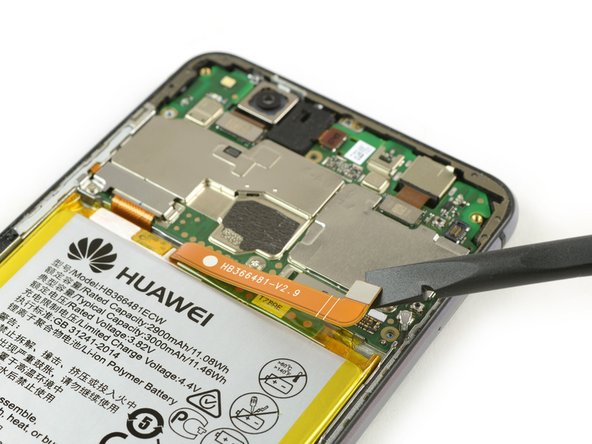
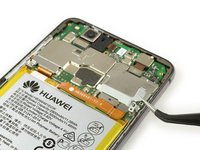
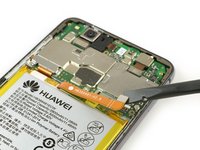
      • Use tweezers to remove the mainboard shield.

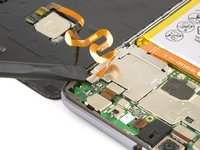
      • Use the flat end of a spudger to disconnect the finger print sensor flex cable.

      • When reassembling apply new adhesive where it is necessary.

      Ask FixBot

      Add Comment

    1. Huawei P10 Lite Charging Board Replacement, Battery Disconnection: step 5, image 1 of 3 Huawei P10 Lite Charging Board Replacement, Battery Disconnection: step 5, image 2 of 3 Huawei P10 Lite Charging Board Replacement, Battery Disconnection: step 5, image 3 of 3
      • Remove the Phillips screw holding the battery connector plate in place.

      • Remove the battery connector plate.

      • Use the flat end of a spudger to disconnect the battery flex cable.

      Ask FixBot

      Add Comment

    1. Huawei P10 Lite Charging Board Replacement, Loudspeaker / Vibration Motor: step 6, image 1 of 1
      • Remove the seven Philipps #000 screws.

      Ask FixBot

      Add Comment

    2. Huawei P10 Lite Charging Board Replacement: step 7, image 1 of 3 Huawei P10 Lite Charging Board Replacement: step 7, image 2 of 3 Huawei P10 Lite Charging Board Replacement: step 7, image 3 of 3
      • Insert an opening pick under the right edge of the loudspeaker unit and lever it up.

      • Grab the loudspeaker unit and remove it.

      Ask FixBot

      Add Comment

    3. Huawei P10 Lite Charging Board Replacement: step 8, image 1 of 2 Huawei P10 Lite Charging Board Replacement: step 8, image 2 of 2
      • Use an iOpener to loosen the glue under the vibration motor.

      • Remove the vibration motor.

      Ask FixBot

      Add Comment

    1. Huawei P10 Lite Charging Board Replacement, Charging Board: step 9, image 1 of 2 Huawei P10 Lite Charging Board Replacement, Charging Board: step 9, image 2 of 2
      Tool used on this step:
      Tweezers
      $4.99
      Buy
      • Use the flat end of a spudger to disconnect the interconnect cable.

      • Use tweezers to disconnect the antenna cable.

      Ask FixBot

      Add Comment

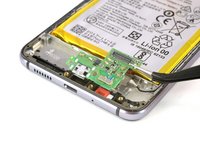
    2. Huawei P10 Lite Charging Board Replacement: step 10, image 1 of 2 Huawei P10 Lite Charging Board Replacement: step 10, image 2 of 2
      • Use an iOpener to loosen the adhesive under the charging board.

      • Remove the charging board.

      Ask FixBot

      Add Comment

Conclusion

To reassemble your device, follow these instructions in reverse order. When reassembling your phone apply new adhesive where it is necessary.

Cancel: I did not complete this guide.

6 other people completed this guide.

Dominik Schnabelrauch

Member since: 11/23/16

263,708 Reputation

682 Guides authored

Team

iFixit Member of iFixit

Staff

123 Members

85,581 Guides authored

3 Guide Comments

thanks and very nice

mj41574 - Reply Share

thanks to all team

mj41574 - Reply Share

p10 lite charging ic change daigram

mj41574 - Reply Share

Add Comment

View Statistics:

Past 24 Hours: 0

Past 7 Days: 6

Past 30 Days: 56

All Time: 11,381