Introduction
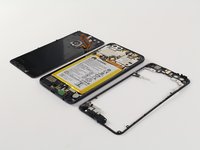
This guide details how to remove the motherboard from the frame.
What you need
-
-
Using a heat gun or hairdryer, apply heat approximately three inches above the glass panel to warm up the adhesive around the outside edge of the phone.
 Ask FixBot
-
-
-
Using a plastic opening tool, gently pry up a corner of the rear glass panel.
-
Slowly slide the plastic opening tool around the outside of the glass panel to break through the adhesive.
-
Gently lift the back panel off once all the adhesive has been removed.
-
-
-
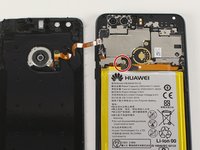
Using a Phillips PH00 screwdriver, remove the silver Phillips 3.5 mm screw circled in red.
-
Using a spudger, gently lift off the small metal tab that was held in place by the screw.
-
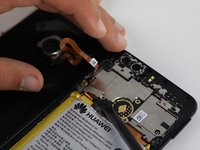
Gently pry off the orange ribbon wire on the back panel.
-
-
-
Using a Phillips PH00 screwdriver, remove the eight silver Phillips 3.5 mm screws circled in red.
-
Using a Phillips PH00 screwdriver, remove the six black Phillips 4.0 mm screws circled in orange.
-
Using a Phillips PH00 screwdriver, remove the single silver 3.0 mm Phillips screw circled in yellow.
-
Using the Phillips PH00 screwdriver tip, gently scratch away the white stickers outlined in green circles to expose hidden screws.
-
Using a Phillips PH00 screwdriver, remove the two black Phillips 4.0 mm screws circled in green.
-
-
-
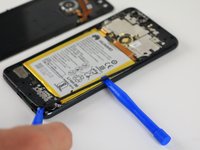
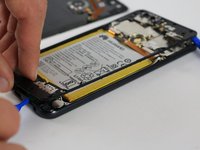
Slowly slide the plastic opening tool around the perimeter of the inner lining.
-
Gently pull the inner lining up to remove it from the phone body.
-
-
-
-
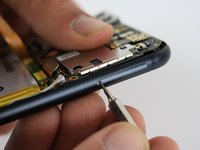
Holding the phone so that the cameras are at the top, locate the small hole on the top right edge of the device.
-
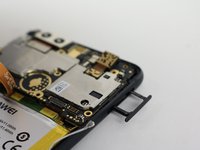
Using the 0.8 mm Sim Eject tool, push down on the small hole to release the Sim Card tray.
-
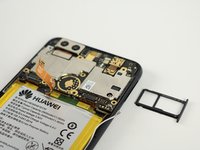
Gently pull out the Sim Card tray and set it aside.
-
-
-
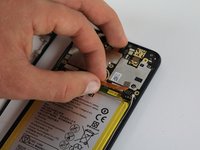
In the following steps you will disconnect the five connectors circled in red holding the motherboard in place.
-
-
-
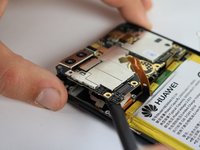
Gently pull the small ribbon connection between the battery and motherboard upward to disconnect it.
-
-
-
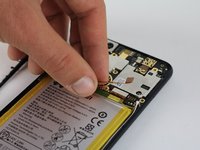
Use a spudger to gently pry off the small antenna cable on the right side of the motherboard.
-
-
-
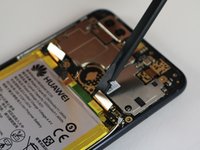
Using a spudger, gently pry up the small connection that holds the motherboard in place.
-
-
-
Using a spudger, gently pry up the connector near the left edge of the motherboard.
-
-
-
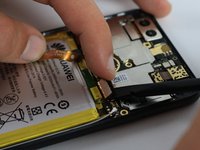
Use a spudger to gently pry off the small connection on the far left edge of the motherboard.
-
-
-
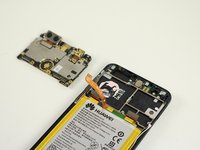
Use a spudger to pry up a corner of the motherboard.
-
Lift the motherboard to remove it from the body of the phone.
-


To reassemble your device, follow these instructions in reverse order.
Cancel: I did not complete this guide.
10 other people completed this guide.
Team

Cal Poly, Team S18-G2, Forte Fall 2017 Member of Cal Poly, Team S18-G2, Forte Fall 2017
CPSU-FORTE-F17S18G2
4 Members
24 Guides authored