
How to Rip a Seam

Brittany McCrigler and 5 other contributors
Last updated on Feb 17, 2026
Views: 28K
View statistics:
- Past 24 Hours:
- 10
- Past 7 Days:
- 57
- Past 30 Days:
- 228
- All Time:
- 28,149
Comments: 0
No one has left comments on this guide. Will you be first?
Go to guide commentsCompleted: 6 7
6 people have marked this guide "completed." Will you be next?
7 people have marked this guide "completed." Including you — great job!
Favorites: 16 17
16 people have favorited (and subscribed to) this guide. Will you be next?
17 people have favorited (and subscribed to) this guide — including you!
Featured Guide
This guide has been found to be exceptionally cool by the iFixit staff.
Patagonia
Patagonia and iFixit are celebrating the stories we wear by collaborating to provide guides for Patagonia's most popular apparel repairs.
Introduction
Go to step 1 ↓Knowing how to rip a seam is essential for basic sewing and clothing repair. Whether you want to make alterations, replace a zipper, or fix a sewing mishap, ripping the seam properly will make the changes nearly invisible.
What you need
Tools
-
-
-
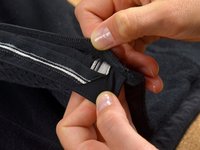
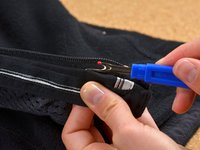
Slip the sharp end of the seam ripper through a single stitch in the seam you want to remove.
 Ask FixBot
-
-
-
Slide the seam ripper forward, bringing the stitch into the crux of the seam ripper's fork and onto the blade.
-
Gently push the seam ripper forward, cutting the thread.
-
-
-
-
Separate the two pieces of fabric held together by your seam.
-
Bring the sharp end of the seam ripper between the two pieces of fabric.
-
Slip the sharp end of the seam ripper beneath one of the stitches. Be careful to avoid catching the fabric.
-
-
-
Slide the seam ripper forward. Bring the thread into the crux of the fork and onto the blade.
-
Gently push the seam ripper forward again, cutting the thread.
-
Continue working, stitch by stitch, until the seam has been removed. Take your time, being careful not to damage the fabric.
-
Remove all of the loose threads from the ripped seam to prevent tangling when you resew the seam.
-
-


Cancel: I did not complete this guide.
6 other people completed this guide.


